
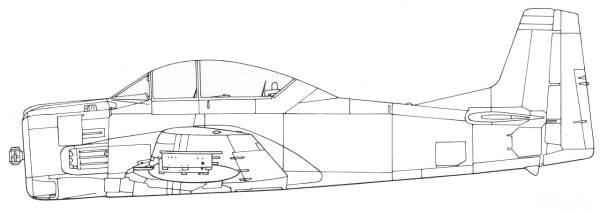
T-28D
The
T-28 was designed as a replacement for the T-6 Texan and first flew on
September 24, 1949. Following suitability test
a contract was issued and between 1950 and 1957, a total of 1,948 were
built. After becoming adopted as a primary trainer by the USAF, the
United States Navy and Marine Corps adopted it as well. Although the
Air Force phased out the aircraft from primary pilot training by the
early 1960s, continuing use only for limited training of special
operations air crews and for primary training of select foreign
military personnel, the aircraft continued to be used as a primary
trainer by the Navy (and by default, the Marine Corps and Coast Guard)
well into the early 1980s. The T-28D's were T-28Bs converted for the
USAF in 1962 for the counter-insurgency, reconnaissance, search and
rescue, and forward
air controller roles in Vietnam.
Fitted with two under wing hard points. The later T-28D-5
had ammo pans inside the wings that could be hooked up to hard
point-mounted gun pods for a better center of gravity and
aerodynamics. 321 were converted by Pacific Airmotive (Pac-Aero). For
more information on the T-28, Google is your friend.
The Kit
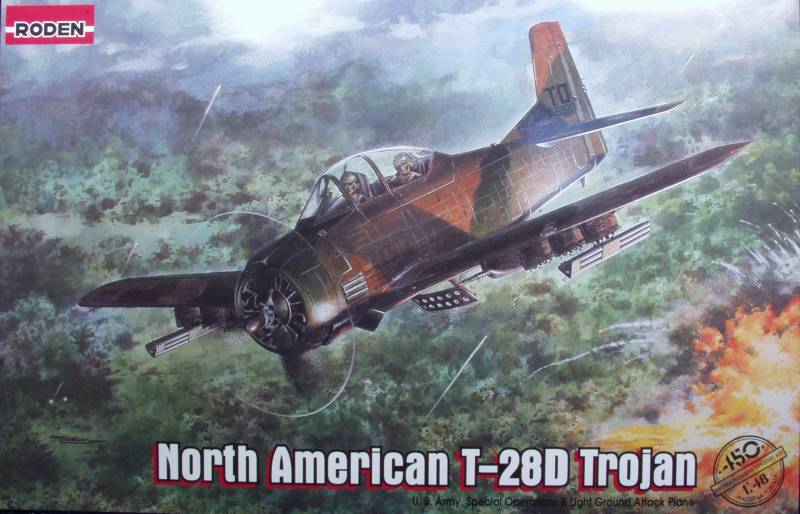
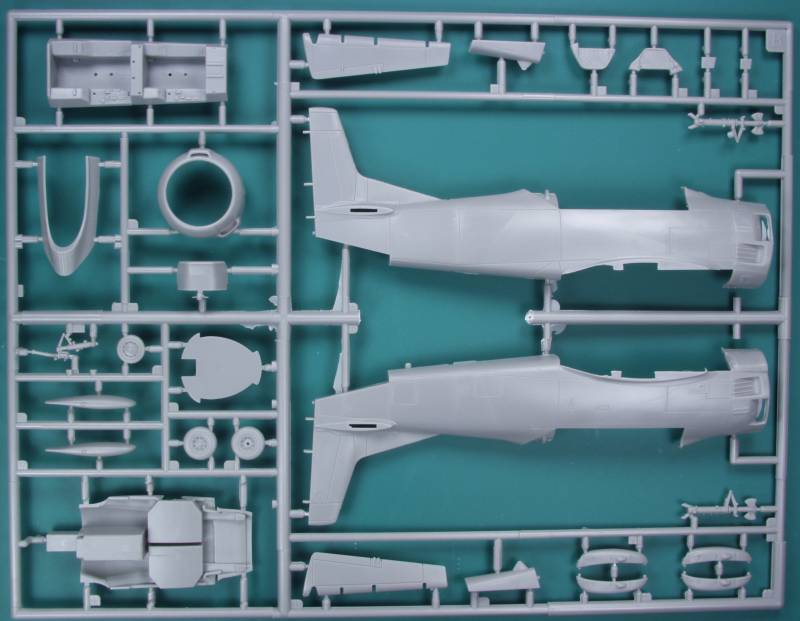
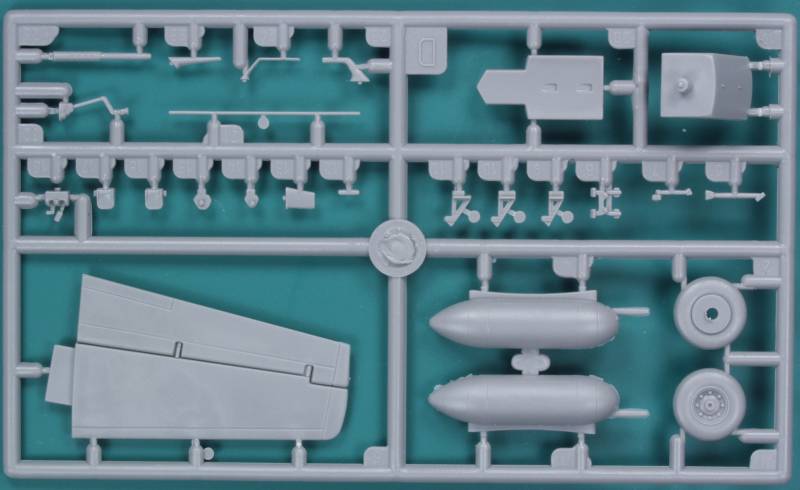
The Roden kit comes in a medium sized top open tray top box with nice artwork on the top. The top is rather flimsy but the bottom is made from thin corrugated cardboard which makes the overall package reasonably sturdy. Inside the box one finds one large bag with all the main parts in it and a smaller bag with the clear parts. Somewhat unusual the instructions are inside a clear plastic sleeve. The kit is molded in a medium gray plastic. Most of the parts have a semi matte finish and the surface detail is predominately recessed panel lines with a few raised details where applicable. There is no rivet or fastener detail. The parts are provided on two large sprues and six small sprues. Three of the small sprues are identical and provide the under wing armaments. Of the other three two are identical with parts that are duplicated and the last contains the engine and propeller.
The parts are cleanly molded and only a bit of flash here and there. The surfaces are free of defects except for some plastic flow patterns and a few unusual surface textures on some of the smaller parts. Nothing that a coat of paint shouldn't cover. Ejector pin marks were mostly in out of the way places. There are some on the inside of the small gear doors and strangely enough in the middle of the pilots seats. Mold alignment seams on the small parts is minimal and the plastic Roden uses is softer than most so use caution when cleaning them up. Similar caution need to be taken removing some of the smallest parts from the sprues.
The assembly is conventional and the cockpit has enough detail to satisfy most. Some of the parts are quite small and will be challenging to clean up and place, almost as difficult as photo etch. The engine is nothing to write home about but all the basic detail is there if a bit heavy. The ailerons and wing flaps are separate as is the speed brake underneath although I believe these were not used on the D model. One must open holes in the wing before assembling the wing halves. The main gear bays are nicely detailed. So let's look at the parts. The first two sprues are the main air frame and cockpit parts with a few odds and ends mixed in.
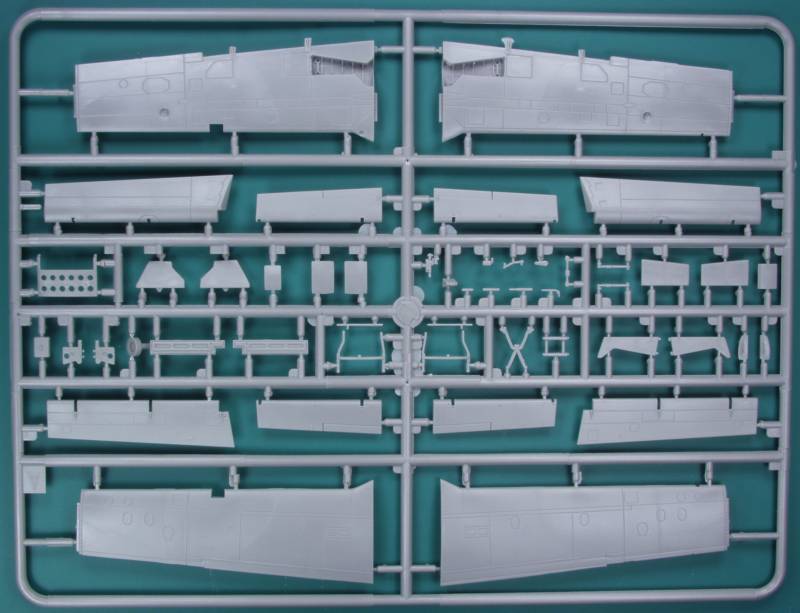
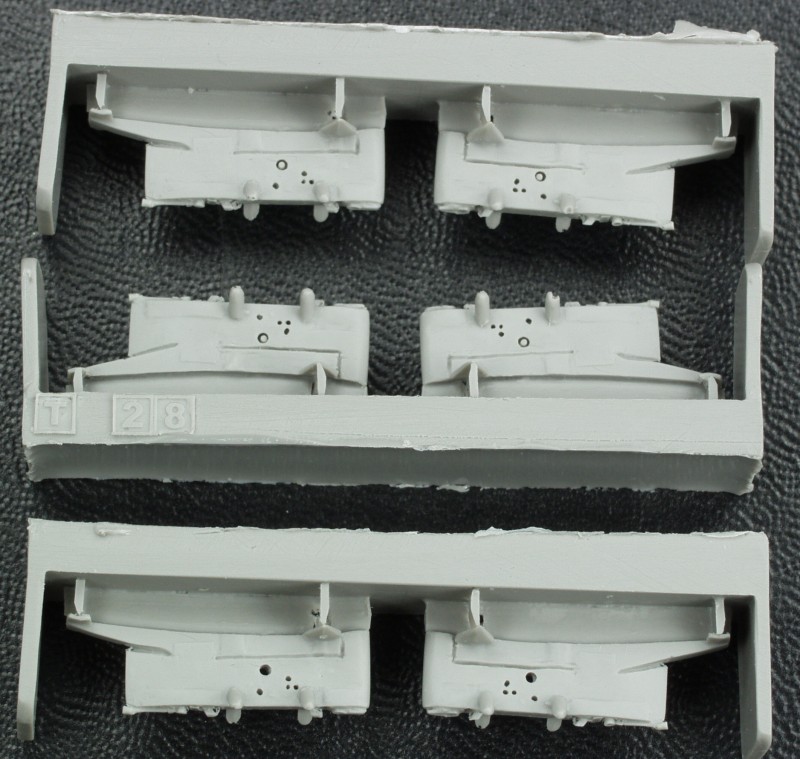
There are three of these sprues with the under wing armaments. A good selection is provided and the sway braces are quite delicate and will require care in handling.
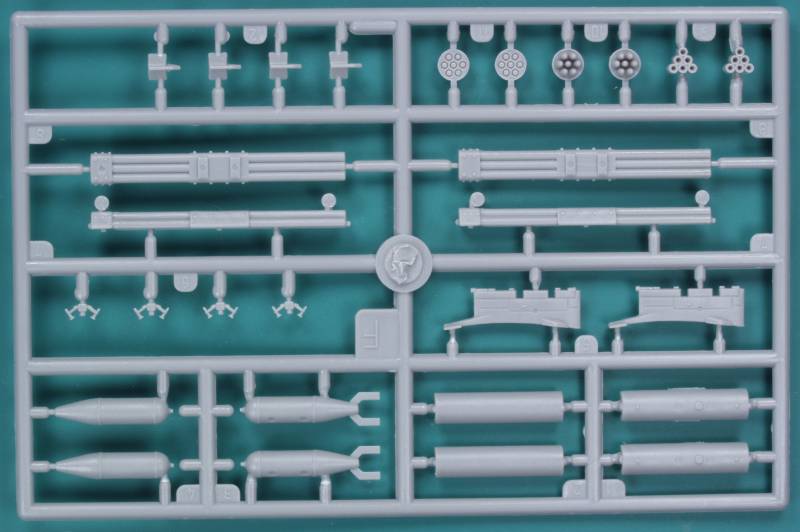
There are two of these sprues, besides the horizontal stabs there are some cockpit parts, main wheels and an under wing gun pod.
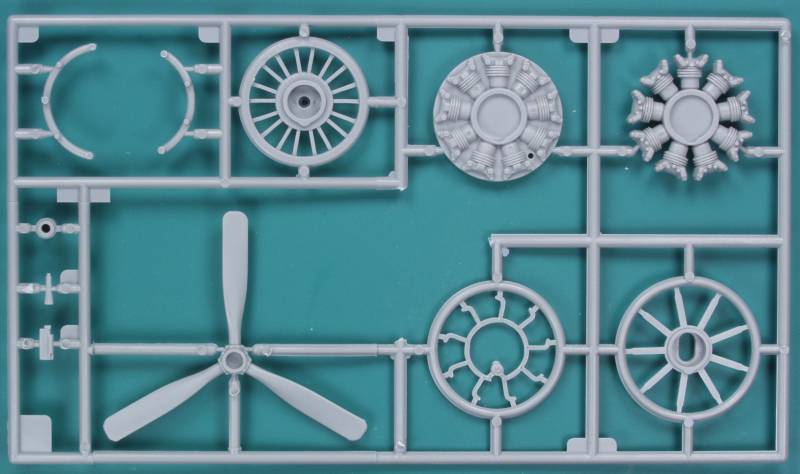
The last sprue is the engine and prop. The engine is basic if a bit clunky.
The clear parts are thin and clear with minimal distortion.
![]()
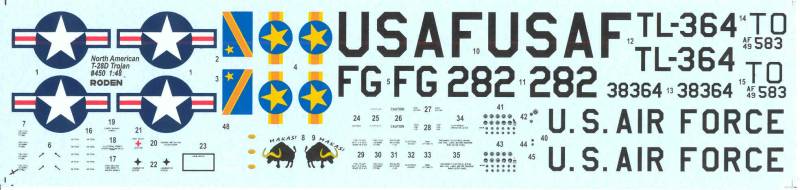
The decals provide markings for three aircraft. A T-28D-5 from the 4400 Training Squadron, USAF, Eglin AFB, 1964. A T-28D, FG-282 Special CIA unit based at Albertville, Congo, 1966. T-28D-5, 606 Special Operations Squadron, USAF, based at Nachon Phanom, Thailand, late 1960. The decals look pretty good on the sheet, thin and opaque but the registration for the CIA plane are poorly registered. A fair amount of stenciling is provided and instrument decals are supplied as well. The stencillings though quite small is all readable. I have had only limited experience with Roden decals and they worked OK for me but others haven't fared as well.
The instructions are two sheets folded to make an eight page booklet. The front page has history and specifications in three languages, the second has the usual safety warnings, icon chart, paint chart with Model Master numbers and the first part of the parts map. Page three continues the parts map and starts the assembly steps. There are 32 assembly steps over the next four pages. The steps appear to be clear and paint numbers are called out along the way. The last page has painting and marking diagrams.
After Market Goodies
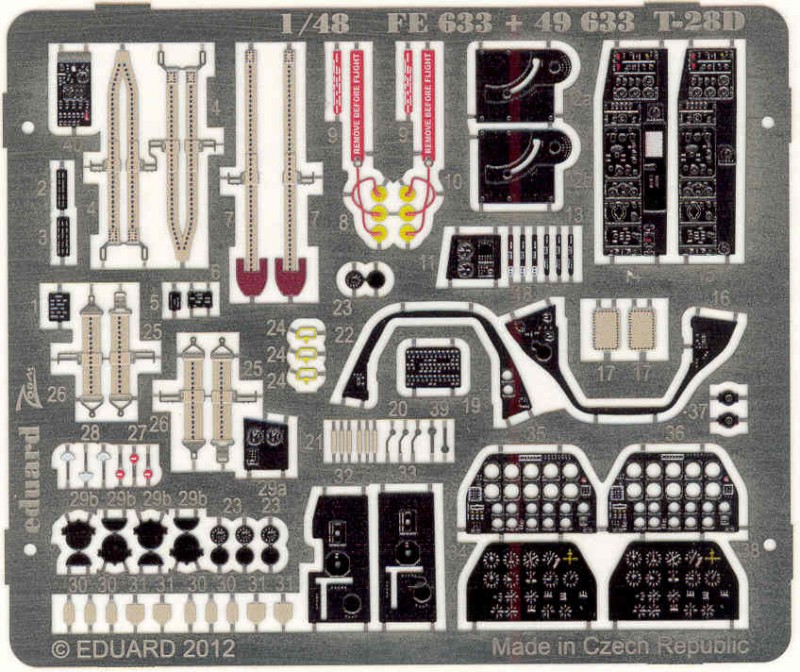
To start off I went with the Eduard Zoom set FE633 which provides the cockpit basics that I so poor at painting. I also got their canopy mask EX381.
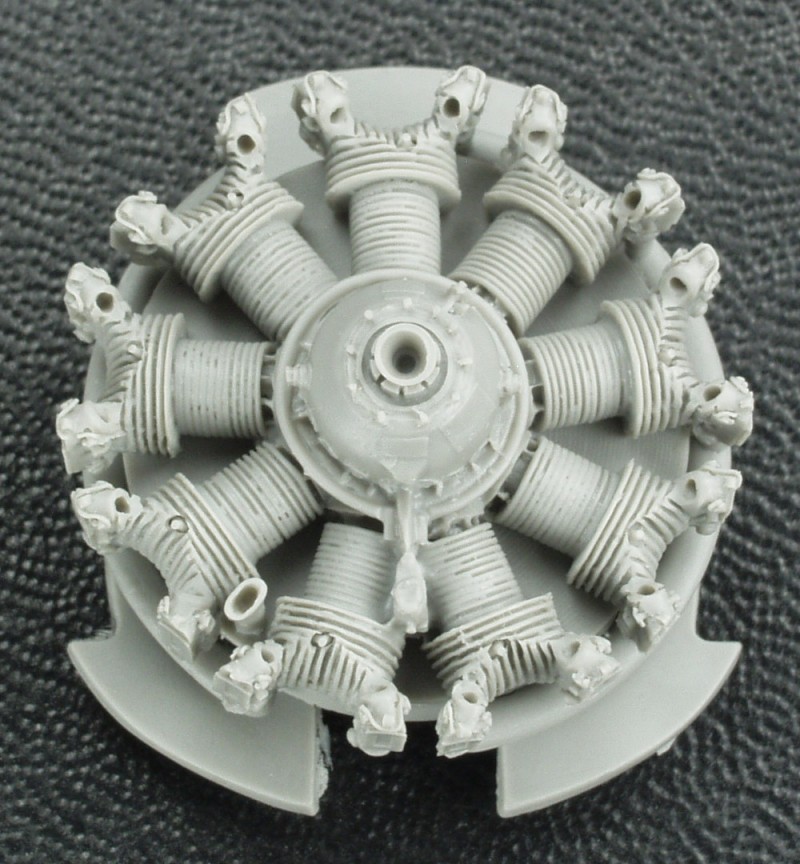
I decided to go with a better engine and chose Quickboost over Vector as I knew it would fit without alteration. It's a lovely casting but will need push rods and ignition wiring to look complete. Check the Internet for a photo to use for detailing this.
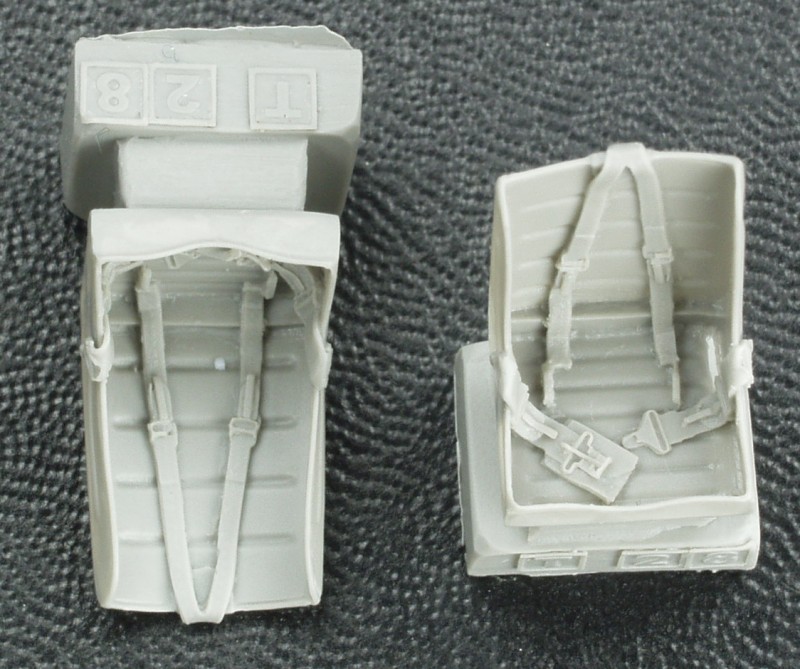
Also from Quickboost I got their replacement seats with the belts and harnesses molded in, I find these when painted up look better than photo etch parts. Also the kit seats have been reported to be a bit oversize.
Yet more from quickboost, replacement exhausts and cooling grills, the exhausts are much finer and open on the ends and the grills (AKA cooling flaps) are much thinner and better looking than the kit parts.
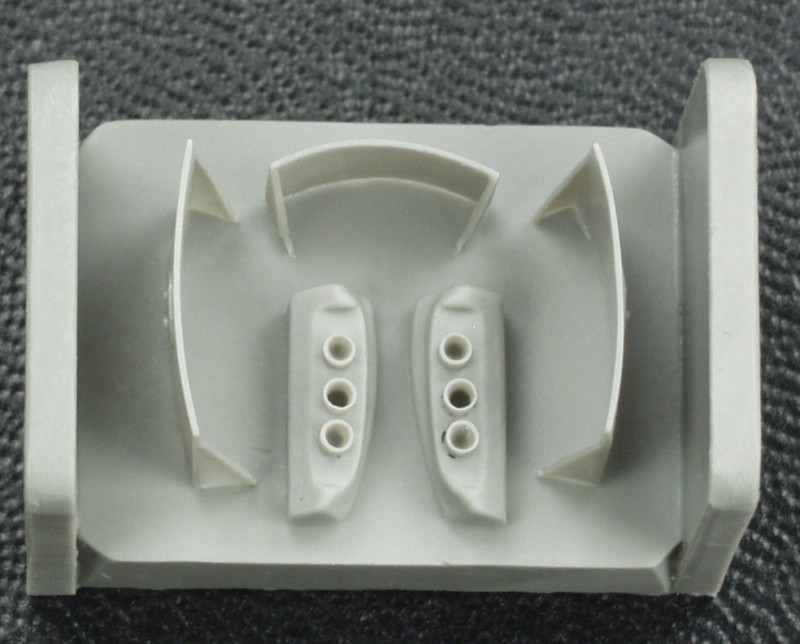
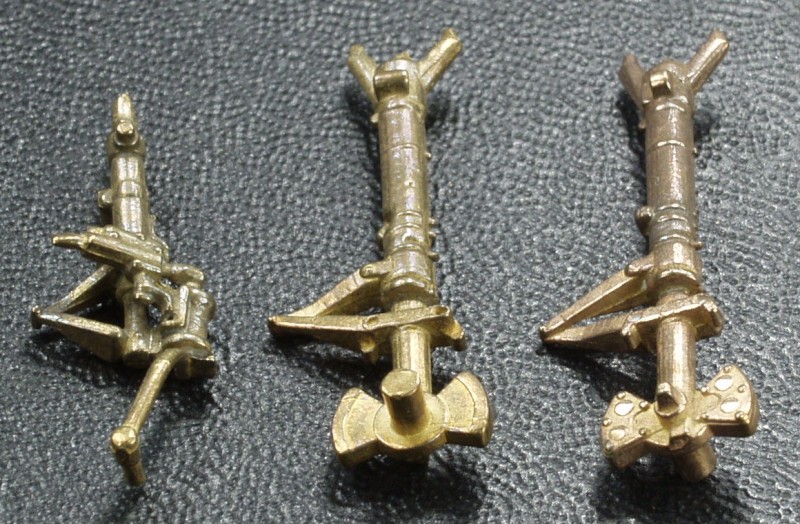
From Quickboost a set of under wing pylons, again finer detail and more accurate shape than the kit parts. Note that the holes aren't air bubbles but holes that are supposed to be there.
And lastly due to complaints that the nose wheel strut was too weak a set of G-Factor (48024) cast bronze landing gear struts.
Conclusions
Overall this looks to be a pretty nice kit. That said I have found that while Roden kits typically look good in the box they rarely are easy builds. While they may look main stream your best bet is to build them as if they are a limited run kit. Do lots of test fitting and expect to deal with fitment issues. Recommended for modelers with some experience with limited run kits.
Links to kit build or reviews
A build review of the 28B can be found here which is essentially the same kit and one here of the 28D made from the B kit.
References
T-28 Trojan in Action by Al Adcock and the Internet.
Back to the Misc 1/48 US page