
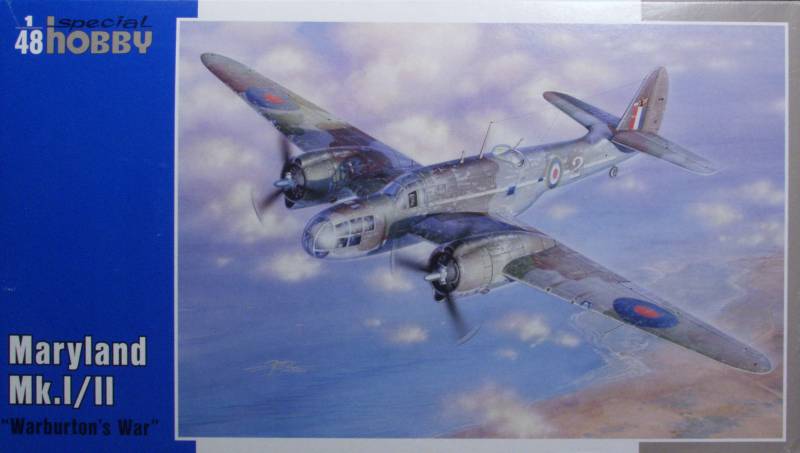
Maryland

In the second half of 1937 the United States Army Air Corps announced a design competition for a twin engine light bombardment aircraft. Key requirements were a 1,200 pound bomb load with a 1,200 mile range and a speed in excess of 200 miles per hour. A fixed forward firing armament for ground attack was also required. From this competition came two light bombers from from the Glenn L. Martin company. They bore the Army Air Corps designations A-22 and A-30. Neither was to serve in combat with the American air arm. Each is now remembered by its Royal Air Force name, the Martin Model 167 as the Maryland and the Model 187 as the Baltimore.
The
model 167 lost out in the
competition to the Douglas A-20 which gave Martin free reign to
concentrate on foreign orders. In fact the French commission had
already placed orders for 115 aircraft before the prototype even flew.
Following the fall of France remaining orders were take over by the
British. In the Mediterranean theater the Maryland acquitted itself
quite well and was well liked by its crews.
The Kit
Well, sometimes things happen. A while back I got the bug to build this kit and dug into it. After I had most of the parts removed from the sprues and a good start on the kit I realized that I never did the review so I'm only going to do a brief summary here and will provide a link at the end to an other review with photos of the kit parts.
The kit comes in a top open tray type box with a nice rendering of aircraft painted in one of the schemes provided. The box top is thin but the bottom is heavier. All the main sprues were in a large bag and inside that bag was a smaller one with the clear parts. Separate from this was another small bag with the decals and a small photo etch fret. All the parts in my kit arrived intact with no damaged or loose parts. If you have ever built a Special Hobby kit, this one is no different than most of their later releases. It's limited run, meaning low pressure injection which results in some soft detail, flash and some fairly heavy mold separation seams to clean up. Like many kits of this type the hardest part is the clean up. There are no alignment pins but in most cases that is a blessing as it just makes it easier to align things. The wings and tail parts both have tabs for attachment which is a step above many short run kits that use butt joints. The kit has a fairly detailed interior for the scale and what you'll be able to see when it's completed. I found that most of the interior actually fit quite well and didn't interfere with the fuselage assembly but lots of test fitting is recommended. Many of the side wall detail items do not have distinct mounting points and the instructions are vague at best on their location so one must check to insure that there are not interference fit with other parts. When gluing the wings together I pressed the parts up against the fuselage and aligned the halves to provide the best joint at the wing root and left the rest to fall where it may as I figured they would be easier to fix than the wing root. This did cause some issues with the alignment of the landing light bays and other things which I will discuss in the build section.
The clear parts are reasonably clear, not the best but they looked OK once dipped in Future. A test fitting showed that they all fit fairly well which is not always the case with limited run kits. The fuselage side windows had slightly tapered edges and seemed to fit best from the outside. They stood a bit proud from the fuselage so after gluing I sanded them flush and repolished them.
The decals are thin and glossy with minimal excess film except for the letter and numbers and are well registered except for the yellow surrounds on the side roundels. It looks like they put on a second coat to insure that they would be opaque and it ended up being off register. The decals provide markings for four aircraft, one in French colors but with British markings, two in British markings and western desert colors and one in British markings and the traditional green and brown over sky colors. I have had good luck using their decals in the past, if I have any issues with these I'll note it in the build section.
The instructions again are typical for Special Hobby, three A4 sized pages printed front and back and folded to produce a twelve page booklet that is not stapled. A brief history is provided on the front page, one page with a parts map and color chart that has Gunze numbers and generic names. Pages 3 thru 7 are the assembly in 19 steps, four pages of marking and painting instructions and the back page is a list of other Special Hobby kits. The marking pages are smallish and a bit hard to read but full color diagrams are available online at the link provided on the instructions.
After Market Goodies
Much to my dismay I found none for this kit, I would really have liked a mask set. That said, the kit does come with a small photo etch fret that includes seat belts and harnesses, levers for the control consoles, a trim wheel, a floor grate for the bomb aimers section, a DF loop, a boarding ladder and some other small parts. The kit also includes cast resin parts which includes the engines with separate cylinders, some of the side wall detail parts including the control consoles, engine exhausts and a machine gun. The engine parts had a lot of flash in my kit but looked OK once assembled. Push rods are left up to the builder to supply and install. Be prepared to sand down the tops of each cylinder or grinding out the cowling in order to get it to fit in the cowling.
Conclusions
Over all this is a nice kit, certainly many times better than the old Foundrie Miniatures kit which was nothing more than a copy of Bill Koster's vacuform kit. Over all the fit was better than some of the other Special Hobby kits I have built. It should be no problem for anyone who has built other limited run kits.
Links to kit build or reviews
An in box review with photos of the contents can be found here and here.
References
Aircraft Profile 232, Martin Maryland & Baltimore variants by Christopher F. Shores
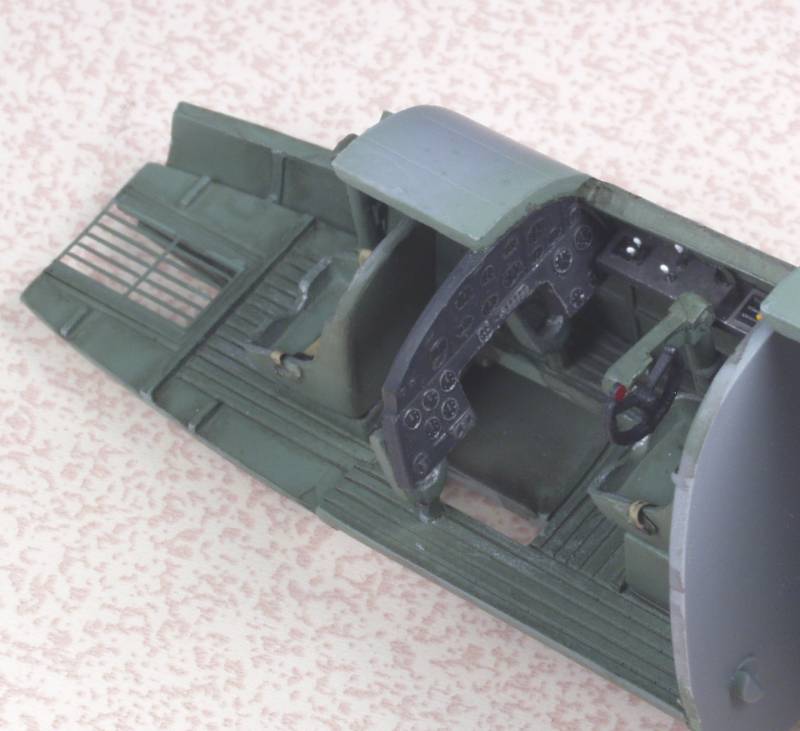
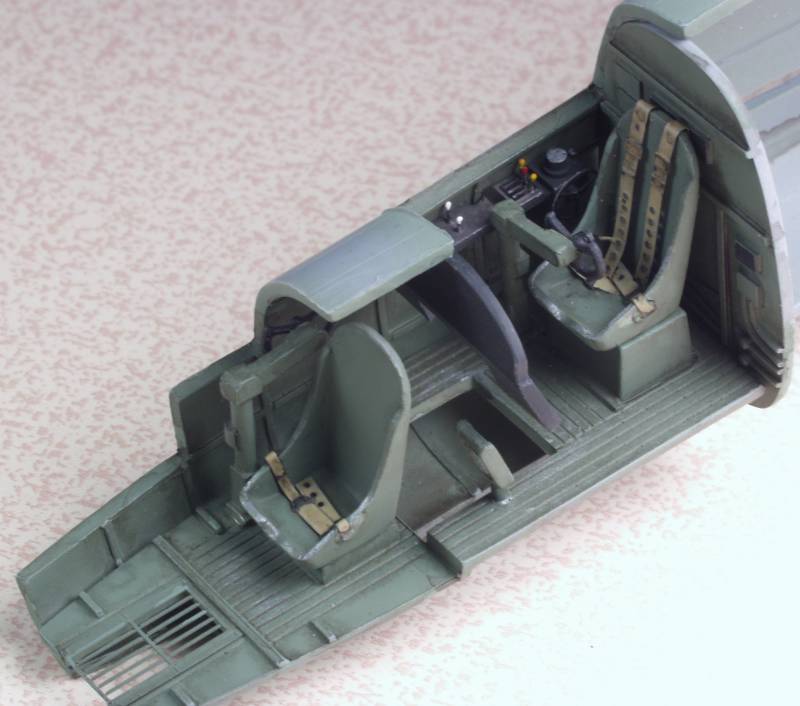
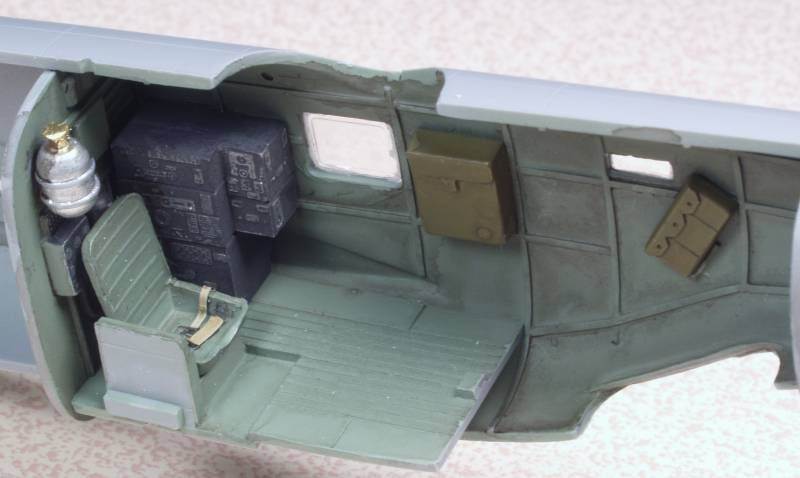
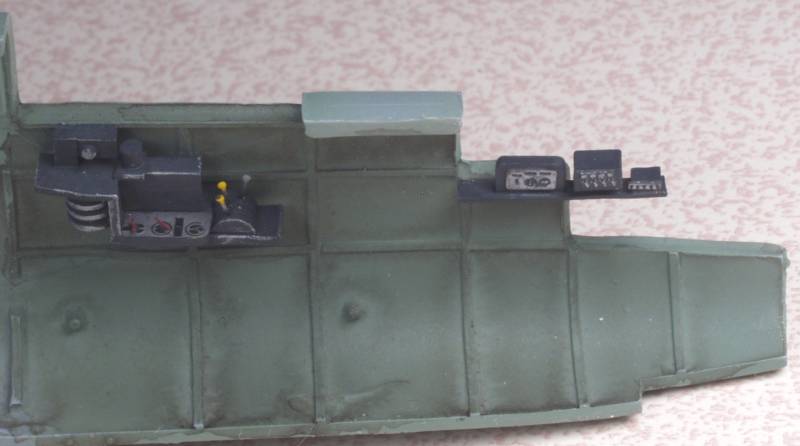
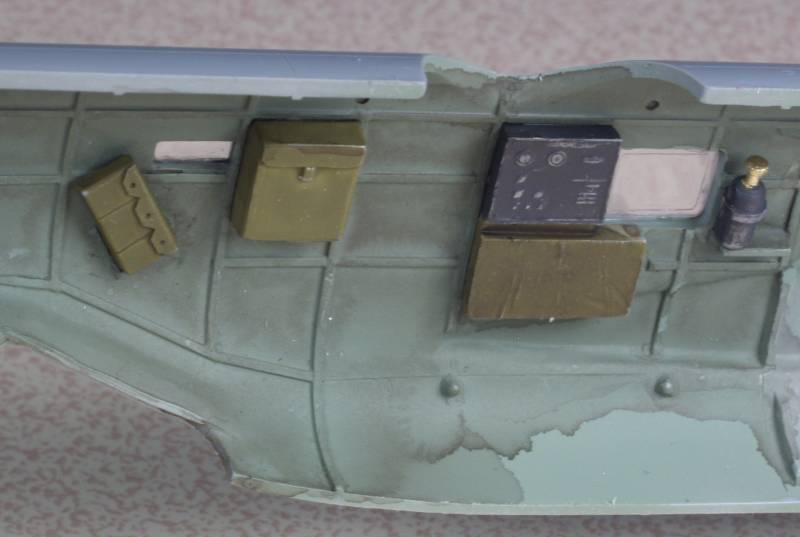
The BuildLike most builds one starts with the interior parts and works out. The instructions call for the cockpit to be interior green, I'm not sure this is correct and feel it could have also been a natural metal but I really hate natural metal interiors and had no documentation one way or the other so I went with green. Personally I was happy with the level of detail. The rudder pedals look a bit large and spaced too far from the pilots seat but again I had nothing showing these so I went with the flow. Once everything was painted up and mounted it looked good to me. I would have liked an Eduard color IP but could not find one so I just high lighted the instruments with a silver pencil and put future on them to represent glass. Looks OK to me. After putting on a grime wash here is how it looks...
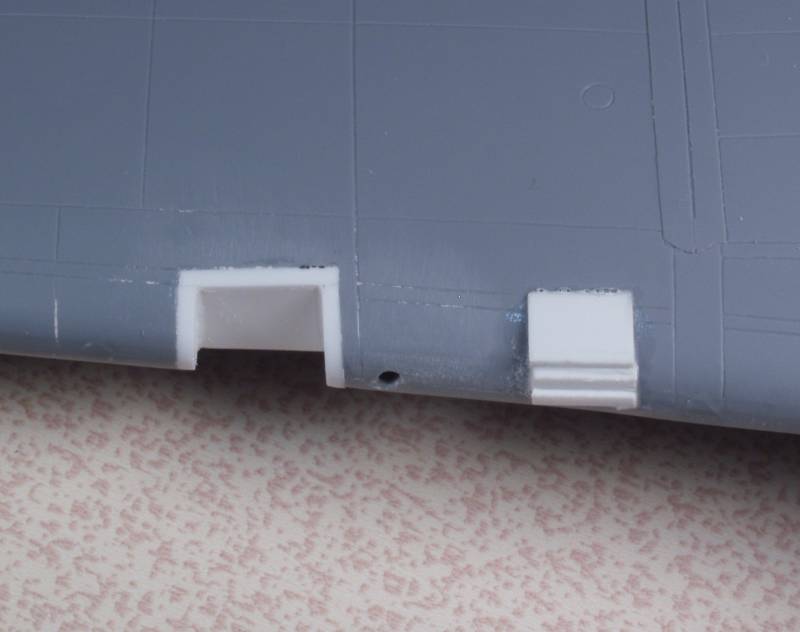
After these photos were taken the fuselage was glued together. I then moved to the wings. As I mentioned in the review when I glued these together I went for best alignment at the wing roots and this threw off the openings for the landing lights and gun port inserts. I had found early on that the landing light inserts fit very loosely in their openings and the gun port insert did not fit well at all. On one wing the openings lined up pretty well but on the other wing they were offset to the point that fixing them would make them way over sized. The final kicker occurred when I was trying to get one of the gun ports to fit and it went flying never to be seen again. At this point I decided to just fill them in with styrene and sand to fit. Ditto with that landing light bays. On them I used a thickness of styrene that would bring the openings to the correct size. These were sanded to the correct profile. I am going to be using clear packing tape for the lenses so I didn't need to make them recessed for the kit parts. The photo below shows one wing with the landing light bay done and the gun port filler still needing to be sanded down.
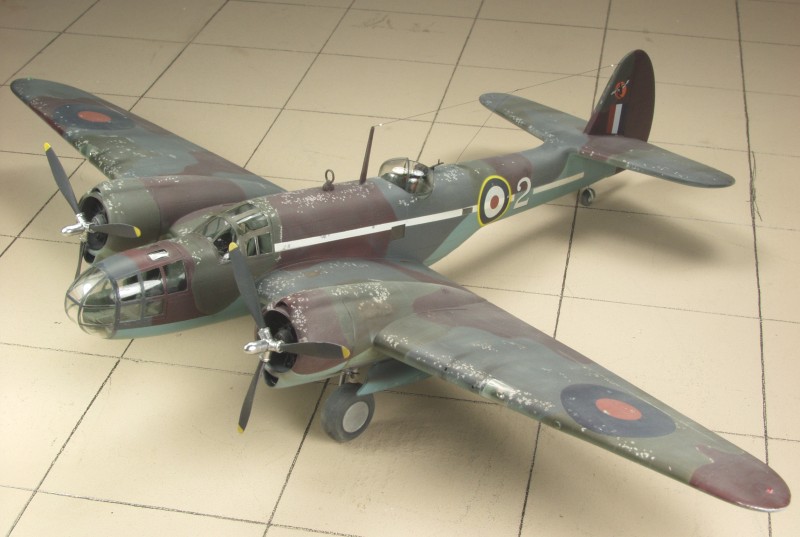
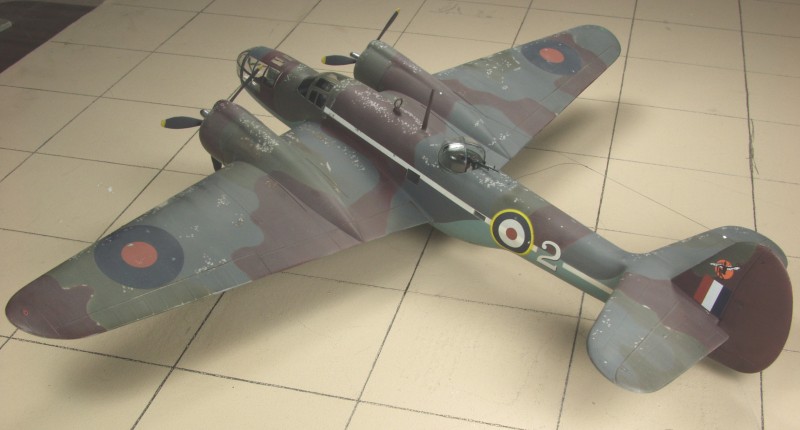
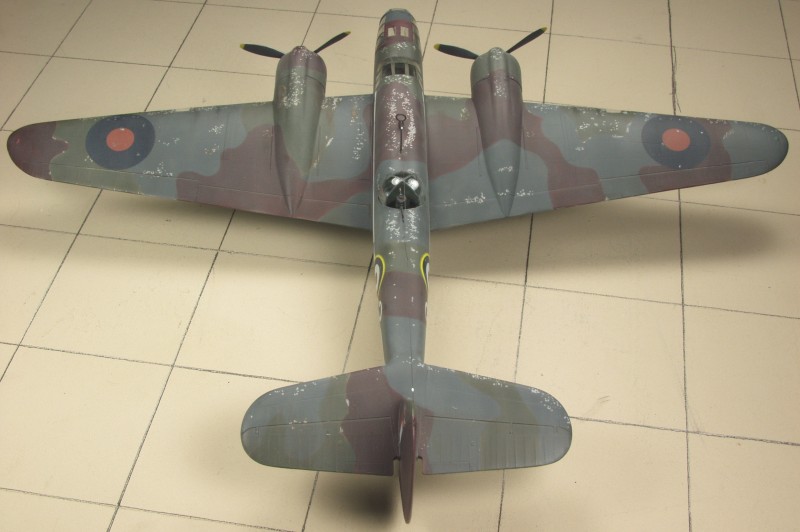
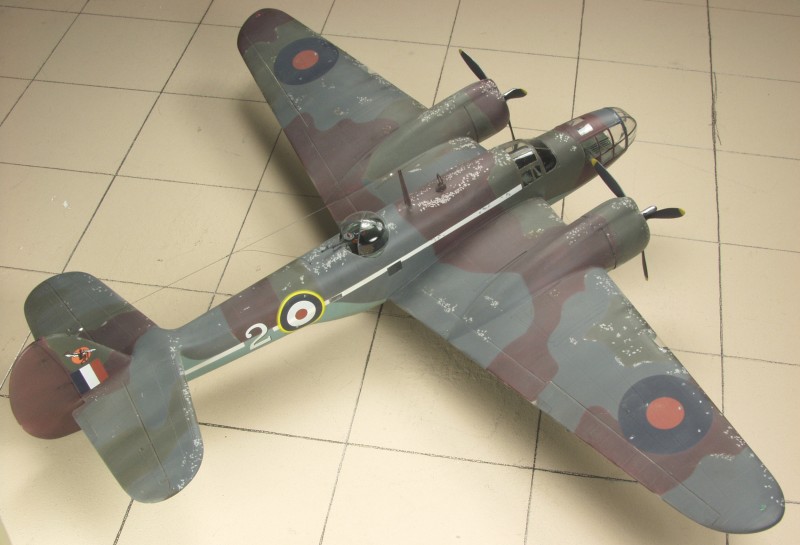
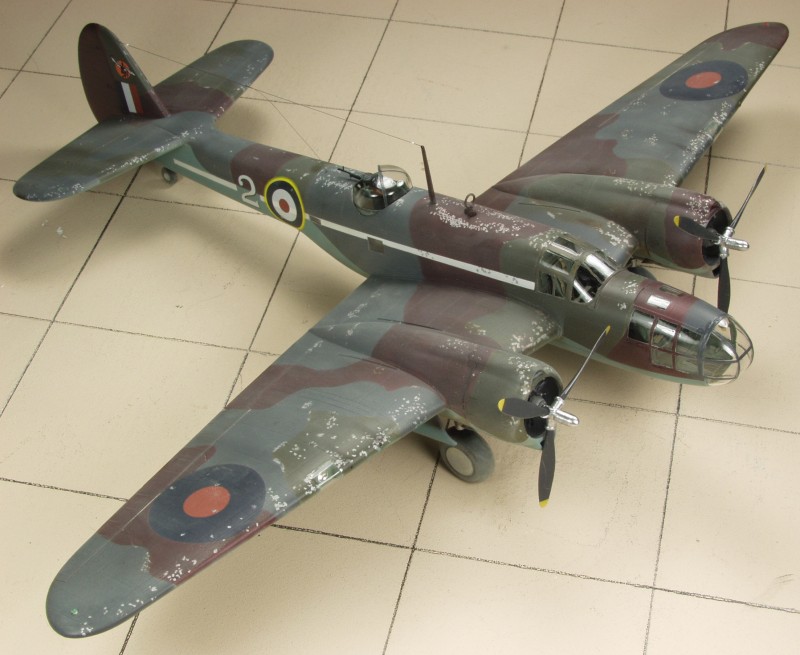
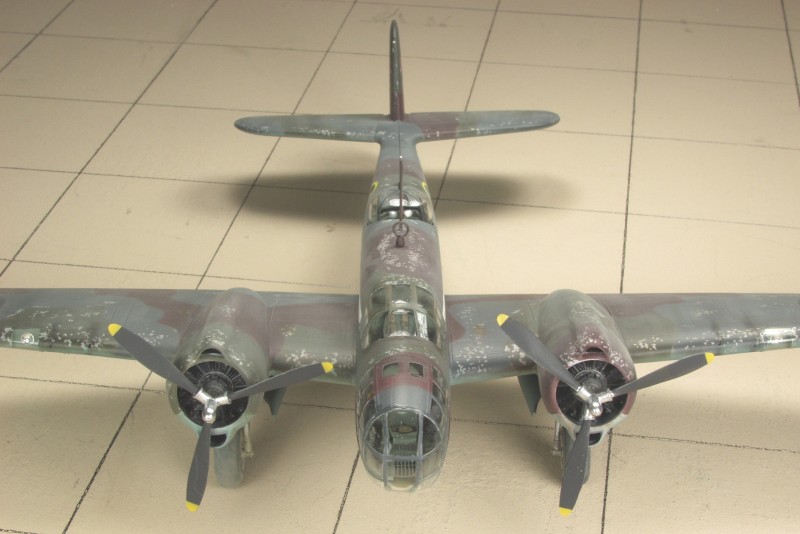
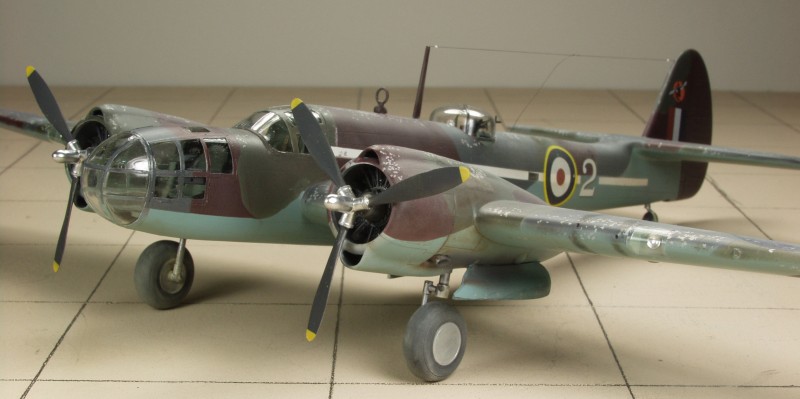
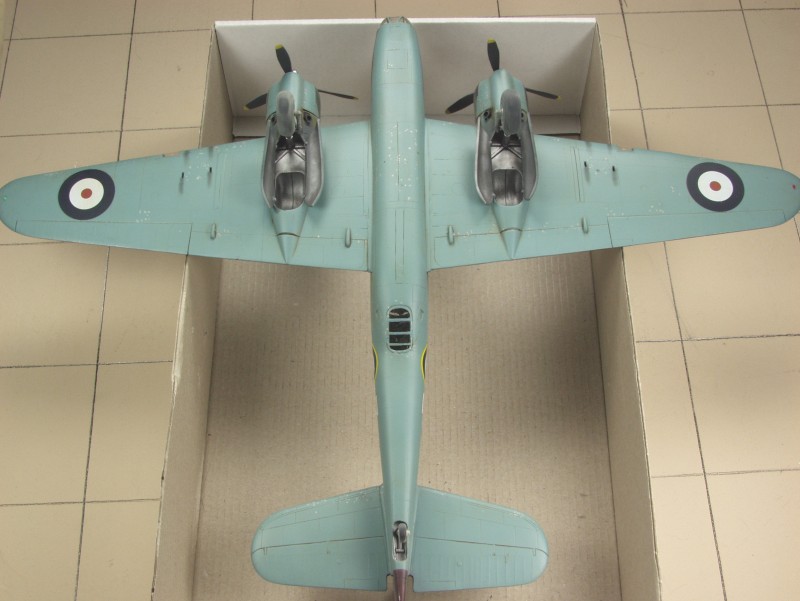
The balance of the build was not documented as it ended up being completed between several other projects. For the most part the build itself was not that hard but the clear nose section did not fit well at all and I nearly ruined it trying to solve the issue. One can see stress cracks in some areas if the light is right. The most time consuming part was the three color top finish. The aircraft represented was one that was delivered to the French in a natural metal finish and painted by the French without benefit of any primer. This resulted in the finish over time looking much the same as many Japanese aircraft did in the Pacific. Salt chipping was used although I wasn't totally happy with the outcome. The multiple masking and salt application soon wore me down. The decals were excellent, I only used some Microset before application and had zero silvering. The only down side to the decals was the lack of opacity on the white part of the fuselage roundels which allowed the white stripe on the fuselage to show through the decal. Shown below are the final assembly photos. The only thing missing is the pitot tube which I found while cleaning up. It was painted up and attached after the photos were taken.
Back to the Misc British Page