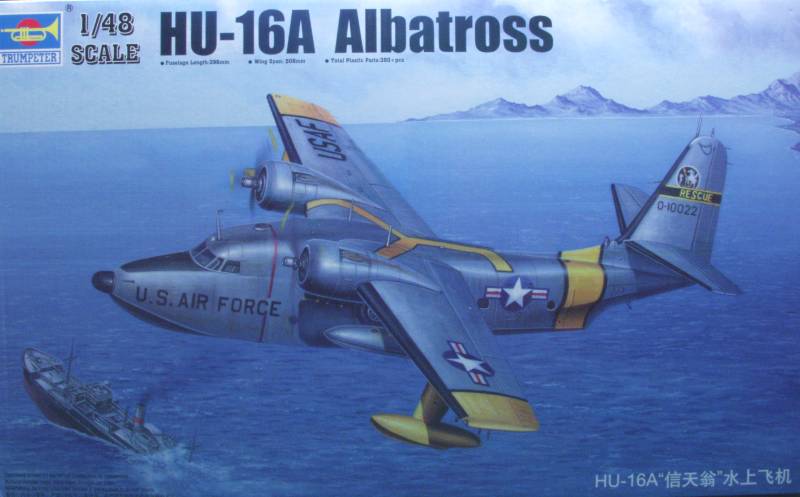
Hu-16A Albatross
The Grumman Albatross is unusual in that, unlike most military aircraft, its design work started as a private venture for a potential replacement for their Goose. In April of 1944 Grumman design G-64 which would later evolve into the albatross, was initiated to be used as a utility transport, trainer and air-sea rescue aircraft. Although superficially resembling the Mallard, the XJR2F-1 prototype, which eventually flew on October 1, 1947 was a much larger aircraft, the largest that Grumman had ever built. The second prototype was given the interim U.S. Navy designation of PF-1. The Navy funded construction of two prototypes and, although pleased with the performance of the aircraft, lacked the additional funds for a production contract. Fortunately for Grumman, the newly independent Air Force was eager to begin maritime operations. Additionally it had a requirement for a rescue amphibian to replace the aging OA-10 Catalina and it had money to spend. It assumed the Navy's original order for 32 PF-1s, changed the designation to SA-16A and contracted for an additional batch of 28 machines. This would later grow to 273, making a total of 305. It would be December of 1949 before the Navy finally took delivery of its first of 99 aircraft. In March of 1952, the U.S. Coast Guard received the first of its 46 aircraft. Foreign interest soon followed.
The Albatross during its service life had a number of designations. The Grumman prototype designation was XJR2F. The original Air Force designation was SA-16A, while the Navy's designation for production aircraft was UF-1 and the Coast Guard designated them UF-1G. All of the aircraft were identical, with minor differences in on board electronics to fit the needs of the using service. In 1956, an improved version of the Albatross was introduced which was designated SA-16B, UF-2 and UF-2G by the Air Force, navy and Coast Guard respectively. An ASW version was built under the designation SA-16B/ASW with the Navy designation UF-2S. As if this were not confusing enough, during 1962 a unified designation system was introduced in the military which resulted in the Air Force machines becoming HU-16As and HU-16Bs, the Navy aircraft becoming HU-16Cs and HU-16Ds and the Coast Guard aircraft becoming HU-16Es (by this time all of the UF-Gs had been retired).
A major prerequisite for an aircraft engaged in search and rescue or surveillance operations was endurance and the Albatross had it in abundance. Auxiliary under wing tanks of 100, 150 o,r more commonly, 300 gallons could be carried. With these larger tanks later versions of the Albatross could easily stay airborne for 20 hours. Pushing it to the limit an endurance flight of more than 25 hours was logged. The Albatross held numerous records for amphibious aircraft including longest non-stop flight (3,104 miles) and an altitude record (32,883 feet).
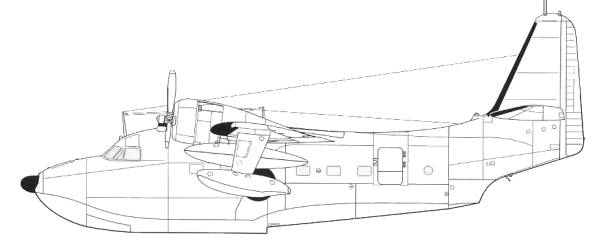
The wing on the Albatross incorporated fixed leading edge slots outboard of the float pylons. The slots served to enhance low speed performance and handling characteristics. The first six production aircraft had dry floats, on all other aircraft the pylon mounted floats served double duty as fuel tanks containing an additional 200 gallons each. Power was supplied by two Wright 1820-76 air cooled radial engines driving Hamilton Standard three bladed constant speed, controllable pitch, reversing propellers. Two JATO bottles could be attached on each side of the fuselage, on the exterior of the port and starboard rear hull doors. The port side door was a two part 'Dutch door' design. In heavy seas the lower section could be left closed ensuring that there was enough free-board to prevent the aircraft from taking on water. A hatch on the hull nose in front of the cockpit allowed a crewman to handle a boat hook or lines to assist with rescue operations or mooring.
In its basic configuration for search and rescue, the Albatross generally carried a crew of six (pilot, co-pilot, radar operator, navigator, flight mechanic and paramedic) plus four litters. The interior could easily be reconfigured for other roles including; medical evac(five crew members and twelve litters), personnel transport (four crew members plus ten seats), and cargo transport (three crew members and 568 cubic feet of cargo space), or a combination of all three. A large overhead hatch facilitated changing interiors or loading bulky cargo item, although it appears that this feature was rarely if ever used.
The Kit
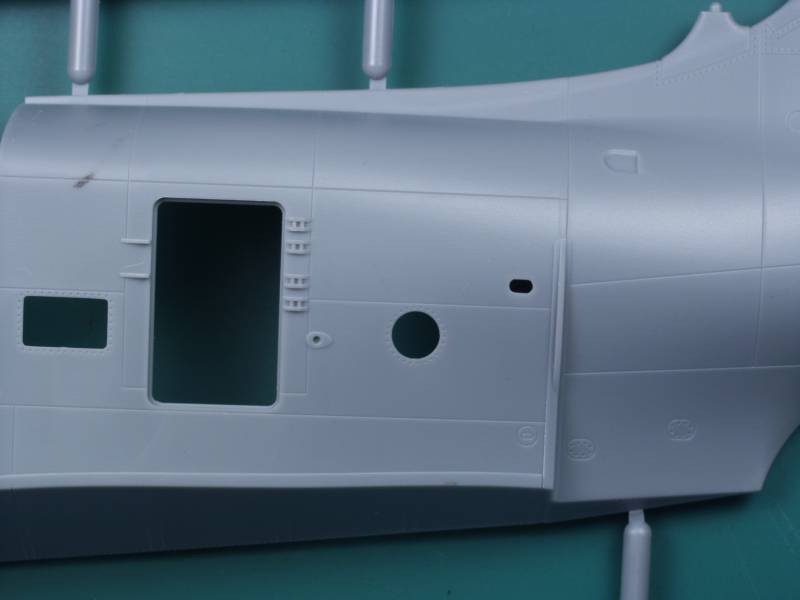
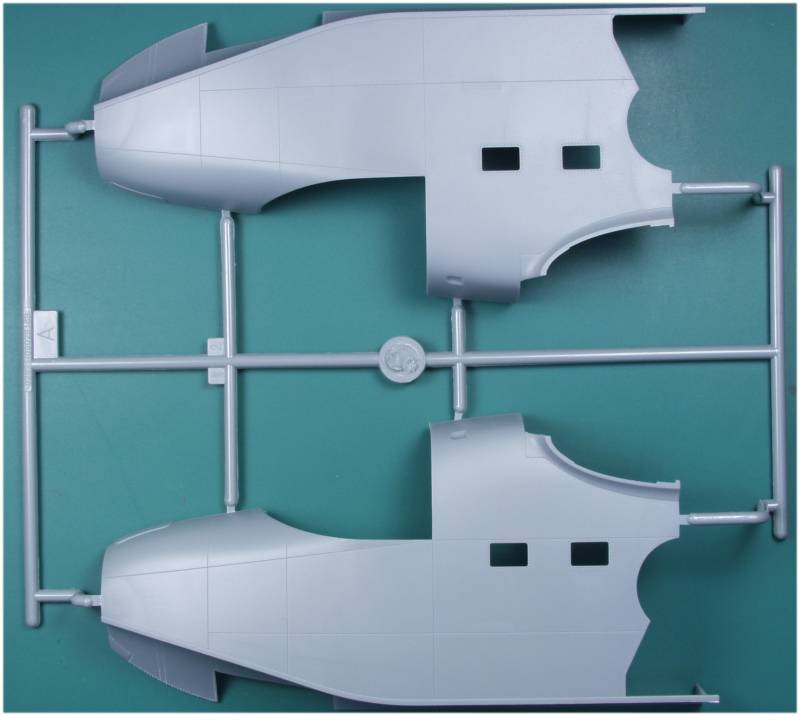
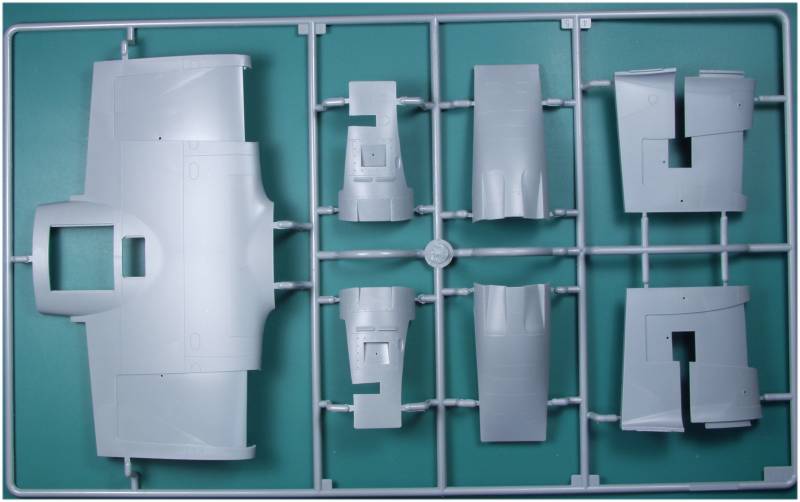
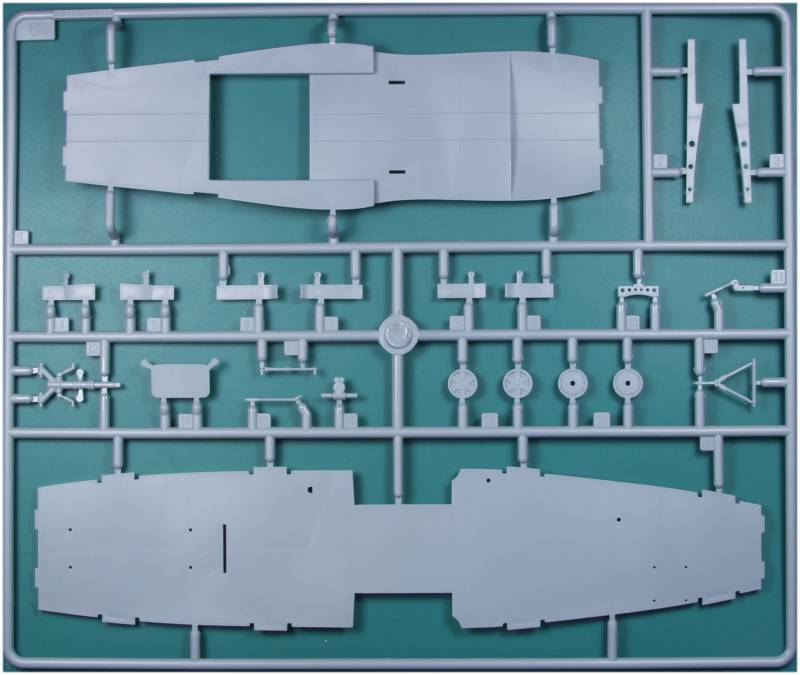
The surface detail consists of recessed panel lines and rivet and fastener detail with a few raised areas as applicable. Some of the fastener detail has slotted heads. Parts with a mold parting line will require a moderate amount of clean up. The kit follows the current trend of putting many of the sprue attachment points on mating surfaces. The vote is still out on this as some modelers like it and others don't. Personally a sprue trimming divot on the mating surfaces is easier to fix than one on the finished surface. The parts are cleanly molded and you must look hard to find any evidence of flash. The surface has a matte finish. Ejector pin marks seem to be limited to the interior surfaces of the fuselage and the inside of the flaps should you pose them open. Most of the ones in the fuselage will not be all that visible but some in the cockpit area you will probably want to fix. The fuselage is split with the portion ahead of the wing being separate. No doubt this was done to provide for an eventual 'B' model which had a longer fuselage. The instructions hint at joining these before gluing the the fuselage together and I think this would be a good idea.
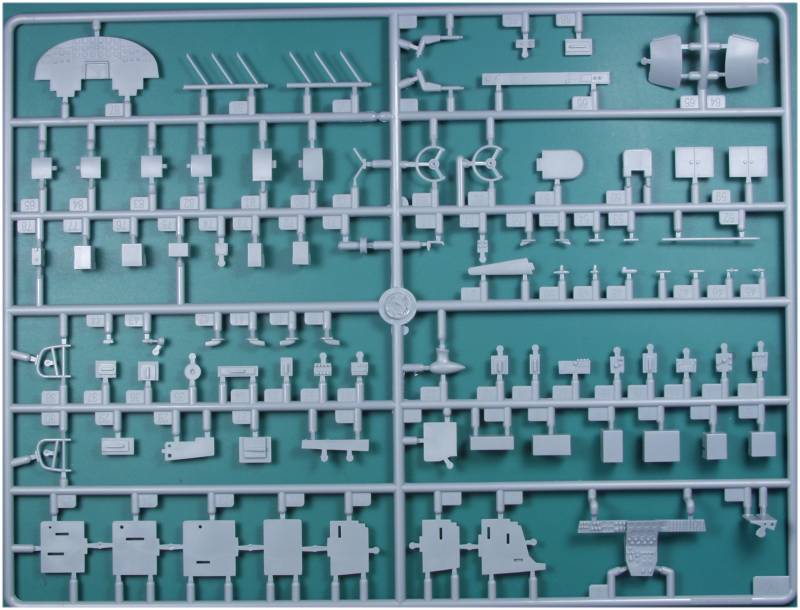
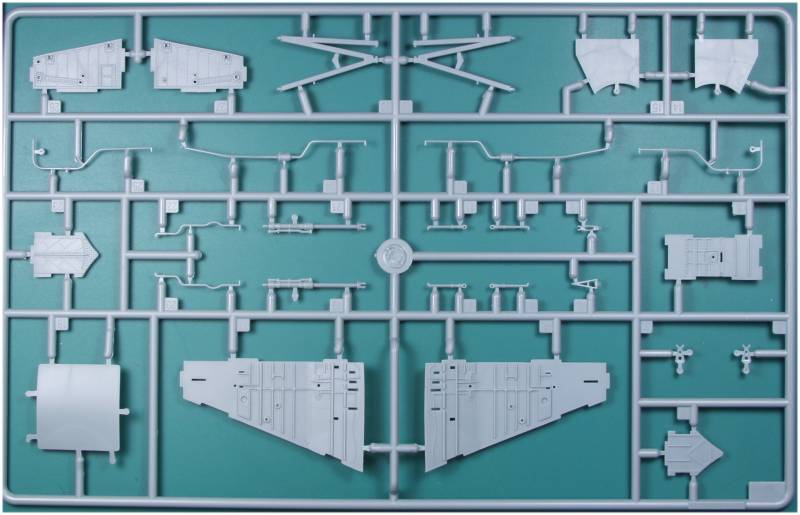
Like many Trumpeter kits the interior is brimming with detail. I didn't do a count but would guess a full third of the kit parts are interior parts. The flight deck appears to be quite complete and PE is supplied for the seat belts and harnesses. The cabin is also populated with three litters, some seats and other details. The main gear bays unlike on most kits are quite visible and well detailed including a couple PE parts and some hydraulic piping. The nose gear well though not as visible is also well detailed. There is a lot to deal with by the time the fuselage gets joined, hopefully it will all play well together. I have had good luck with this aspect in other Trumpeter kits.
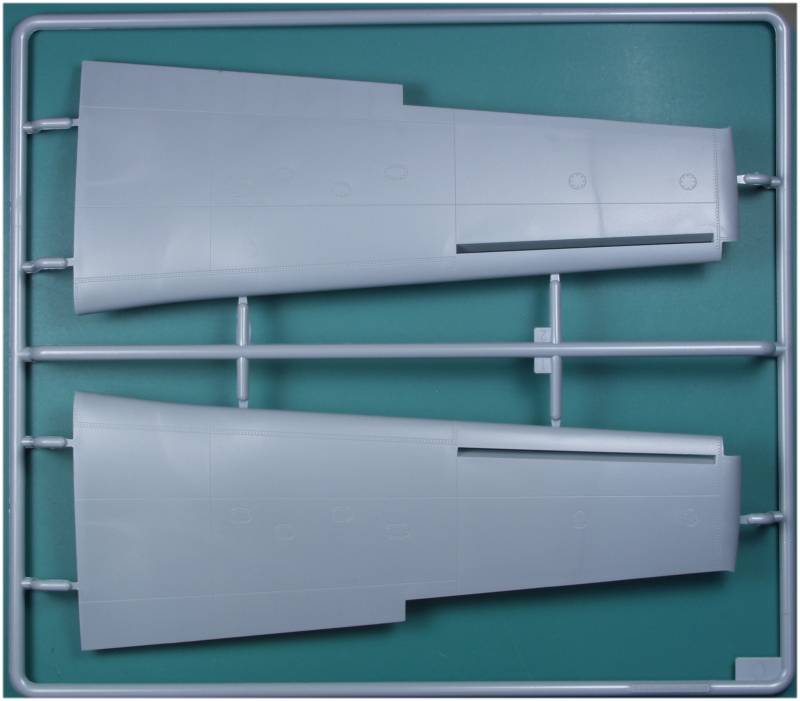
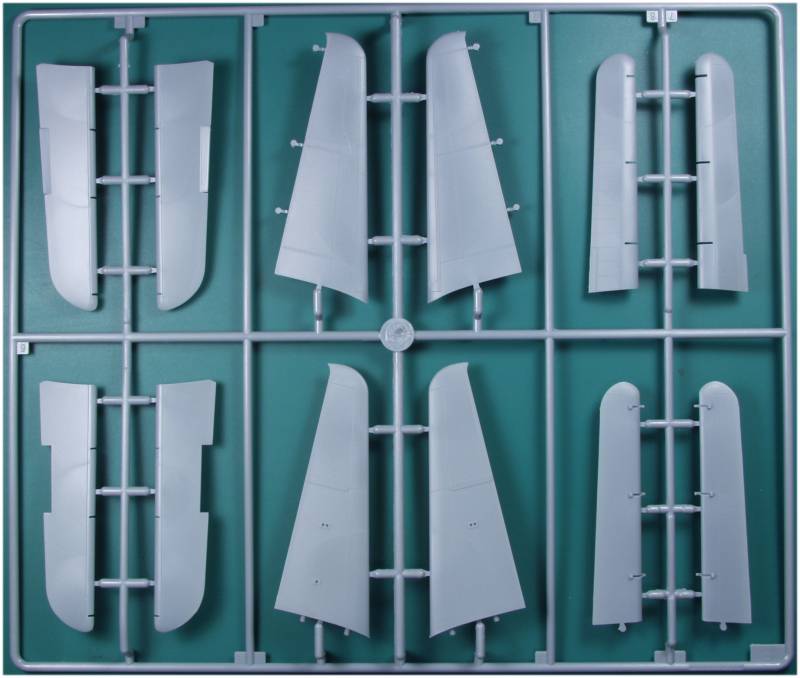
The control surfaces are all molded separately. On the rudder even the control balance tab is separate and on the elevators these are molded in a deflected position rather than neutral. Not sure how correct this is so check your references. If it is wrong it might not be all that easy to fix. As mentioned earlier the flap have some ejector pin marks to fix if you want the flaps deployed.
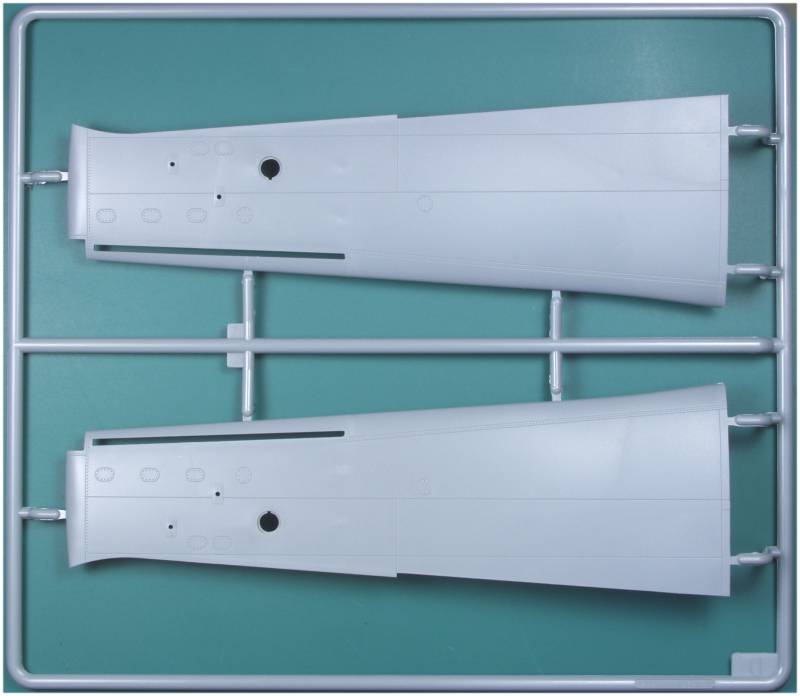
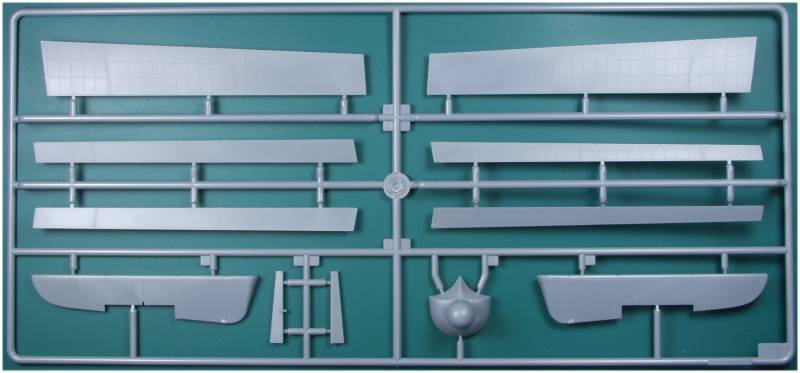
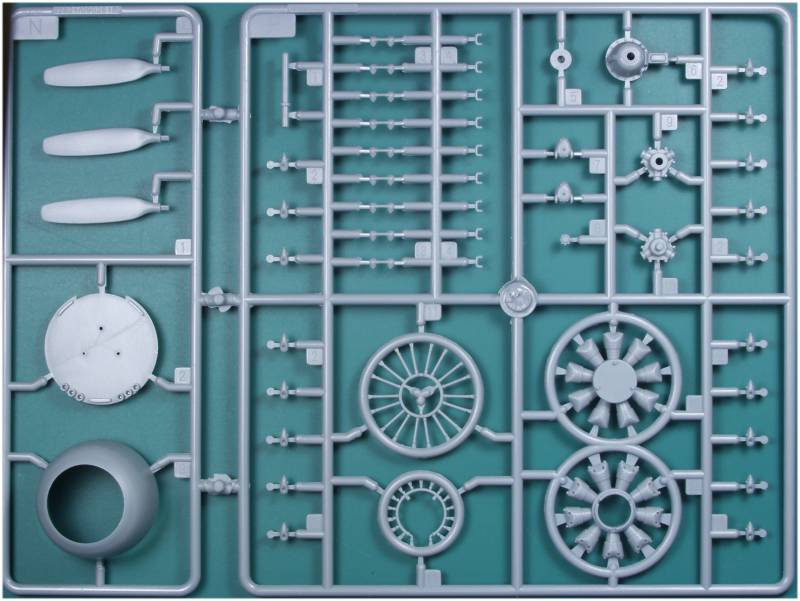
The engines are well detailed with some PE used and separate rocker covers and a push rod spider. The magnetos and gearbox are separate parts as well. Holes to mount the floats and under wing fuel tanks must be opened up before gluing the wings together. The wings are composed of outer sections and a center section. It appears that the outer sections fit into the inner sections. Hopefully this will be a good tight fit as no wing spar or other support structure is supplied. The main gear and nose wheel struts are supplied both as plastic as well as metal parts. Using the metal parts is probably a good idea as they are rather thin and the model will be quite heavy when complete. The gear is quite well detailed with a plethora of small doors and struts as on the prototype. The instructions recommend a 50 gram weight in the nose (not supplied), while that may sound like a lot, there is a lot of model aft of the gear so some checking before gluing the fuselage halves together might be good advise.
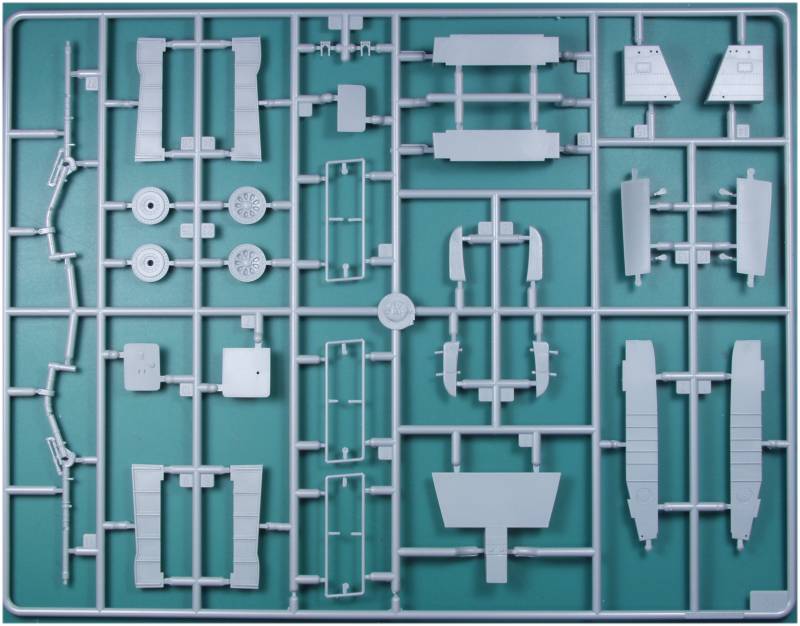
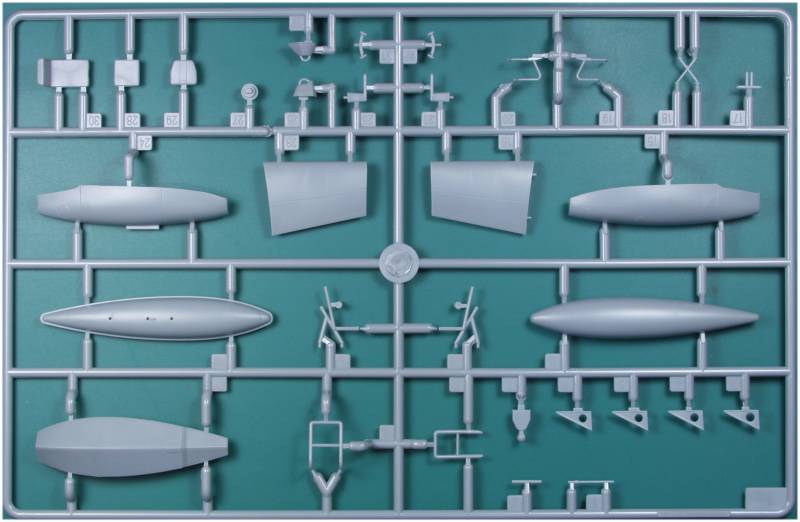
OK, lets look at the parts...

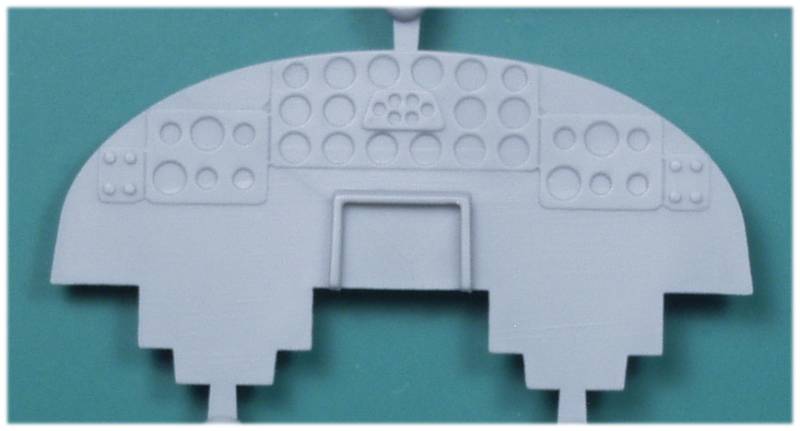
A close up of the fuselage to show surface detail.
The instrument panel is a bit lack luster, there is a decal for the instruments but how well it will settle over the detail remains to be seen.
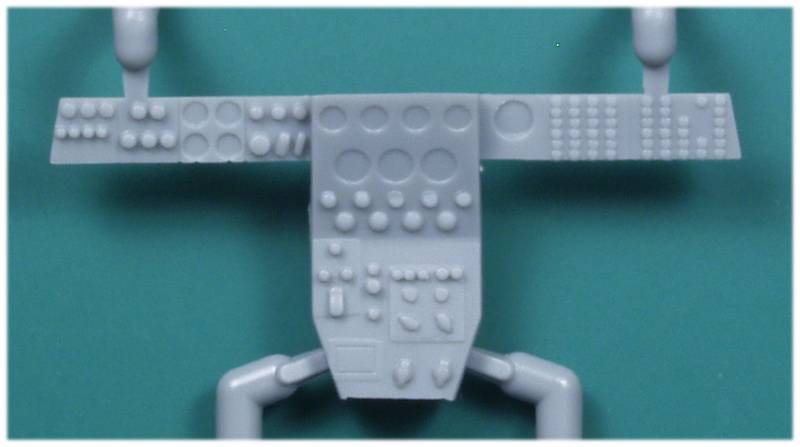
This console is a bit better and there are decals for this too but some Airscale decals might be a better choice here.
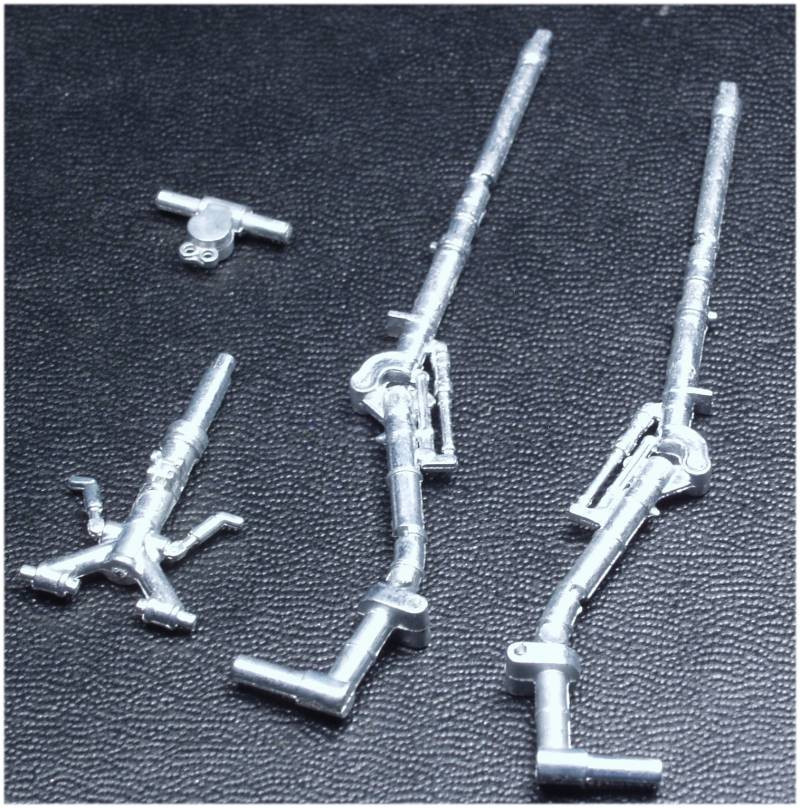
The metal gear parts are very nicely cast with a nice level of detail and only a light mold parting line to clean up, with a lot of weight in the nose to keep the kit from being a tail sitter the metal gear is a nice bonus.
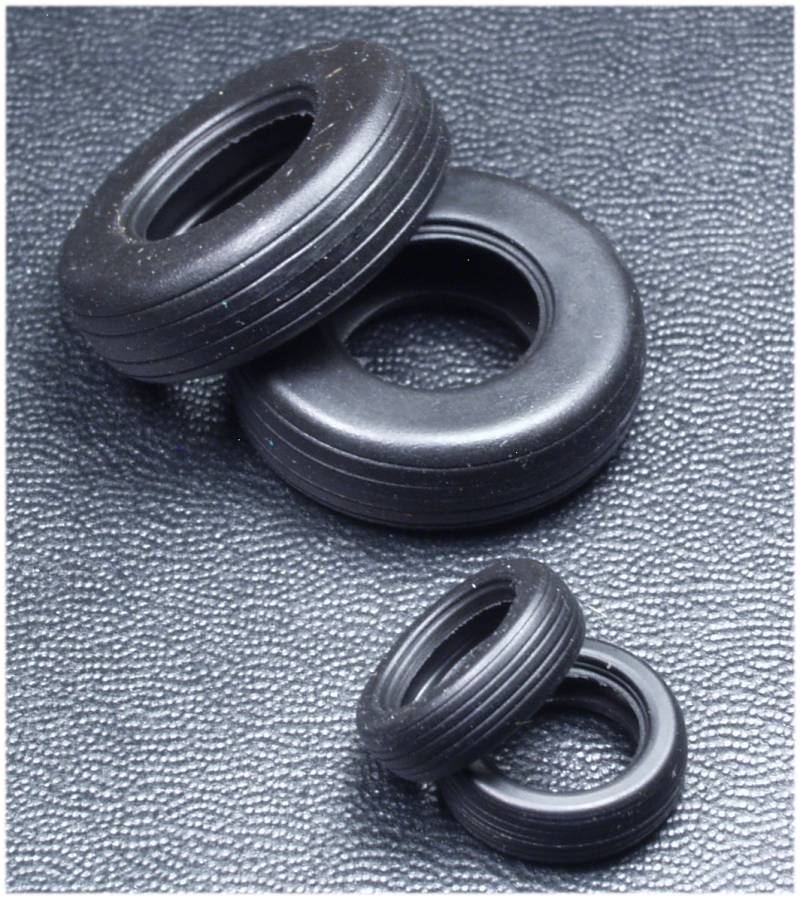
I know a lot of modelers grimace at rubber tires in kits due to issues with these in the distant past but I have not heard of any issues in recent times. Having separate wheel hubs is a real bonus for painting and the mold seam down the center is fairly small and shouldn't be that hard to clean up with a sanding stick and provide some wear on the tire at the same time.
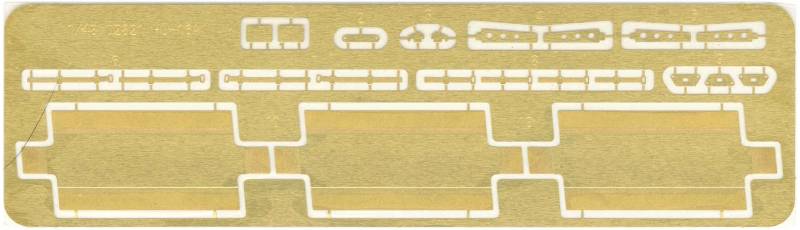
A small PE fret provides seat belts and harnesses, some gear bay and engine detail and the three stretchers for the main cabin. On these I think annealing them before bending would make it easier to provide some sagging after folding them.
The clear parts are quite clear and have very little optical distortion. Areas to be painted are frosted. Escape hatches are provided as separate parts in case you want to open them up.
![]()
![]()
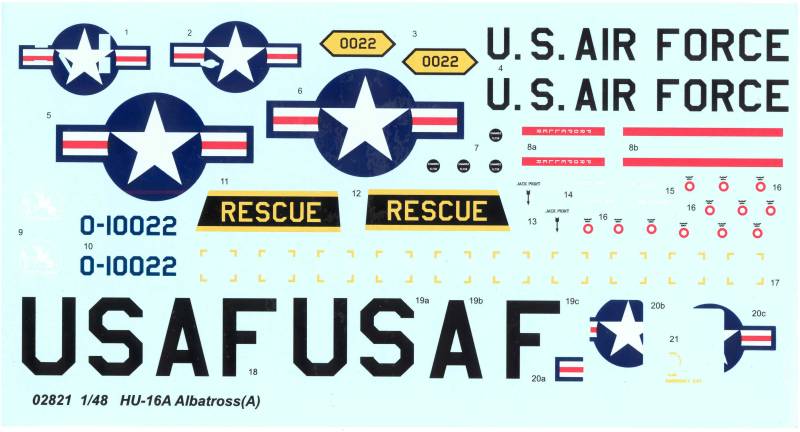
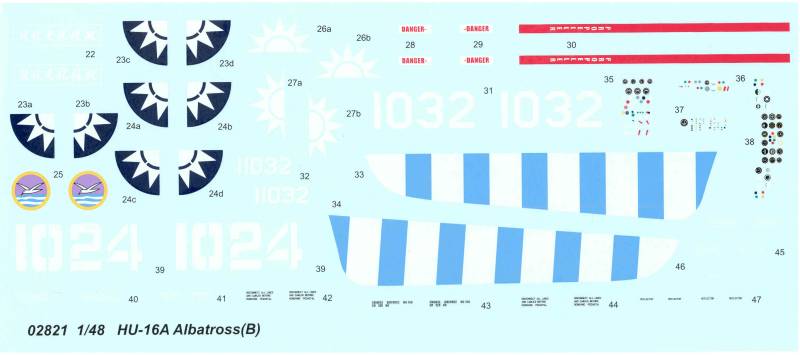
The decals look thin and opaque and are in register. They vary some in the amount of excess film. A fair amount of stencils are provided. There is a spelling error on the 'jack point' stencil with point being spelled 'piont'. The text on the smaller red circles is not readable. The decals provide markings for two aircraft, one in U.S.A.F. marking and the other a Taiwanese aircraft.
The instructions are a 16 page stapled booklet in the landscape format. The front page has general assembly instructions and decal application instructions as well as an icon chat. Page 2 and most of page 3 are for parts maps. The assembly instructions start on page 3 and continue through page 16 in 14 steps. Everything looks to be clear but there are not a lot of paint call outs on the interior. The exterior painting and marking guides are on a separate page printed in color on glossy paper. Each side cover one aircraft and each has a paint chart with generic names, and reference numbers for Mr. Hobby, Vallejo, Model Master, Tamiya and Humbrol paints if there is a match.
After Market Goodies
So far not much to report here, Eduard makes a mask set (EX405) but as of yet no PE. It would be nice to have a color Zoom if only for the instrument panel.
Conclusions
This is a large kit of a fairly large aircraft and as such I have not yet seen many built. It has a great level of detail and based on my experience with other Trumpeter kits should go together and fit together reasonably well. I have not read to much grousing concerning shape errors but one after market company (Ally Cat) did make a a replacement nose section so at least someone must have felt there was something there that could be improved. Most modelers should not have any issues with it but due to the parts count I'm not recommending it to beginners.
Links to kit build or reviews
No builds found yet but other in box reviews can be found here and here.
References
HU-16 Albatross in Action by Robert D. Migliardi
Grumman Hu-16 Albatros by Steve Ginter