
Halifax Mk III

The Handley Page Halifax played second fiddle to the Lancaster much as the B-24 did to the B-17. Four out of every ten bombers built in England during the Second World War were Halifaxes. Although not considered as shapely as its Avro contemporary, its deeper, slab sided fuselage rendered it suitable for a wider variety of roles and unlike the Lancaster which was used almost exclusively as a bomber during the war years, the Halifax achieved an enviable reputation as a freighter, personnel transport, ambulance, glider tug and maritime reconnaissance aircraft. Its initial design was based on the same specification that would also eventually produce the Lancaster. Failure of the Rolls-Royce Vulture engines to reach production status required Handley Page to redesign to a four engine layout much the same as was done with the Manchester design at Avro. The prototype flew in the fall of 1939. By the time the second prototype had flown the bomber had already been ordered into production. The first production Halifax flew in October of 1940. The initial production batch was designated Mk.I Series I and they were followed by Series II a which had increases in fuel capacity and were stressed to be operated at higher loads and the Series III which had higher horsepower rated Merlin engines. The Halifax had the distinction of being the first RAF four engine bombers to drop bombs on German soil.
Operational experience had indicated the desirability of a power operated dorsal turret which led to the Mk.II with a bulbous Boulton Paul turret similar to the one used on the Lockheed Hudson. The prototype of this version flew in July of 1941 and by September the first production Mk.II was flown. Entry into service use however was not without difficulties as the Halifax had always been slightly under powered and the increased weight and drag of the turret seriously affected performance. Fully loaded aircraft developed a tendency to spin uncontrollably and losses mounted. To address this issue a program was mounted to reduce weight and drag and this resulted in the Mk.II Series IA, which saw the deletion of the nose turret, this being replaced by a streamlined glazed nose, removal of the dorsal turret, the tail wheel was made semi-retractable, use of a shallower astrodome, the removal of the under wing fuel dumping pipes, removal of the asbestos shrouds on the exhausts, removal of the antenna mast and more powerful engines were installed. All of these changes resulted in a ten percent increase in maximum and cruising speed. At this period in its development the aircraft began suffering a series on unexplained crashes where the aircraft got into an inverted dive. This was eventually traced to rudder stalling in the triangular shaped fin. New rectangular fins were designed to rectify the problem and these were introduced as a retrospective modification during 1943.
In 1942 a Halifax was fitted
with Bristol Hercules VI 1,615 h.p. engines. The extra power
provided
by these engines offered significant advantages and it was
placed into
production as the Mk.III. The wingspan was also increased at
this time
from 98 feet to 104 feet two inches, improving the operational
ceiling.
The service debut of the MK.III in February of 1944 reinstated
the
Halifaxes as a fully operational type. For the previous five
months the
Mk.II version had been relegated to less hazardous targets
owing to a
steep rise in losses sustained.
The Kit
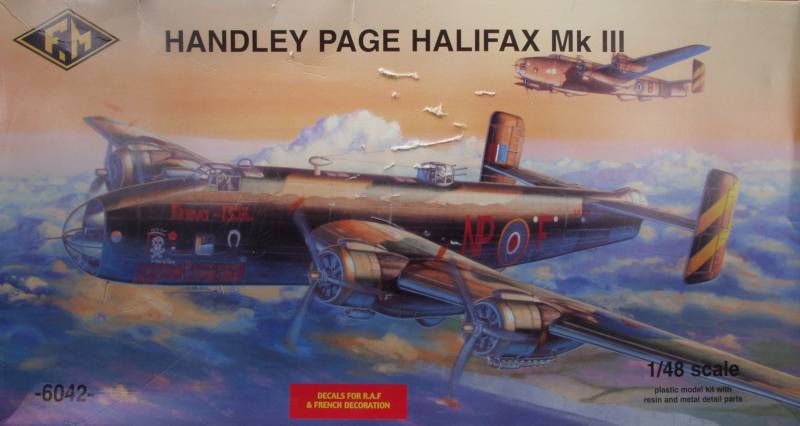
If you have ever read anything good about this kit, it was probably one of the early post release in box reviews, most of which were much too generous with praise. Later reports from builders told the ugly truth, this thing was a dog to build. While I'm not sure I will every tackle it, lets take a look at it any way so that forewarned will be forearmed ! The FM kit comes in a fairly large top open two part box with OK artwork on the front. The top is made of rather flimsy cardboard while the bottom is made from more substantial corrugated cardboard. Inside the box are several bags, some containing one sprue, others containing several. There are two zip lock bags, one with resin parts the other with cast metal parts. The clear parts were left unprotected to fend for themselves inside the box and at least one of my suffered from this.
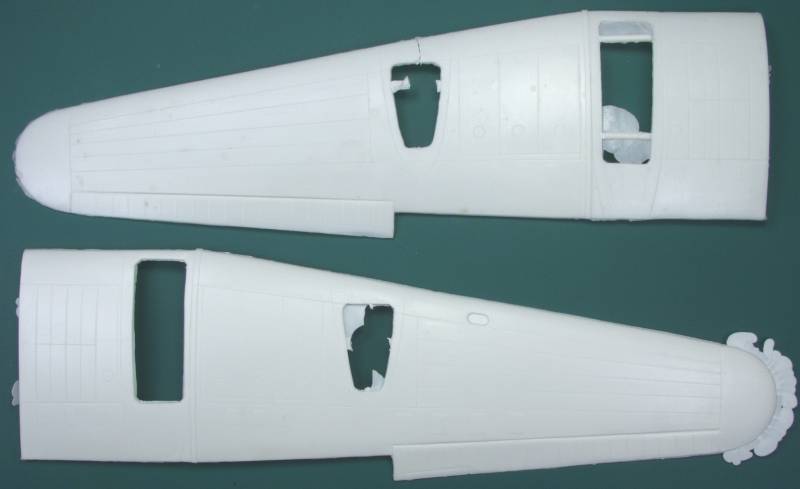
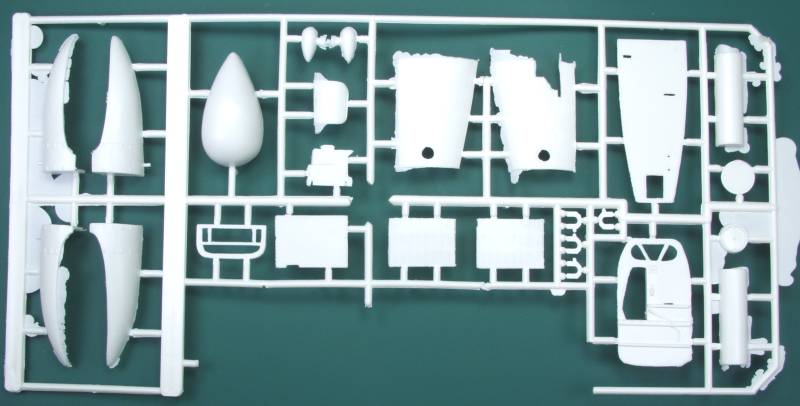
Most parts were on sprues and in bags with the exception of the bottom wing halves which were loose in the bottom of the box. The parts are molded in sort of an off white color and feature recessed panel lines and some raised detail where applicable. The panel lines are for the most part uniform and typical for the scale but not all of them are. The surface is moderately smooth but has some roughness and most of it looks like it could use at least a light sanding. Almost all parts show flash, some quite heavy. Combine that with heavy sprue attachment points an a large portion of the assembly time is going to taken up with trimming and cleaning up parts. One of my lower wings was broken near the leading edge where the outboard engine attaches. The crack will be hidden but certainly unexpected.
The control surfaces are all fixed with the exception of the split flaps which are separate and I assume positionable. The fabric surfaces are represented by rib tape only which is probably better than the saggy fabric look most use and if you don't like them you can sand them off. From the flight engineers compartment forward the interior is well appointed with parts of plastic, resin and metal. There are bulkheads, side panels and the like. It makes one believe it's all quite well detailed but as rough as some of the plastic parts are I'm dubious about how well it will all go together. The bomb bay is also well appointed structure wise but you are on your own for bombs. The main gear bays are also a multipart assemble that should look good assuming it all fits. The tail wheel bay is a separate resin part. The wheels feature a smooth tread and are weighted.
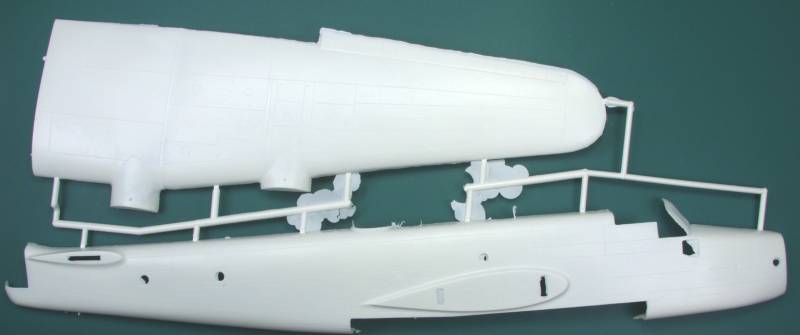
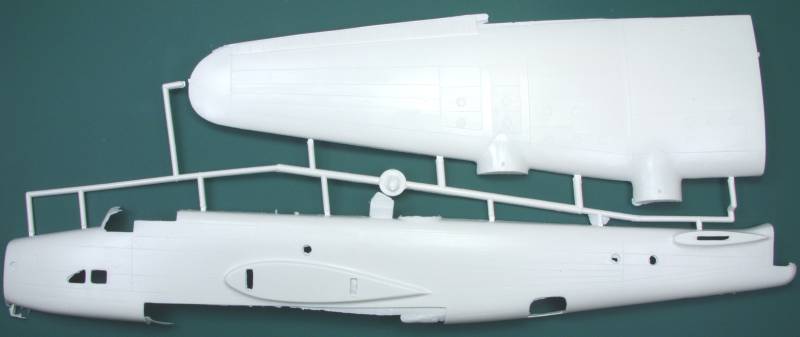
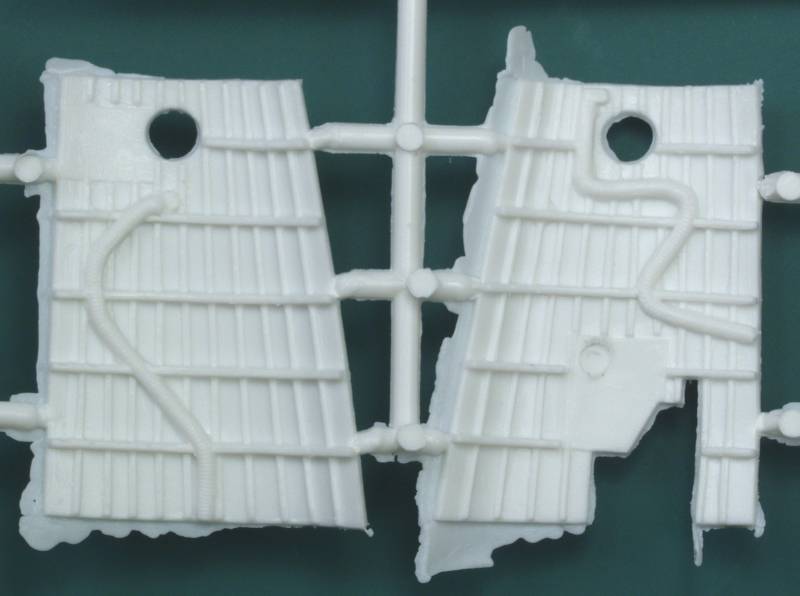
The wings have through the fuselage spars for support so they should be strong enough although I looked a long time before I realized that the spars are just a flattened portion of one of the sprues which will need a lot of clean up before use. One might be better off using a stick of styrene stock. The parts are all numbered on the instructions but not on the sprues and no parts map is supplied. By my count there are 148 parts in white. Note multiple sprues are not shown, there are four with the props on them and two with the engine nacelles and gear bay parts. One photo shows an up close look at the nose interior panels to give you and idea of the flash level and clean up that will be required. See below


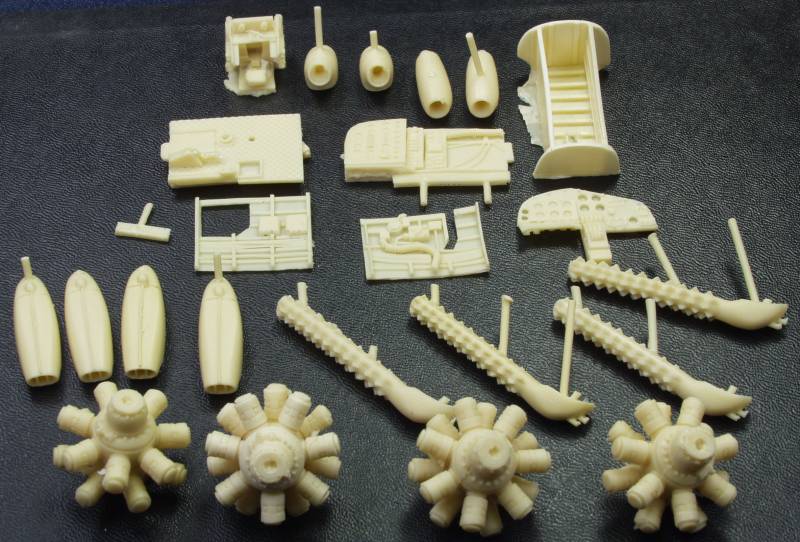
The resin parts may be the only bright spot in the whole kit. Molded in a tan colored resin they are all very cleanly and crisply molded with very little in the way casting sprues or blocks to remove. There is some light flash which should clean up much easier than the other kit parts. I only found a couple pin holes on the hedge hog exhaust stacks. The engines on my kit were rather amazing one piece castings. I have heard that some kits come with individual cylinder heads and it makes me wonder if maybe the molds wore out early on as the complete castings look like they would be difficult to remove from the molds. If that is the case it may mean my kit was an early mold kit and may not be as bad as later kits. All together there are 23 resin parts, see below.
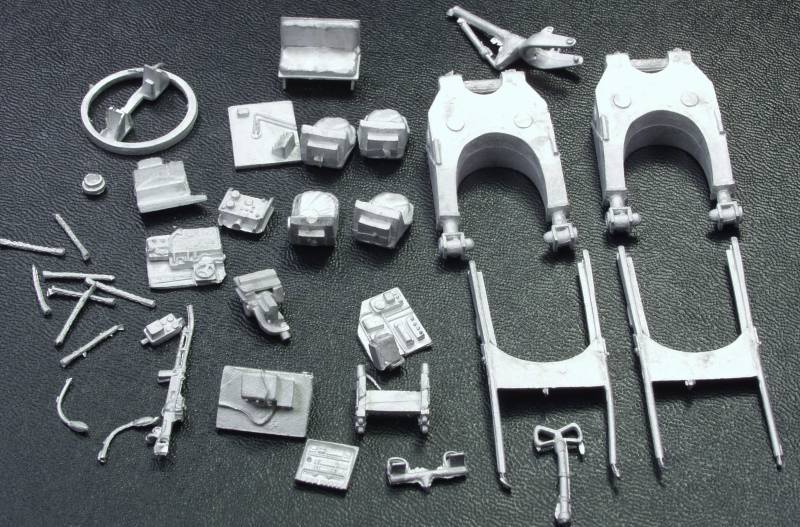
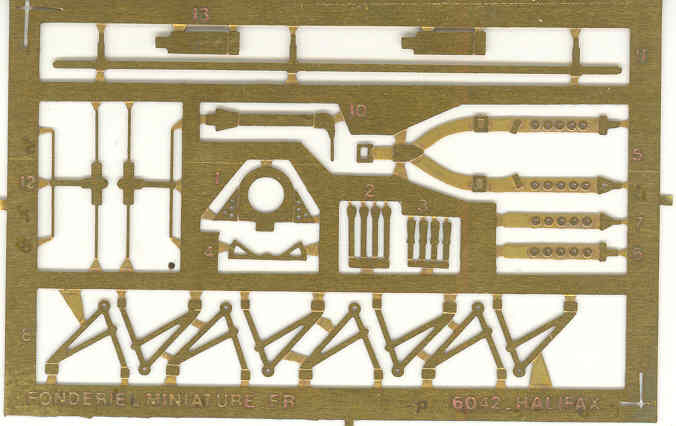
The metal parts included in the kit are probably the second bright spot in the kit. They include the seats, main and tail wheel struts, some interior equipment panels, the top turret interior, nose machine gun, rudder bar, control column, mass balances and machine gun barrels. The parts are nicely done in fact one panel has better instrument detail on it that the resin panels. The seats lack belts or harnesses. Most parts should only require a light amount of trimming or sanding to clean them up. The gun barrels are the only thing that I wouldn't bother with, better to use some hypodermic tubing. Altogether there are 34 metal parts, see below.
The kit dose include a small photoetch fret with harnesses and belts for the pilots seat, throttle quadrant levers, a pitot tube, some bomb bay door hinges as some other parts I didn't take the time to identify. See below.
The clear parts are not very impressive. The main canopy, nose, astrodome and turrets are supplied as vacuform parts. The parts are not particularly clear but may look OK with a coat of Future, one can only hope ! There are extras and it's a good thing as one of my turrets was smashed beyond use. There are 13 vacuformed parts, only six will be actually used. See below.
![]()
The balance of the clear parts are injection molded. They are thick and feature a rough surface and are anything but clear. They look like they need to be polished then coated with Future, but make sure they fit first, I'm not holding my breath ! See below.
![]()
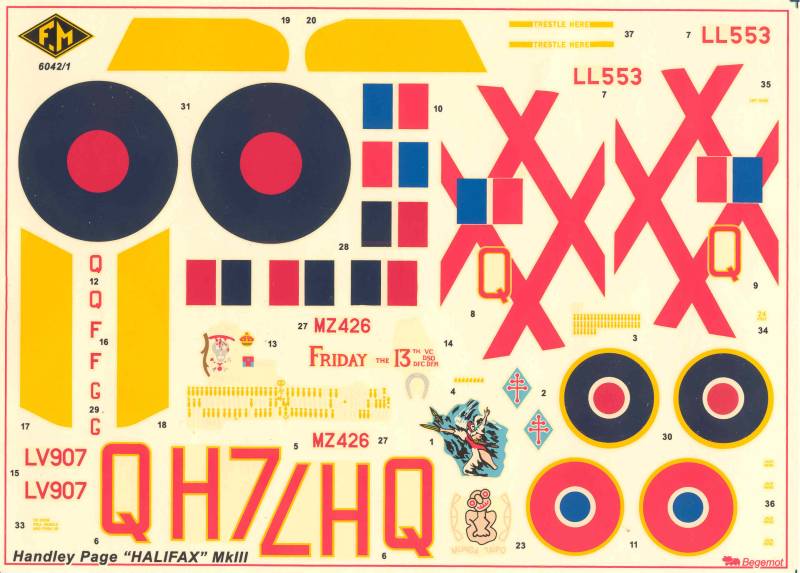
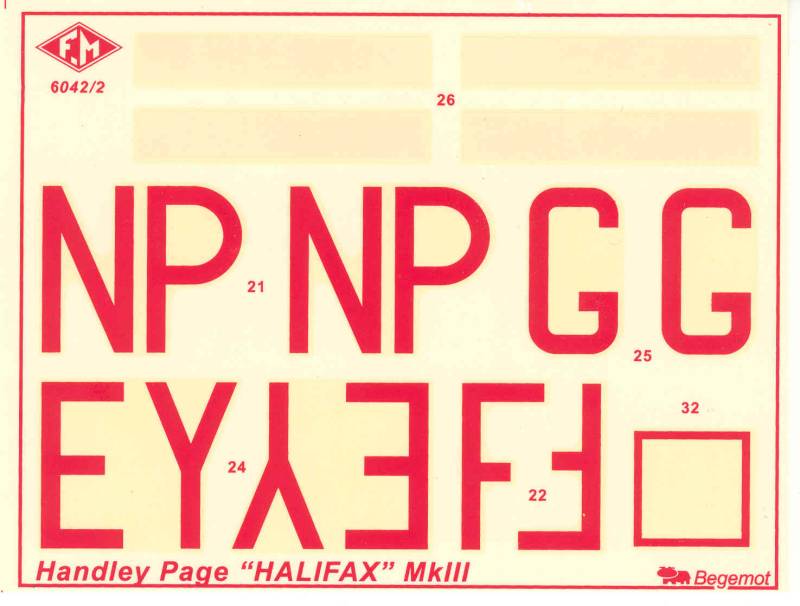
The decals provide markings for three aircraft and include some stenciling. They look thin but the registration is off on the smaller roundels and I'm not very hopeful based on other reports that these will work well. Two sets of code letters are on a second sheet. I'm not convinced these are as opaque as they need to be. See below.
The instructions are as big a let down as the rest of the kit, four A4 size pages printed on both sides and stapled together. Page one has history in English and French, pages two through six have assembly drawings as well as assembly instructions in English and French, pages seven and eight have painting and marking instructions, such as they are. At least the decals have numbers on them. No paint colors are provided for anything but the outside camouflage and then only by color name. It's too bad a parts map wasn't supplied or the parts numbered on the sprues as the instructions and drawings refer to them.
After Market Goodies
None that I am aware of.
Conclusions
I guess there is more than one way to look at this kit, it is more than likely the only one we'll every see in this scale. Even 1/72 scale doesn't have a current one, only and old Matchbox kit and even older Airfix kit so in that case we should be glad to have it. On the other hand it is just another worst case example of a short run kit. Just like a Mach 2 kit done in 1/48. Consider yourself forewarned that if you take this one one be prepared for a long haul. Clean up will be a major chore and don't expect anything to fit the way it should without a lot of fitting, carving, grinding, filling and sanding. I will say this, the couple I have seen built up online look very nice but hide the work that went into them. Caveat Emptor, the buyer beware ! I do not recommend this kit to anyone except the most experienced modelers.
Links to kit build or reviews
A review / build can be found here, the reviewer has done several FM kits on Hyper Scale and personally I think he glosses over some of the issues but probably has much more short run kit experience than others and he still had issues with this kit. I did not provide links to any in box reviews because most of them seemed to be taking the high road to avoid ticking off the generous supplier who sent them the kit. If you want to read about some others trials and tribulations, go to the Fine Scale Forums and do a search for Halifax and read the threads there. Personally I think they run to the other extreme but I won't know till I've tried to crack this nut myself !
References
Famous Bombers of the Second World War by William Green
Halifax, An Illustrated History of a Classic World War II Bomber by K. A. Merrick