
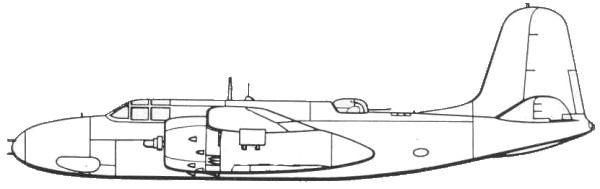
A-20G
The Douglas A-20G was the most
produced
variant of the A-20 with 2,850 of them having been built. The
biggest
change from previous variants was the turret replacing the
open gun
position and the bombardiers position in the nose being
replaced with
four 50 caliber machine guns giving it total of six forward
firing
guns. Numerous other minor production changes were made with
each block
built. For a more complete history check the Internet or the
references
at the bottom of the review.
The Kit
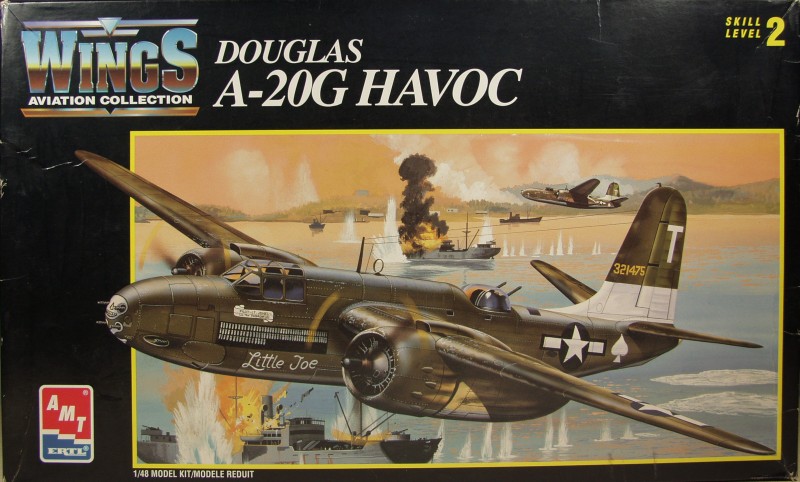
This kit was originally released by AMT and dates back at least to 1994 and it has been released numerous times by AMT, ERTL and currently Italarie . Just about every version, B/C, G and J have been boxed as well as the P-70 night fighter. For its age it has held up fairly well, some parts do have a bit of flash to clean up but overall it fits together well. As you might guess many of the parts are the same. I will be referring back to the P-70 review found here as it contains many of the same parts.
The parts have a smooth finish and have fine recessed panel lines. Some of the parts had a moderate amount of flash with one sprue having more than the others. The sprues also appeared to have been cut from a much larger sprue either to fit the box or to separate parts for this specific version. I did not find any sink holes or other surface defects on the outer surface of the kits and AMT did a good job with ejector pins marks in keeping them where they wouldn't be seen. There are some on the insides of the main gear doors but they line up with the lightening holes on the door so they aren't that noticeable and the ones on the inside of the fuselage aren't in the cockpit area. The cockpit area is moderately detailed but could stand some photoetch to dress it up. One of the issues with the kit is that AMT left out the life raft which was stowed on a shelf directly behind the pilot. Another issue is the exaggerated tire tread pattern they used on the wheels. Fortunately both can be dealt with with after market items discussed later.
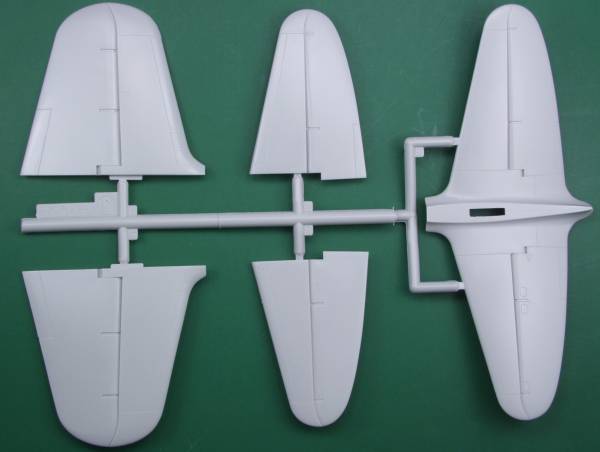
The fuselage halves in all the kits that I have seen are usually separate as if having been cut from a larger sprue, all have the option for a separate nose depending on the version and are different depending on whether the version had a rear turret or a gunners position. The fuselage halves for this kit are shown below.

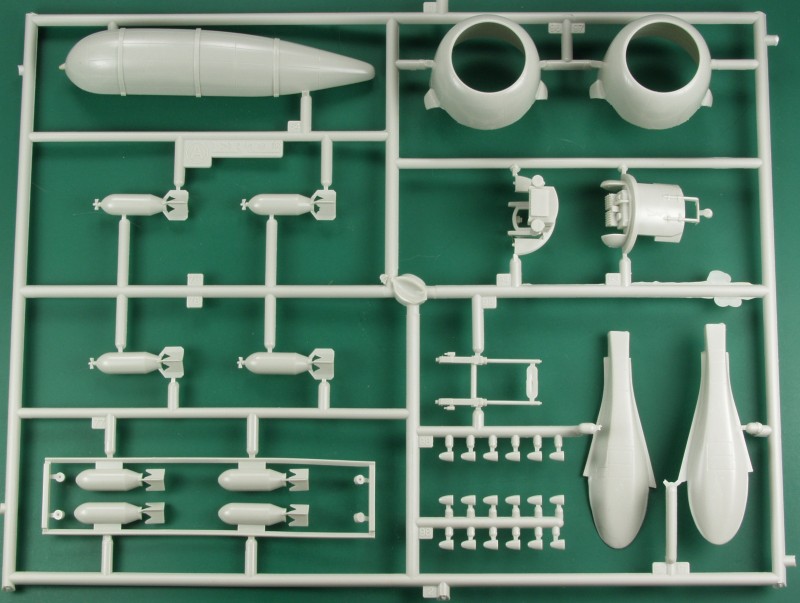
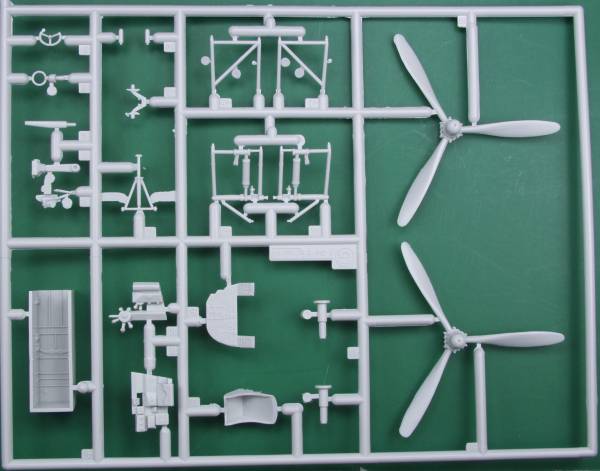
The "A" sprue in this version contains the engine cowlings and carburetor air intakes which fit into recesses in the upper wings. Both of these items can vary depending on version. This sprue also contains the turret parts, exhaust stubs for the cowlings some bombs and belly tank that was carried by some aircraft. The exhaust stubs are not hollowed out and the cowlings have light scribe marks to locate them.
The "H" sprue contains the cockpit floor and shelf behind the cockpit, the nacelle halves and the bomb bay doors. These are molded as one piece and can be cut apart if you want to display the bomb bay open.
The "J" sprue contains the tail parts and are to the best of my knowledge the same for all versions.
Sprue "G" contains the propellers and shafts, nose gear bay, cockpit interior parts and part of the landing gear parts.
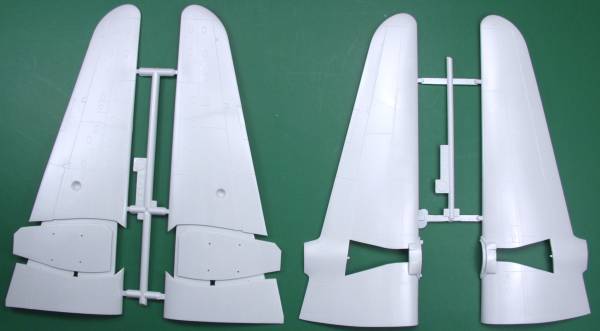
Sprues "L" and "K" are the lower and upper wing halves respectively, the cut out in the top wing is for the carburetor intake. The lower wings have a groove to locate the engine nacelles. I always find that these are most helpful for fit purposes, with the nacelle set into the wing there is less likelihood for gaps during assembly which because of their location can be hard to deal with.
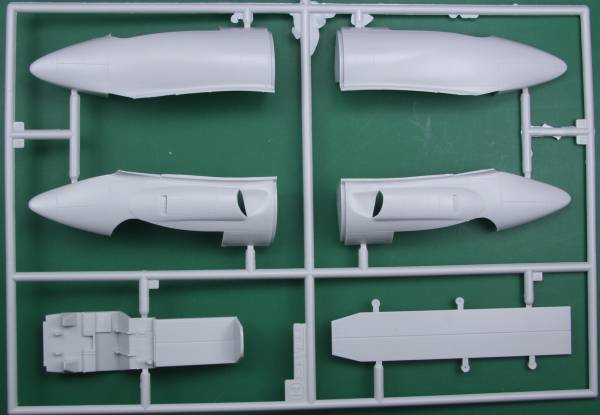
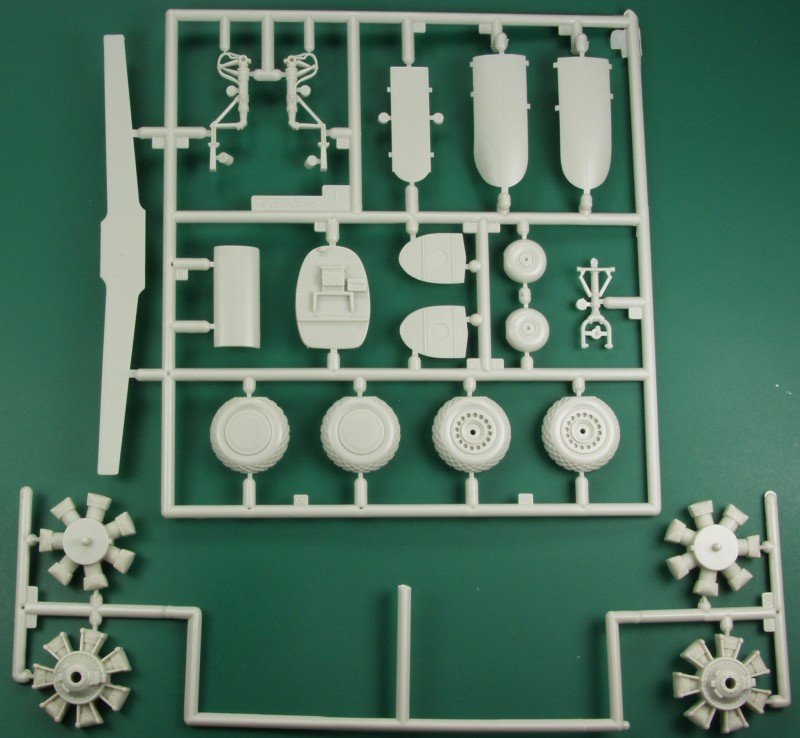
Sprue "I" contains the main and nose gear struts and wheels and the main and nose wheel doors. These like the bomb bay are molded in one piece and must be cut in half for a wheels down display. Also included is the wing spar, cockpit hatch cover, forward fuselage bulkhead and two gear bay bulkheads. The wheels are not weighted and the main wheels have some exaggerated tread detail. I also included the sprue here with the engines as it has no identifying label. The engines feature front and rear cylinder banks and look quite nice just needing so ignition wiring to dress them up.
The clear parts are clear and relatively distortion free although mine displayed some scratching from being mixed in with the other kit parts. The one upper hatch cover part was broken off the sprue. Besides the cockpit glass and turret the sprue, also labeled as sprue "A" contains two landing light lenses, two small oval windows for the fire extinguisher locations and a tail cone for the fuselage.
The decals appear thin, in register and where possible exhibit very little excess film, I have good success with other Scale Master decals and suspect that these will work as well as others. The sheet contains marking for two aircraft from the Pacific Theater of operations. One of them, Little Joe, is how the A-20G in the National Museum of the United States Air Force is currently marked.
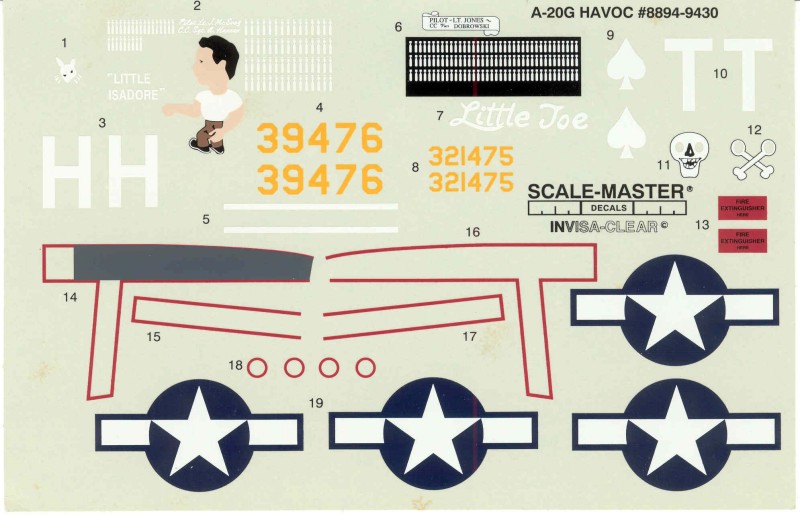
The instructions are printed on a large sheet roughly the size of a "C" size drafting paper that is folded to provide multiple assembly panels. Each panel has color information by color name only. A second sheet 11" x 17" and printed on both sides and folded to fit the box has some brief history, painting and decal location diagrams for both aircraft included on the decal sheet. Colors are called out by name and Federal Standard numbers. It also has a section tips on building the model.
After Market Goodies
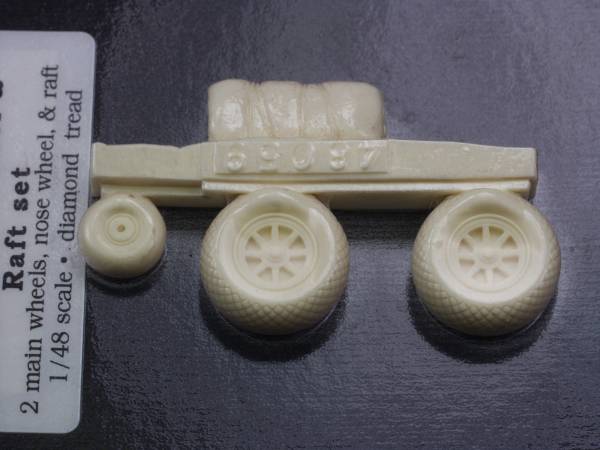
True Details Wheel and Raft set [48059]
As mentioned in the above review two of the issues of the kit are lack of the life raft in the area behind the pilot and the overdone herringbone tread on the tires. In this case both can be problems can be solved with this set. While I'm not real keen on TD wheels, they always look a little too flat to me, in this case they are a major improvement over the kit parts and the raft is a nice bonus. See below.
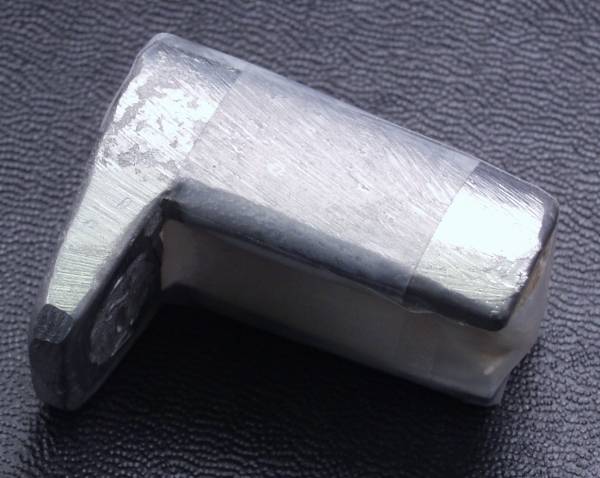
This kit will be a tail sitter if one doesn't add weight to the nose area. The instructions call for 10 grams in the nose For a more elegant and easy fix I recommend a Terry Dean nose weight.
The Terry Dean weights are really slick. They are cast to fit specific models and provide enough weight to keep the nose firmly on the ground. You don't need to guess or mess around stuffing shot, wheel weights, fishing sinkers or nuts and bolts into nooks and crannies and hoping you have enough. Weights for other planes fit in noses or wheel wells and are made for aircraft in 1/72 and 1/48. If you haven't checked these out for yourself, give them a try. He doesn't have a website but you can see and read about them at this link over at Modeling Madness. The weight for this kit fits around the nose wheel well. Note: the light colored area is a chunk of wood inserted in the weight to retain it's shape during shipping and until it's ready to be installed. I used one of these in the P-70 kits and it worked great, highly recommended. Unfortunately these are no longer available unless you can find one on eBay you are on your own. See photo below.
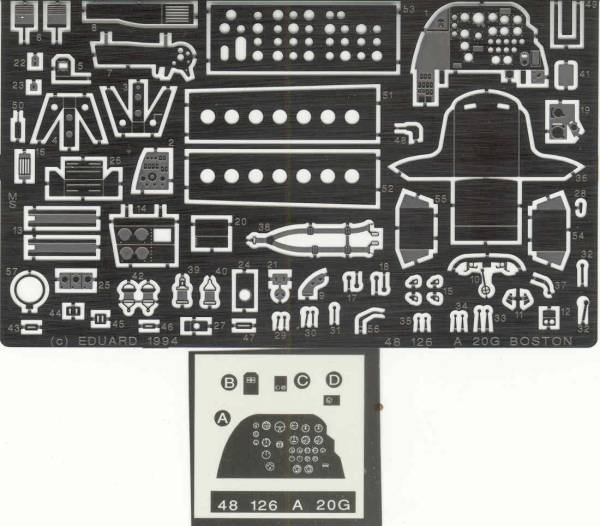
Interior detail photoetch set from Eduard (48-126)
This set is one of Eduard's older non color sets using a film and PE sandwich for the instrument panel. While it's mostly cockpit detail it does include a few external parts that could be used as well. If you use the Vector set show below you really don't need this set, all I used from it were some of the PE levers. The instructions are the usual Eduard A4 size page printed on both sides with pictorial diagrams. See below.
Eduard makes an undercarriage set that adds some structural detail to the landing gear bays. Quite honestly I can not recommend it. It is very difficult to install and in the end I tossed most of it. How often do you look into the wheel wells on a kit after it is finished ?
Eduard also makes a canopy mask set (EUEX064) Which is most useful and recommended.
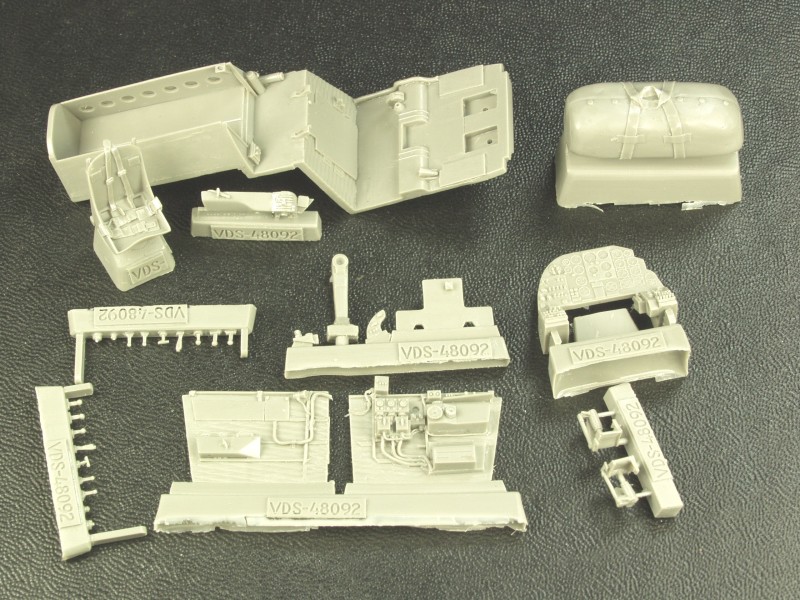
I also highly recommend the resin cockpit set made by Vector, The Vector number is VDS 48-092. The set contains a replacement floor and compartment behind the pilot, new instrument panel, side walls, control column, seat with molded in harness and belts, throttle console, rudder pedals with brake cylinders, life raft and a lot of knobs and handles. All are molded with the quality for which Vector is known. While you will need to paint the instrument panel it sits back under the cowl and is very difficult to see so time spent detailing it to the nines will be mostly wasted. I used this set in the P-70 and found that unlike most resin cockpit sets this one actually fit quite well with only some minor trimming required for a good fit. Unless you plan on leaving the cockpit access panel open don't spent a lot of time painting and detailing the life raft as all you will see is the very end. Photos of the completed assembly installed can be found in the P-70 review here, scroll down to the build section.
Conclusions
For a 20 plus year old kit this one holds up quite well, fit isn't perfect but a lot better than most kits this age and nothing a most modelers can't handle. I was pleased enough with my build of the P-70 variant that I decided to add this one to my build list and may eventually add the A-20J to the list as well. No one else has released a kit of the important aircraft in this scale and most likely because it would be hard to top what is already here.
Links to kit build or reviews
Build reviews can be found here, here, here and here.
References
Famous Bombers of the Second World War by William Green
What would probably be considered the bible for this aircraft: The Douglas A-20 Havoc, The Ultimate Look by William Wolf.
Back to
the Misc. 1/48 US page