
Ju 388L
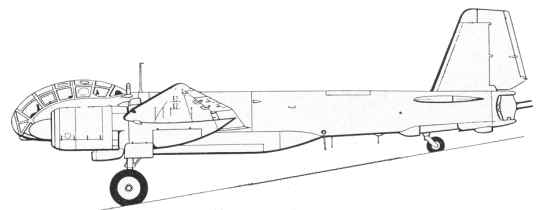
The failure of the "Bomber B" program left the Luftwaffe in a situation where much of its bomber, reconnaissance and Zerstorer aircraft were rapidly approaching obsolescence. They needed an aircraft capable of much higher operational ceilings and speeds and needed it as quickly as possible. The Ju 388 offered the required increment in performance without disrupting existing production arrangements. Known as the Hubertus project, the Ju 388 shared a common airframe with the Ju 188 and in the case of the L model the identical pressurized forward fuselage as the Ju 188S and T. The L version was a long range reconnaissance version. The primary difference between the L and K which was the bomber version was that the ventral pannier contained cameras and extra fuel while on the bomber version it was set up as a bomb bay. I chose to build the recon version because it was the only version to see much use. The bomber version was never used in combat.
The Kit
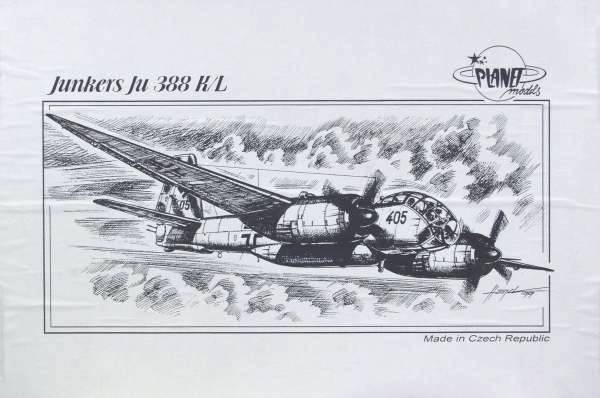
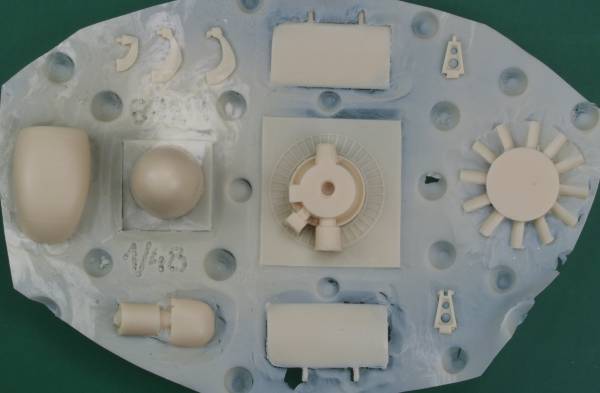
The Planet Models Ju 388 is a resin kit with vacuum formed canopies. It comes in a sturdy box of corrugated cardboard with many of the parts packed in a heat sealed compartmented bag. The fuselage halves were not bagged and a small bag contained some of the smaller detail parts. The box has a typical Planet models black and white rendition of the aircraft. I must say that I was most impressed by this kit. The surface detail is recessed and consists of panel lines and rivet detail and it rivals most injection molded kits in its rendition. I had to look hard to find any surface defects on the major pieces. There were a few incomplete panel lines and one or two minor blemishes and pinholes.
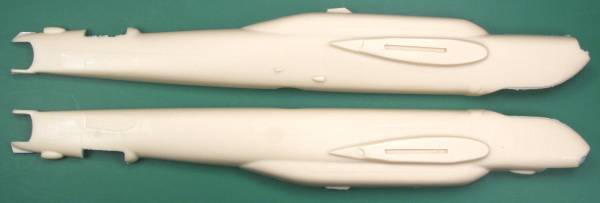
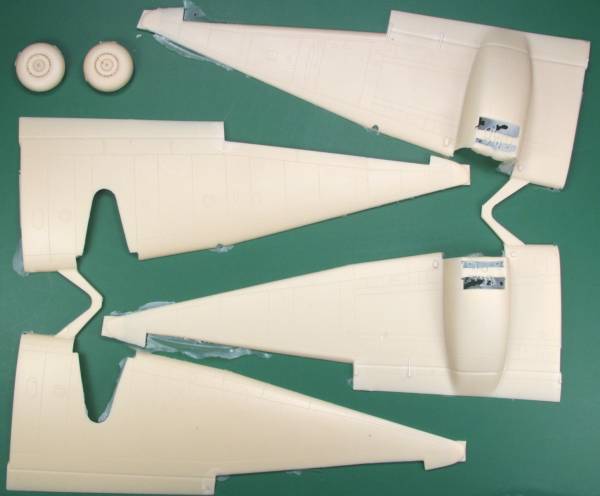
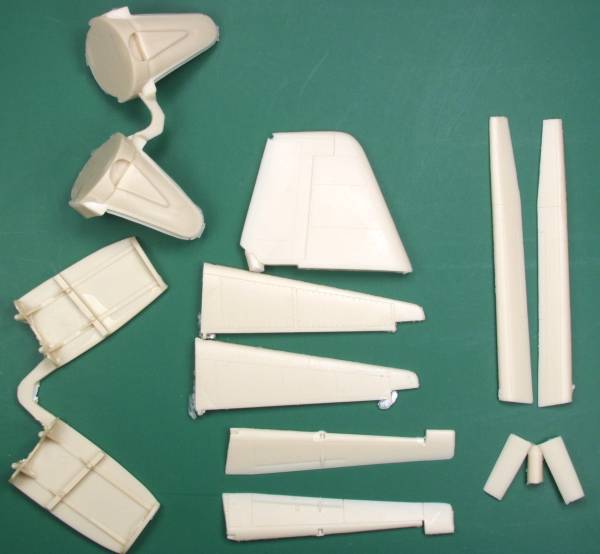
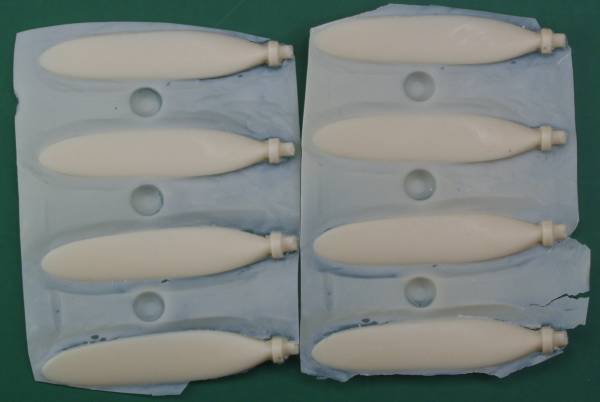
The fuselage halves and wing halves are hollow cast and did not appear to be warped. Casting blocks are small and should be easy to remove. What flash there was is paper thin and easy to clean up. The ailerons and elevators are molded separately but the rudder is cast with rest of the vertical tail unit. There was a void at the upper tip of the rudder on my kit. A couple things I found confusing with the tail unit, for one the panel lines are different on each side of the vertical unit, one side showing some rivet or fastener detail and the other side not. A similar situation was found on the horizontal stabilizers in that the panel lines were different from one side to the other and one side had rivet detail and the other did not. This may be totally correct but it seemed strange none the less.
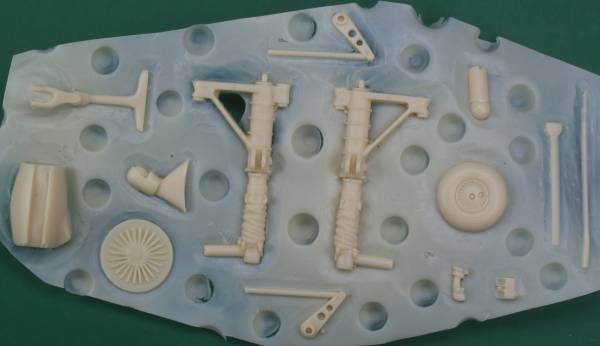
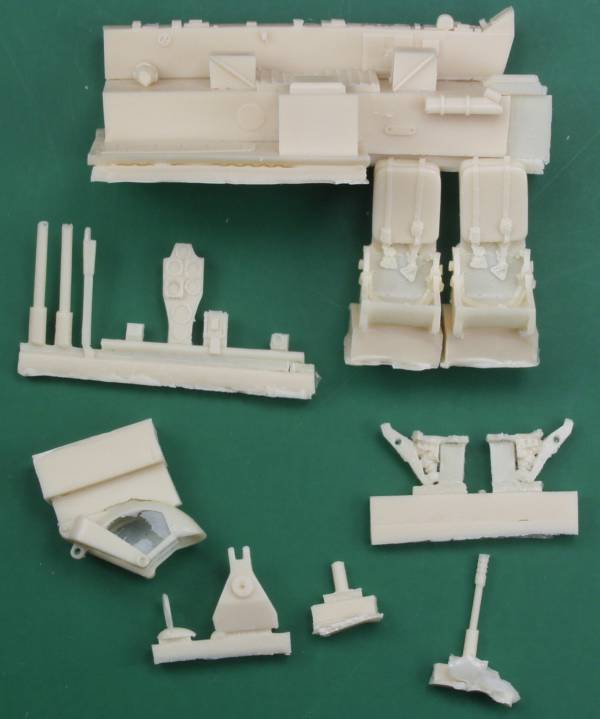
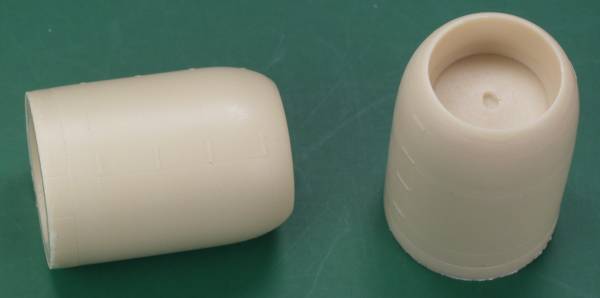
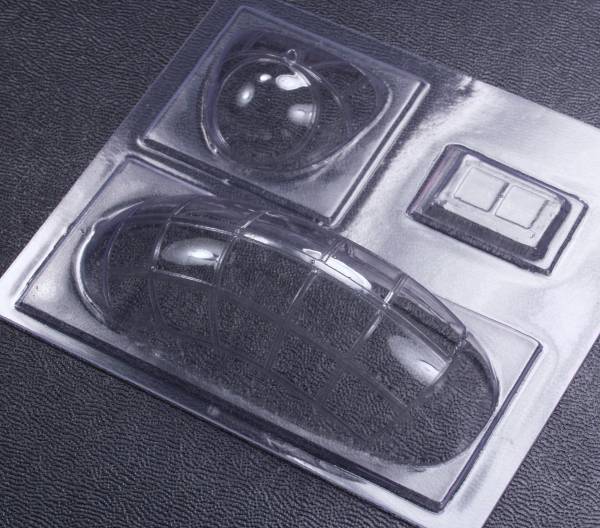
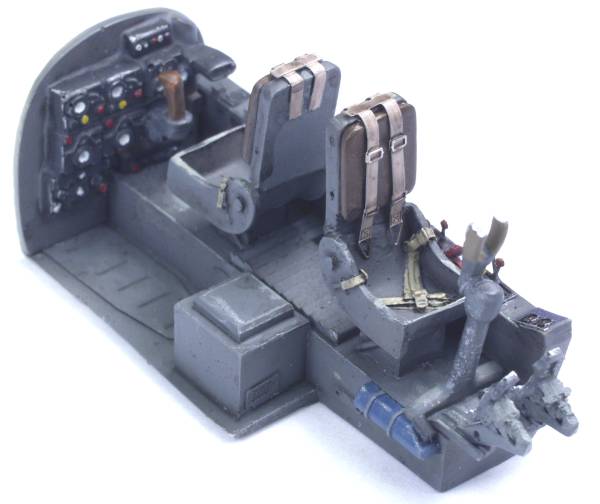
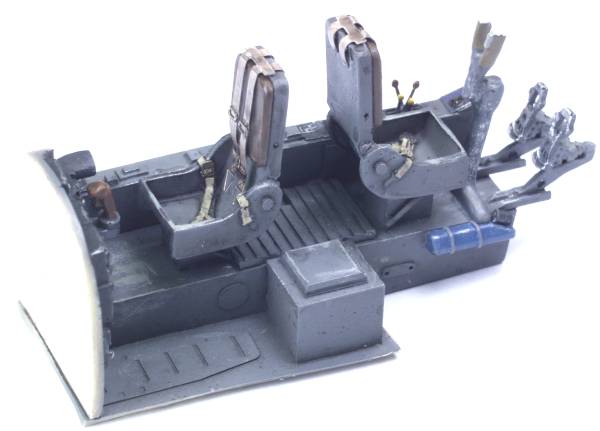
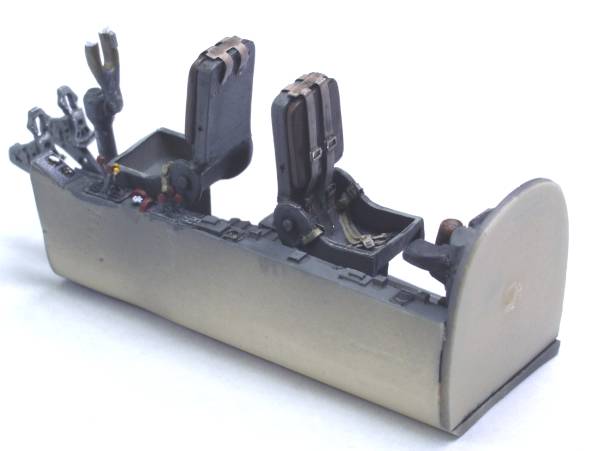
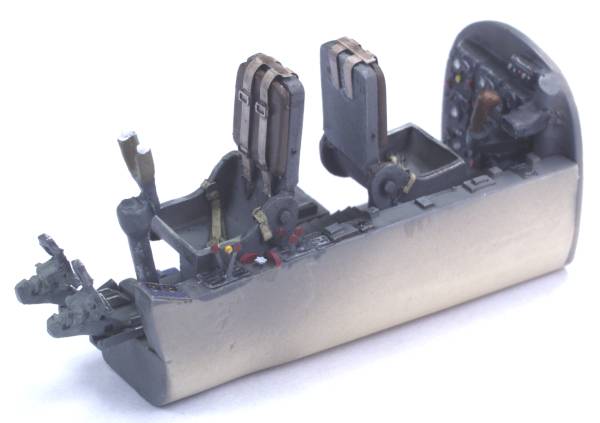
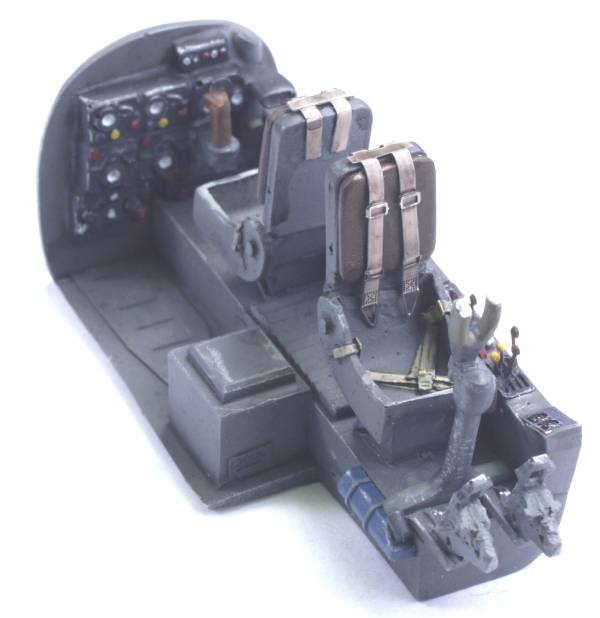
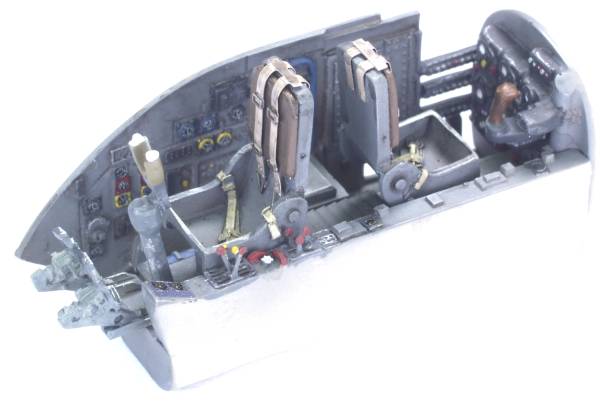
The Cockpit is nicely detailed and should look great painted up. The reviewer in the link at the bottom of the page felt the detail was a bit soft, but I have seen worse on main stream kits. The seats include belts and harnesses and are very well done but the harnesses seemed a bit too thin. There really aren't engines supplied per se but you wouldn't be able to see them behind the cooling fans and the tight fitting cowls anyway. The wheel wells have some minimal detail. As with many resin kits the attachment points for the wings and tail could be better and would benefit from some additional support in the form of metal pins. I can't tell if the landing gear struts have any reinforcing in them but the reviewer at the link at the bottom of the page thinks they do. He stated they were reinforced with steel wire, however if it is it must be stainless as they do not respond to a magnet. I hope he is correct. The clear parts are vacuformed and nicely clear with well defined frame work however the optical panels in the prototype's canopy aren't rendered. Two complete sets are supplied which is always a plus. Photos of the parts are shown below.
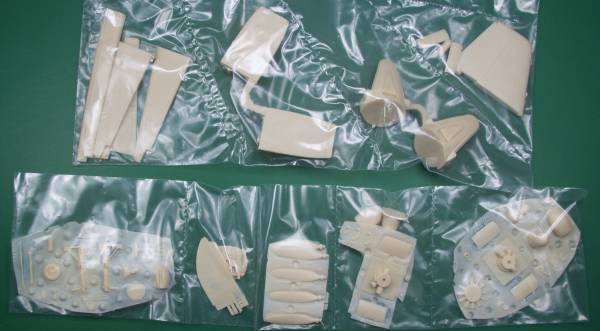

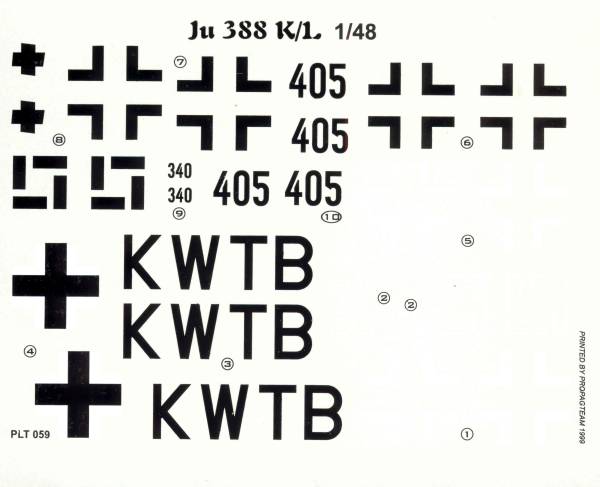
The decals appear reasonably thin and include markings for on K variant and one L variant. I haven't researched them yet to see if they are real or fictitious as there were relatively few aircraft that were actually used for anything other than development work. While they are very hard to see the sheet does include white crosses as well as the black. The swastikas unfortunately are the two part variety. See below.
After Market Goodies
Not much need for anything except for a little photo etch to dress things up. While there is no PE set specifically for the 388 I found many useful parts on the Eduard Zoom color set [FE400] which is for the 188A or E versions. A brief review and a photo of it may be found in the 188A review located here.
Conclusions
As I said at the beginning of this review I an mostly impressed with this kit. I have already started to clean up some of the parts and have found a few pin holes and voids in the smaller parts that I didn't initially find but nothing that is show stopping or unusual for a resin kit. I did find cleaning up some of the parts to be a real test due to their small size and their fragile nature but nothing that some super glue couldn't fix. I may end up substituting some metal for a couple parts for better strength. Otherwise I think that overall this may be an easier build than the Ju 88's and 188's that are injection molded and would recommend it to any one who has successfully completed other resin kits.
Links to kit build or reviews
A review can be found here and a build here.
References
"Junkers Ju 388" by Christoph Vernaleken and Martin Handig
"Black Cross Volume 2 Junkers Ju 288 / 388 / 488" by Karl-Heinz Regnat
Last updated 4/17/08