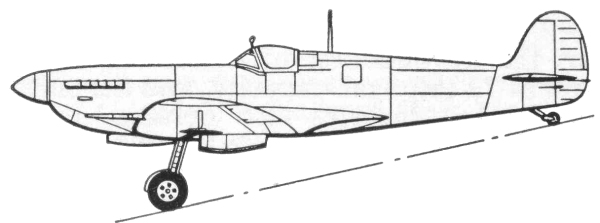
Supermarine
Spitfire Mk.IXc
The
Spitfire along with the other most famous fighters of WWII are well
covered from a historical standpoint so I not going into a lot of
detail here. It was the material symbol of final victory to the British
people in their darkest hour and it was probably the only fighter of the
Second World War to achieve truly legendary status. The Mk.IX version
came about as a result of the Mk.V having difficulty in combating the
newest versions of the Bf 109 and being completely outclassed by the
then new Fw 190A. To achieve the desired performance improvement with
the least possible delay, it was decided to install the Merlin 60
series engine in the basic Mk.Vc airframe. This marriage of
convenience became the Mk.IX which was essentially an interim type
until the projected Mk.VIII became available. Apart from the changes
required to accommodate the two speed two stage Merlin which drove a
four blade Rotol airscrew, no other modifications were made to the
airframe. The first Mk.IX's reached the squadrons in July 1942 and
reduced, although failed to eliminate the margin of performance of the
190 over the Spitfire.. Later in life the Mk.IX was modified for use in
the ground attack role. For this it was equipped to carry a 500 lb.
bomb under the fuselage and two 250 lb. bombs under the wings. Since
these operations were carried out at low altitude the wings were
frequently clipped. Although the Mk.IX was an interim type, with the
Mk.V, it was produced in larger quantities and was more widely used
than any other variant of the Spitfire.
The Kit
I
I put off reviewing this kit for a long time for no other reason than the shear complexity of the kit. I felt it was going to be quite a chore to do it all justice. This is what I refer to as a Tamiya 'Super' kit. Tamiya started this line back around 2002 with the release of their 1/32 scale A6M5 Zero, which set new standards for detail, engineering, fit and ease of assembly. Fast forward to 2009 and the second kit in this series was released, the kit which is reviewed here. Since that time they have released two variants of the P-51, a second Spitfire and the most recently a F4U-1 Corsair. With that out of the way lets see what we have here...
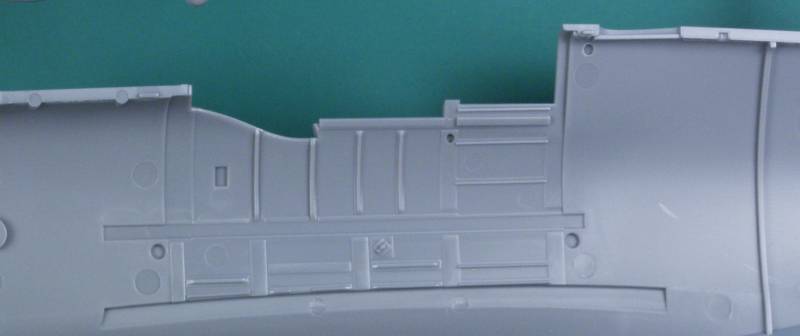
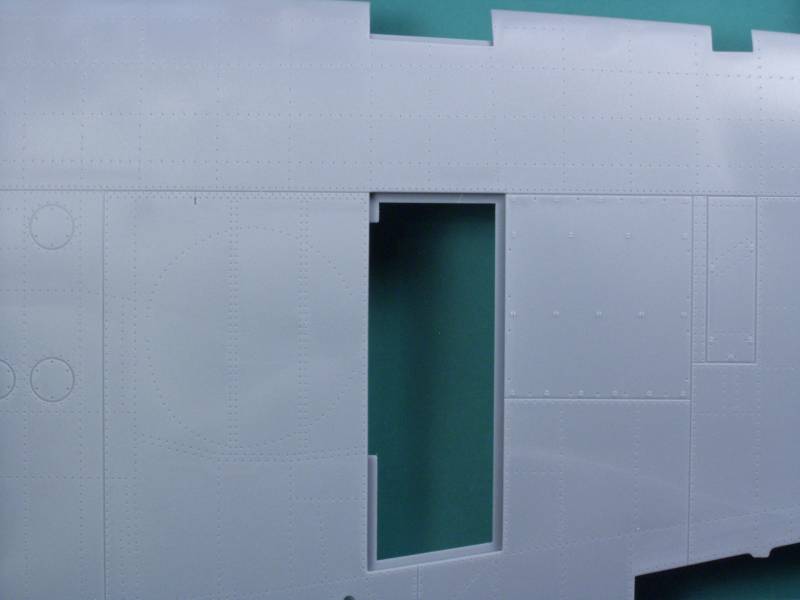
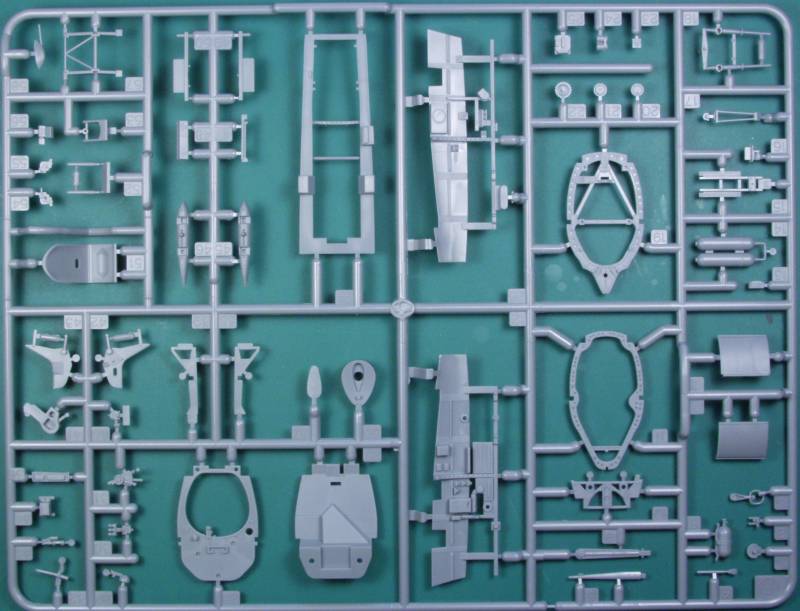
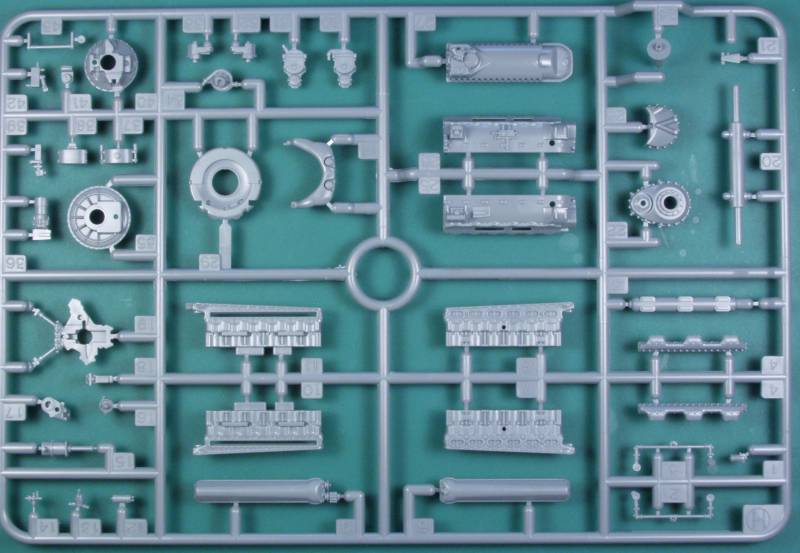
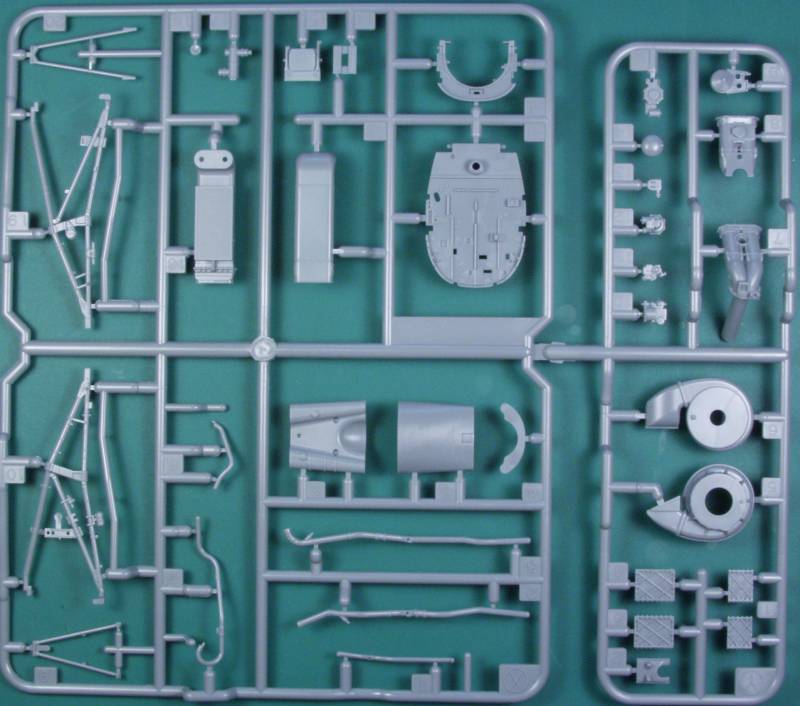
The kit comes in an ample sized box that is packed full of plastic and other goodies. It is a top open box with nice artwork on the top of two Spitfires flying along the white cliffs of Dover. Inside the box we find that, with the exception of where there are multiple sprues, every sprue is in its own sealed bag. There are 15 sprues and of those two sets are duplicates. There is also an internal box which runs the length of one side. Its contents will be described later. The parts are molded in a dark gray color and features recessed panel lines which are fine and uniform and very fine recessed rivet detail. The combination of these two create some of the most realistic surface detail available on kits today. The surface is quite smooth and has a matte finish to it. Not all, but many of the sprue attachment points are located on mating surfaces taking the worry out of trimming them and marring the visible surface. The parts are absolutely flash free. Not just the main airframe parts, but all the parts. Parts that have mold parting seams show only a whisper of a line and many would pass muster with no clean up at all. The fabric surfaces have rib tape detail only and to my eye it seems a bit heavy, if you feel that way it will be a simple matter to fix. The control surfaces are all separate and the ailerons, elevators and rudder are all attached using functional hinges. Many modelers find this an unnecessary and fiddly detail but I'll leave that decision to you. It does allow you to pose these anyway you want. The flaps can be positioned up or down but must be glued which ever position you chose.
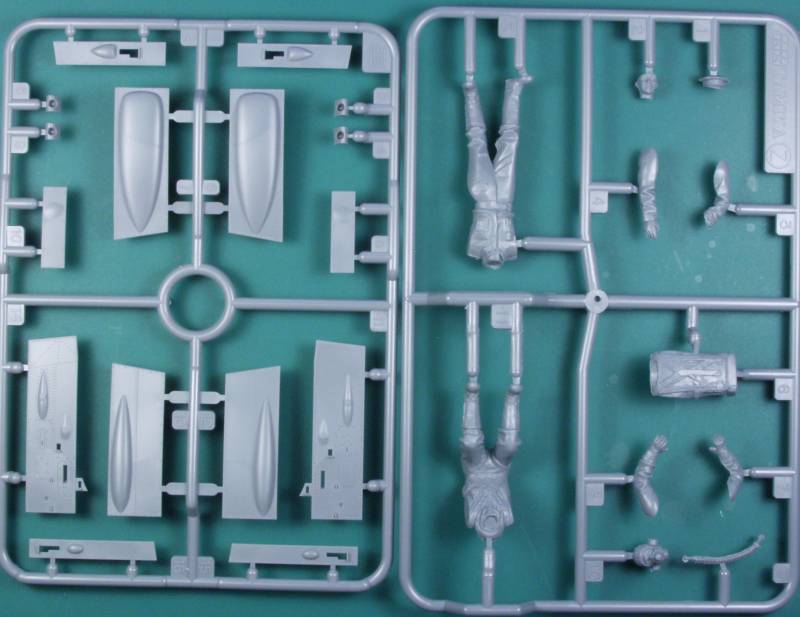
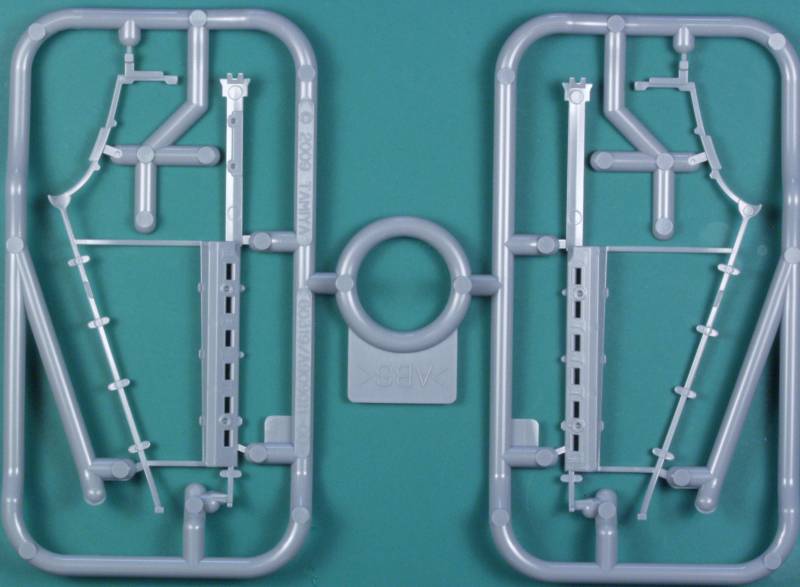
There are a lot of option parts included depending on which aircraft you are building so it would be a good plan in advance to chose which markings you plan to use and follow the instructions carefully. There are also parts that will only be used on future releases as well. The kit also provides the option,of gear up or gear down and it is a reversible choice and can be changed at any time. The kit comes with two figures that must be assembled, a seated pilot with an oxygen mask an a standing pilot with a flight cap. Both are very nicely molded. I did not find any surface defects on any of the airframe parts but there are a number of faint ejector pin marks that are located where they will show and will need to be cleaned up. The kit contains a very detailed Rolls-Royce engine and the forward part of the fuselage is set up so that the engine can be displayed. The structure around the engines has been very nicely modeled and one of the primary features of this kit was a set of extremely thin engine cowling panels that are affixed using small rare earth magnets so that the panels could be closed up or opened at will to display the engine. While good in theory this seems to have not worked out all that well with many reporting that the magnets aren't quite up to the job. I'll give them an E for effort. Since I prefer my models all buttoned up it's not an issue for me. None the less the panels all fit very well unlike some kits with removable panels that are best left off because they fit so poorly when closed. The instrument panel is a multi part affair with an injected front panel in to which you insert from behind clear instrument lenses to which you apply reverse printed decals. Not bad but due to the thickness of the lenses it doesn't com off all that well, to my mind a multilayer photo etch panel would be better. The cockpit I couldn't imagine looking any better. Made up from dozens of separate parts including photo etch embellishments it's a complete model by itself. It's almost a shame to bury it in the fuselage. The wings have separate access panels above and below for the wing armament. while there is no interior detail here, it could be added and if you want them closed, again the fit is perfect. There are alternative wing tips again depending on the aircraft markings you chose, either normal or clipped wing versions. The kit includes two nice 250 pound bombs with racks to mount under the wings and two 30 gallon drop tanks for under the fuselage. One for display with the gear down and the other becomes a mounting point for the display stand which is supplied. This too can be interchanged if desired. Two sets of landing gear are supplied, one is built up in the down position and the other retracted. They mount to the aircraft with screws that are hidden by cover panels and can be interchanged at any time with a small screwdriver, also supplied with the kit. The four bladed Rotol propeller is nicely molded in two parts that key together.
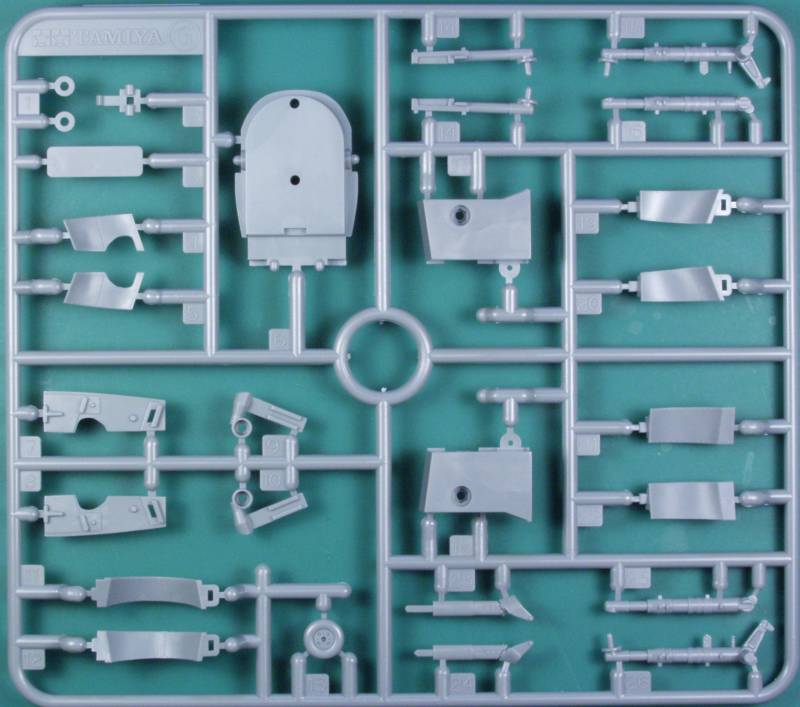
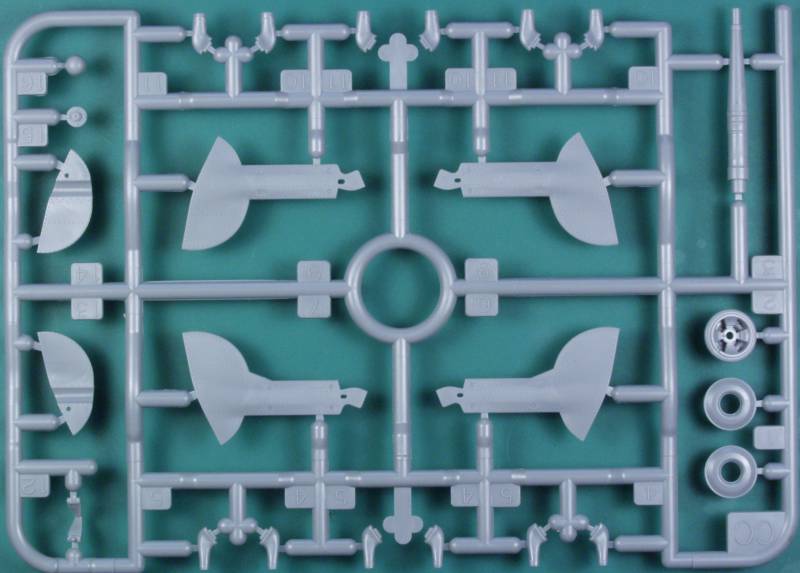
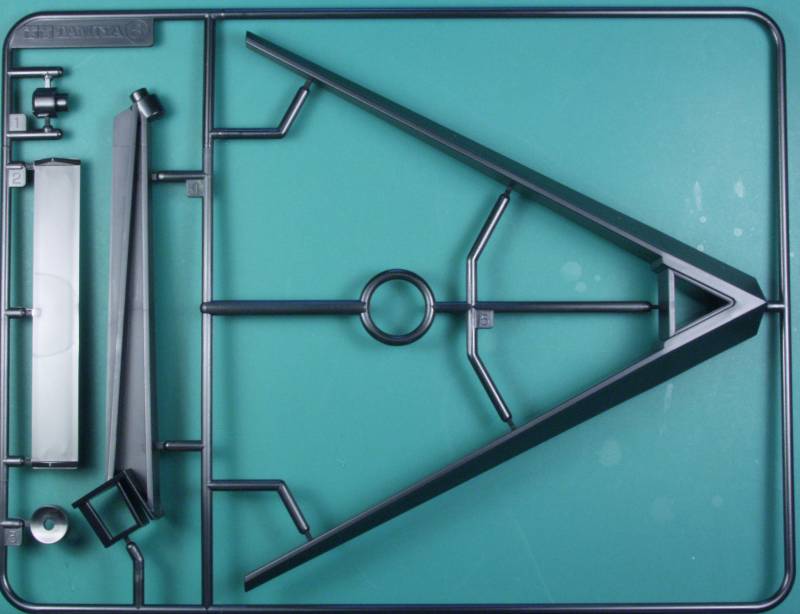
I'm almost sure I have left something out as you can see this is a most complex kit. If you are interested in a listing of the part counts for all the media supplied in this kit please refer to the in box review listed near the end as they have tallied all of this up and I see no point in repeating it here. Not shown in the photos below are a small bag of screws, a small bag of magnets, a small bag with some steel wire cut to length for the control surface hinges and a small bag containing a small screwdriver and some poly caps. All of these along with the photo etch, rubber parts, masking material for the canopy which must be cut out and the thin engine cowl parts were all enclosed in the inside box. Sprue photos follow;

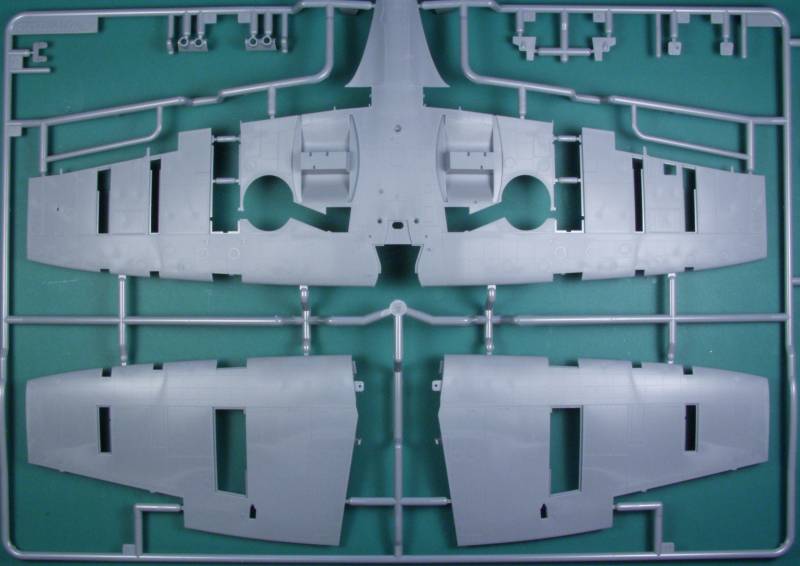
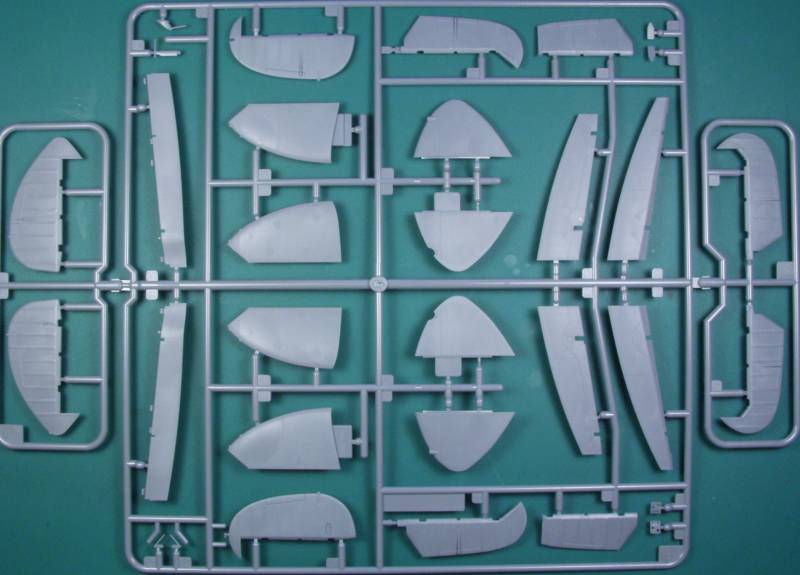
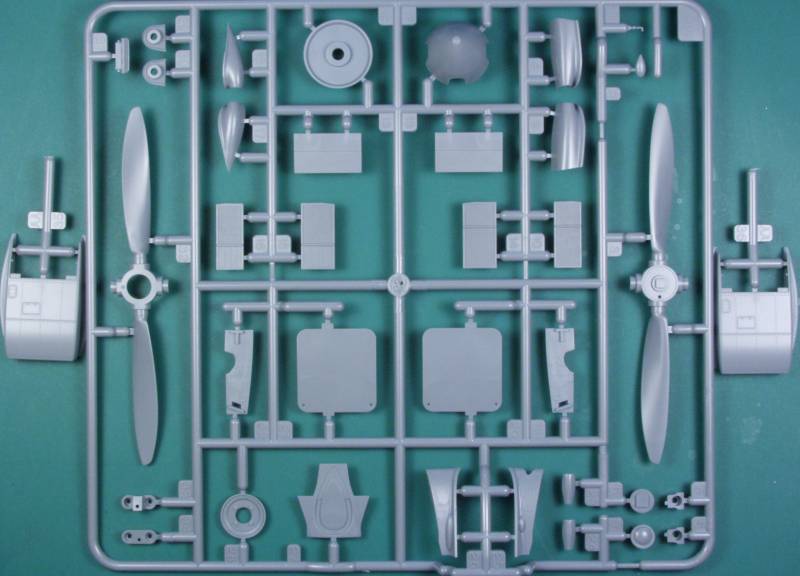
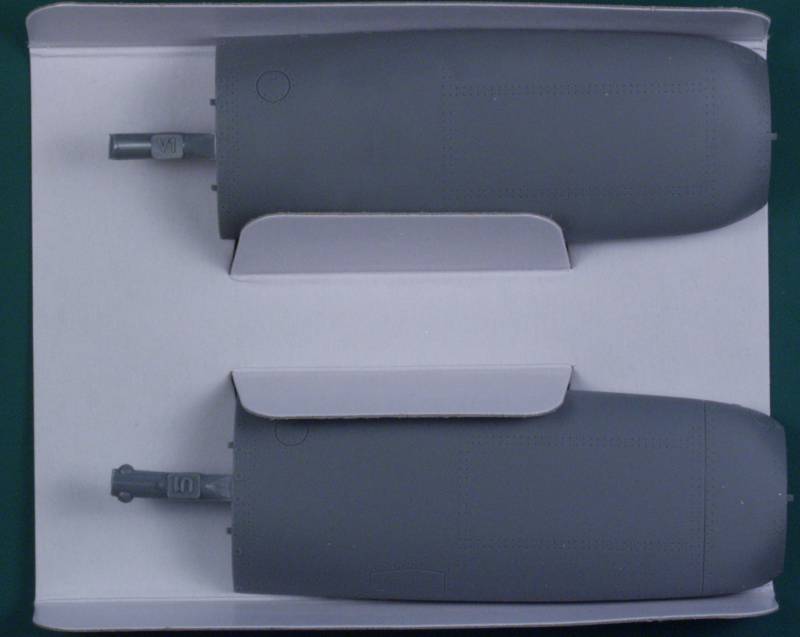
There are two of the sprues shown below.
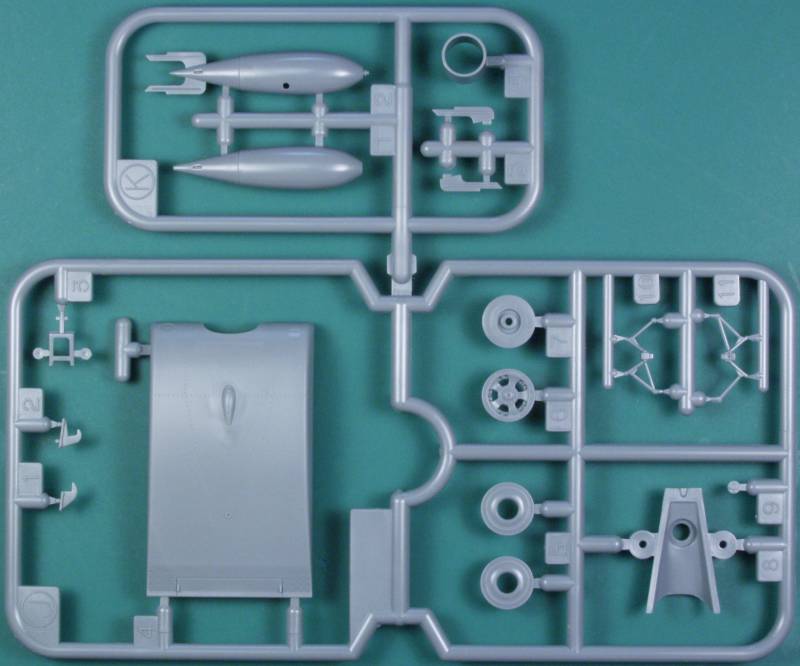
There are two of the sprues shown below.
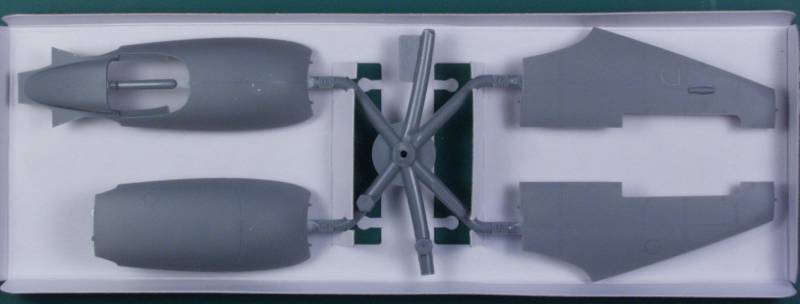
The next two photos show the care taken packaging the extremely thinly molded cowling parts, they are fit into a cardboard tray enclosed in a sealed bag and packed in the kit in an internal box.
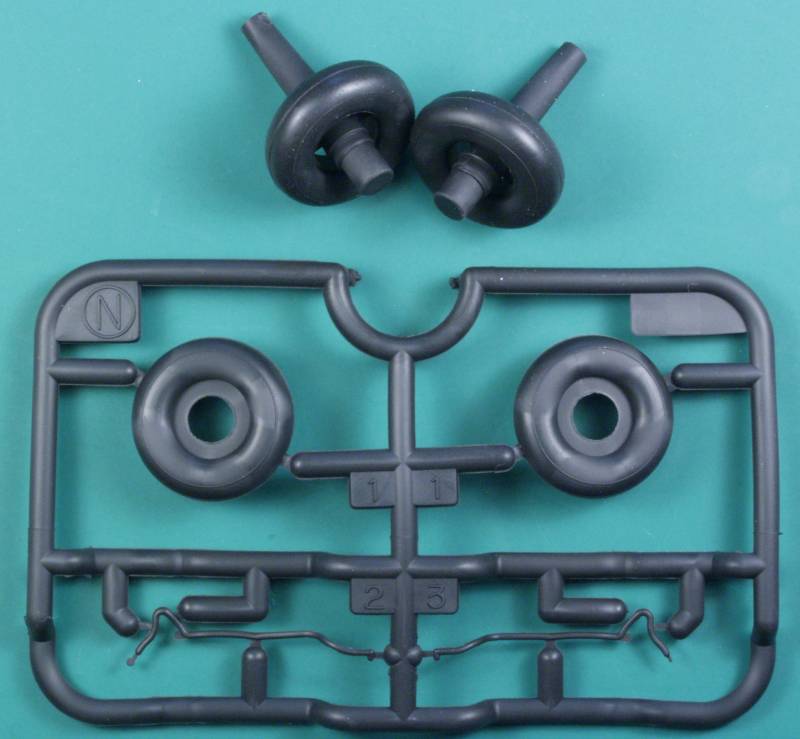
The next photo shows the parts molded in rubber, two whole tires for gear down and two half tires for gear up. Also included are two flexible brake lines for the main gear.
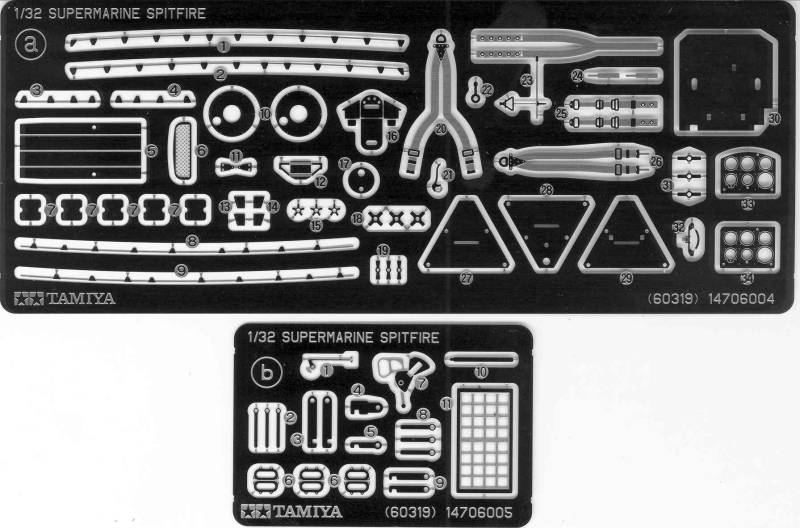
The next photo shows the photo etch parts included with the kit. These are very heavy (thick) and include cockpit parts and well as detail parts for other areas.
The clear parts are thin and crystal clear and besides the canopy parts include the clipped wing tips to eliminate the need for separate navigation lights, clear gun sight glasses and gun sight and lenses for the instruments on the instrument panel. See below.
![]()
The decals are typical Tamiya fair which means that they appear rather thick however others report that they settle down nice with setting fluid so I'll withhold judgment on that issue, beyond that they are in register and contain just about every imaginable stencil that was ever used on a Spitfire. The sheet includes marking for three aircraft. See below

The instructions, I could probably write a book on the instructions. They come in an A4 sized stapled booklet that is 36 pages long. The first half dozen pages have history and the usual safety and health warnings, recommended tools, paint chart and general assembly instructions, all of this in multiple languages. The next five and a half pages detail the cockpit assembly and its installation into the fuselage in a series of 15 steps. The next eight pages cover the assembly of the wings and tail surfaces and mounting them to the fuselage in 24 steps. The next page and a quarter cover the landing gear in five steps. The next six pages covers the engine assembly and its installation along with all the associated covers and intakes in 17 steps. The next five pages cover the canopy, propeller and the other extraneous detail parts including the pilot figures and covered in 12 steps. There is a half page metal parts list, 1 1/2 pages of stenciling locations and 3 pages of decal locations for the three aircraft covered on the decal sheet. The back page of the booklet had some basic painting information, decal installation instructions and a part number list of the sprues contained in case it is necessary to order replacements. The instructions are very straight forward and clear throughout the booklet and include color call outs, which I recommend you check before using as these things occasionally have been known to be incorrect. One only needs to focus on the task at hand and follow the instructions and I'm quite sure the outcome will be favorable. skip steps and you may find to your dismay that there will be trouble later on in the assembly. It's also very important to pay attention to the notes concerning alternative parts for the different versions supplied in the kit. It might be helpful to go through and high light the parts differences in advance so none are missed. Over all I give high marks to Tamiya's instructions for this kit. Also included in the kit is an 11"x 16" color printed sheet with the markings for the 'A' set of markings, that of Johnnie Johnson's aircraft and a small booklet in color with additional historical information on the Spitfire including color photos of museum aircraft and detail photos of the engine and cockpit and numerous other walk around style photos. Although the photos are rather small it is a nice touch to be included.
After Market Goodies
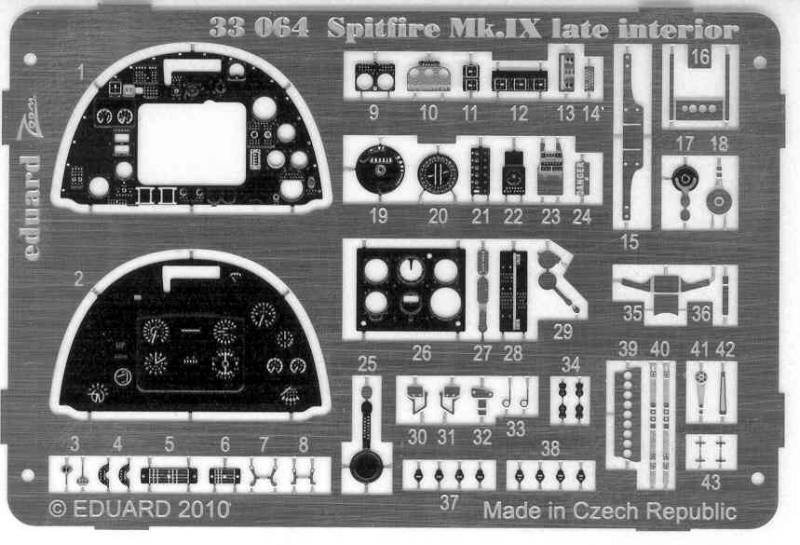
Ohh for God's sake you say, with all the included parts why do you need after market parts ? Well, as I explained earlier I wasn't all that impressed with the way Tamiya handled the instrument panel and I felt that the Eduard color Zoom set (33064) would look better so I acquired it. It uses self adhesive parts for the instrument panel so no messy gluing required. The rest of the parts add cockpit details. Not sure I'll use them all but they are there if I decided to do so. See below.
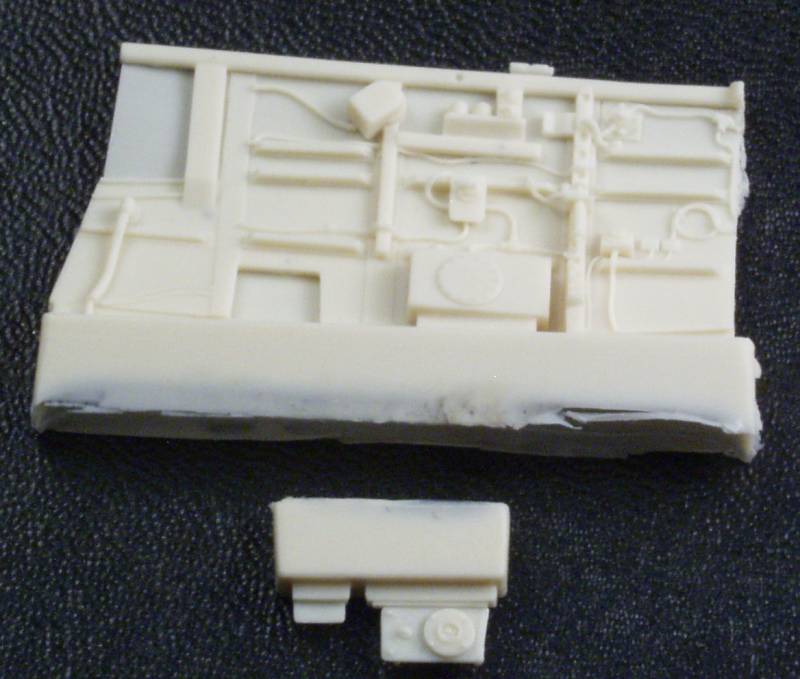
The next item certainly isn't a must but I couldn't resist. It's the starboard cockpit side wall and while the kit part is OK, this one is better and includes all the wiring and plumbing and a remote contactor box not included in the kit. This is Barracuda Cast (32008) and is a resin part cast in a light tan resin and is a very nice casting with no visible defects. Both the side wall and contactor box have a fair sized casting block to remove, See below.
Conclusions
Well, if you managed to make it all the way to this point you probably know why I referred to this as a 'Super" kit in the introduction. Tamiya has set a very high bar and has produced an accurate, detailed and relatively easy to build as long as you stay focused and following the instructions. It is not an inexpensive kit but I feel you get a good deal for money spent. I must admit though that with everything all closed up, the way I like them, a lot of that expensive detail is wasted. The engine while nicely detailed is only a good starting point if you want it displayed as it needs wiring harnesses and additional plumbing to look complete. I wish Tamiya would adopt the strategy that Eduard does and offer both a fully detailed kit with all the bells and whistles and a simplified version for less money without the engine and a lot of the other hidden details for those who prefer them all buttoned up. That said, with the instructions supplied I think even a beginning modeler could do a credible job of assembling this kit as long as they stay focused and follow the instructions. Highly recommended !
Links to kit build or reviews
Another in box review can be found here and a build / review here.
References
There is probably more
reference material available on the Spitfire than I could possibly list
here. If you are looking for some, Google is your friend.
Back to the 1/32 Scale British Aircraft page