
SO3C-1
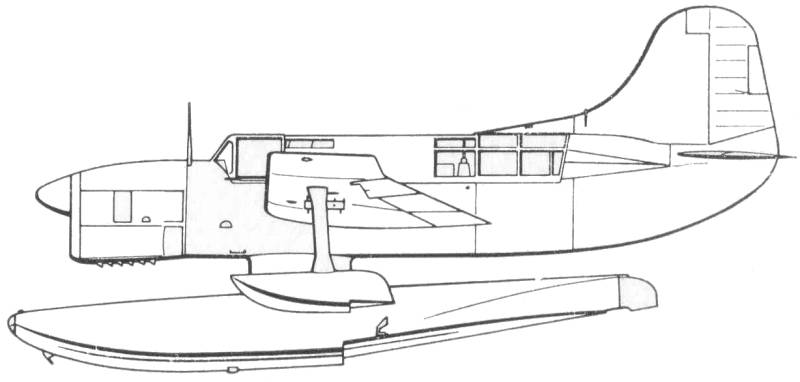
The Curtiss Seamew was designed as a successor to the Curtiss SOC series and followed the traditional formula for a scout-observation aircraft convertible for land or seaplane duties with interchangeable wheel and float undercarriages. Intended for catapult launching from warships, it was not an unqualified success. It saw limited operational service and in fact was outlived by the aircraft that it was intended to replace.
Design work began in 1937and Curtiss received a prototype development contract on May 9, 1938. It flew for the first time on October 6, 1939. While undergoing trials as a float plane a large ventral fin was added to the rear fuselage and subsequently the vertical tail surfaces were redesigned and enlarged. As flight testing progressed it became obvious that the wing dihedral was insufficient. Increasing the dihedral would have required major airframe modifications so the effect was obtained by turning up the wingtips.
In addition to its primary role the SO3C was intended for antisubmarine and inshore patrol in its land plane configuration but to carry two 325 pound depth bombs for these tasks it was necessary to remove the pilot armor and the flexible 30 caliber gun with its ammunition together with the fuselage fuel tank and replace the self sealing oil tank with a non sealing type. The narrow track under carriage was set so far aft that a very steep ground angle resulted and ground handling and landing characteristics suffered as a result. This coupled with generally poor performance and poor flying characteristics did not make them very popular. As a consequence a large number were converted to radio controlled target drones. Two hundred and fifty were to be delivered to Britain for use by the Fleet Air Arm but only one hundred and fifty actually reached Britain where they saw no operational service serving in the training role. A total of eight hundred machines were built, the last being delivered in January of 1944 shortly before the aircraft was withdrawn from service.
The Kit
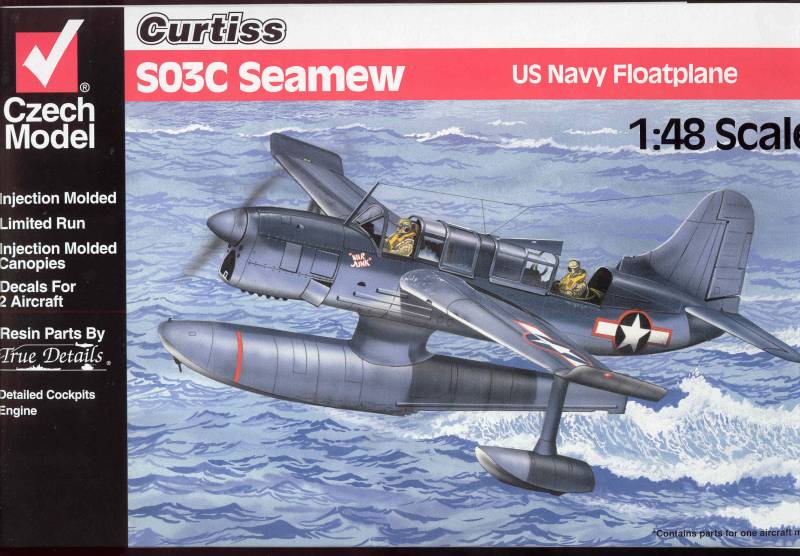
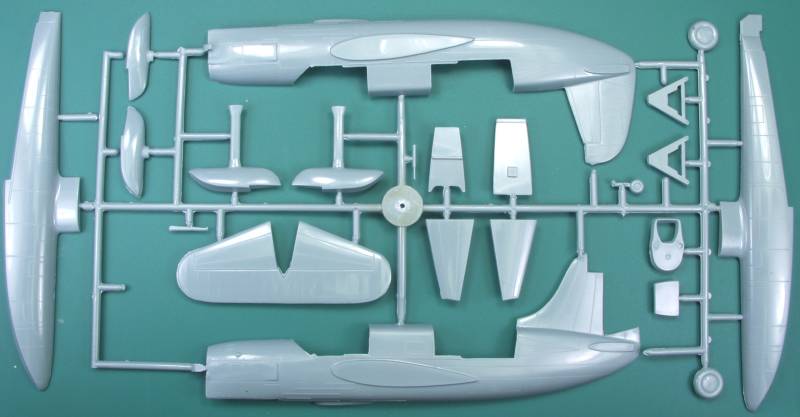
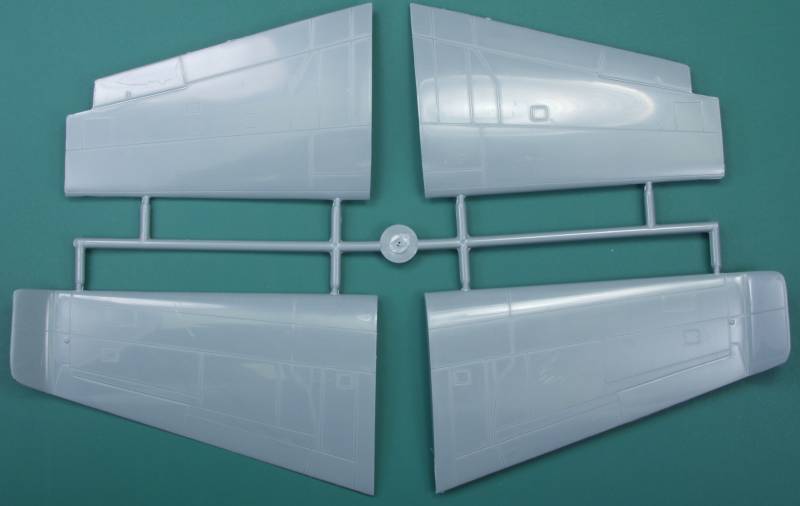
The Czech Model kit comes in one of those unhandy end flap boxes with decent artwork on the top and a color profile on the bottom that serves as the painting and marking instructions and includes aircraft specifications and a color chart listing color names and FS numbers. Inside the box one finds a large bag with everything in it except the clear parts. Inside the bag is a smaller bag containing resin parts. The injection molded parts are presented on two sprues, with the wings being presented on a separate sprue from the rest of the parts. A number of which had become detached during shipping on my kit including both fuselage halves, one float half and the prop and spinner. The parts are molded in a blue gray color and feature recessed panel lines and rivet detail as well as some raised detail which appear to be some external stiffeners. The panel lines are consistent and uniform except for one on the tail which fade out at one end. The control surfaces are all molded in the neutral. The fabric covered parts are done with minimal sagging effects as they should be. The kit supplies beaching gear similar to those used on the Kingfisher.
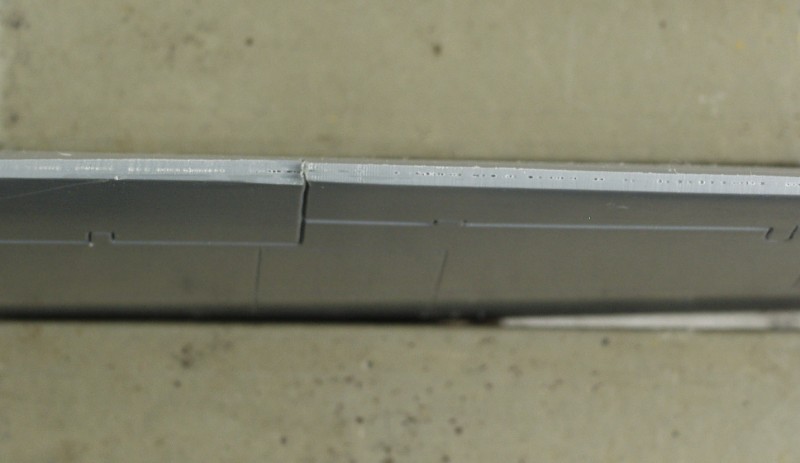
I found no surface defects worth mentioning on any of the airframe parts. The turned up wing tips are molded into the top surface of the wing and the bottom surface butts up to the overlap on the bottom. The depth of this was different on both wings so some care may be needed in fitting in this area and it creates a joint in the aileron where a panel line would not be. The fuselage also has an overlapping area at the tail to keep the vertical tail at a reasonable thickness and test fitting in this area will also be required. There is some molded in wall detail in the gunners position, the pilots area will be covered with the resin parts. There is only one ejector tower that will need to be removed on each fuselage half to allow fitting the resin parts. The wings and horizontal tail are just butt joints to the fuselage so one may want to add some strengthening at least in the wing area, it would be difficult to do at the tail as the entire tail is one piece. Altogether there are 27 parts. See below.
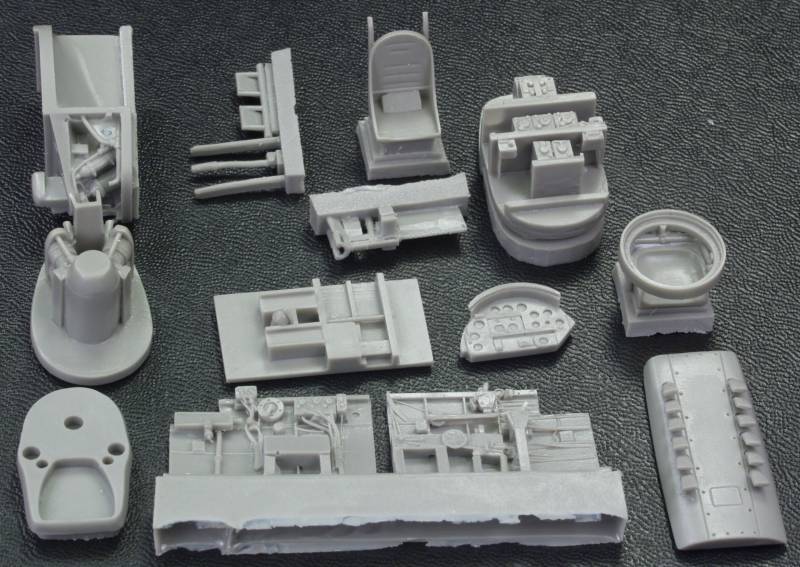
The resin parts consist of the cockpit side walls, floor, rudder pedals and stick, seats for both crew members, rear bulkhead for the pilot, instrument panel,front and rear bulkheads for the gunner which include the radio rack and other instruments, machine gun, a casting with the front four cylinders of the engine, the bottom cover with the exhaust stacks and the front of the cowling. The castings in my kit were very crisp and detailed, especially the cockpit walls and radio rack. There are no belts or harnesses molded in so those will need to be supplied by the builder. The parts were free of bubbles and short shots and only a couple of them will require care when removing them from their pour stubs. See below.
The clear parts are a little thick by today's standards but are clear and have well defined raised framing detail. See below.
![]()
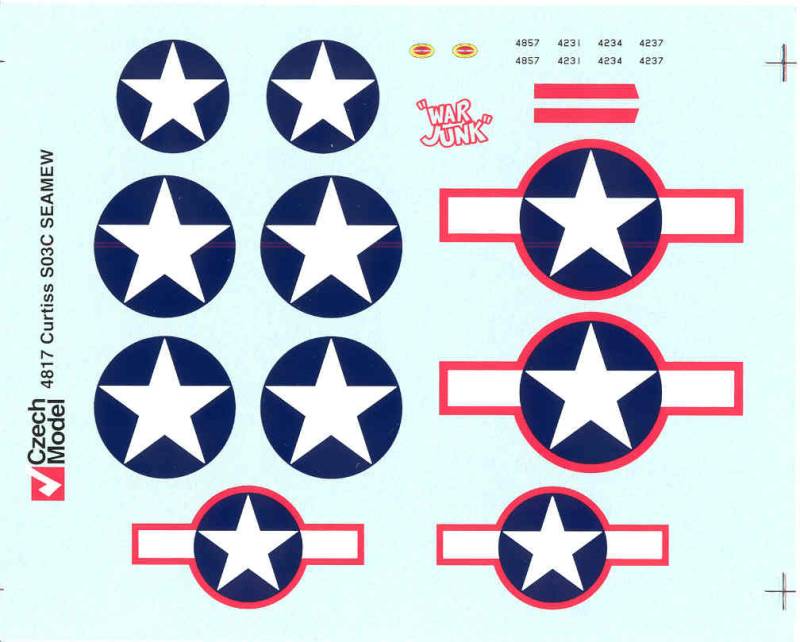
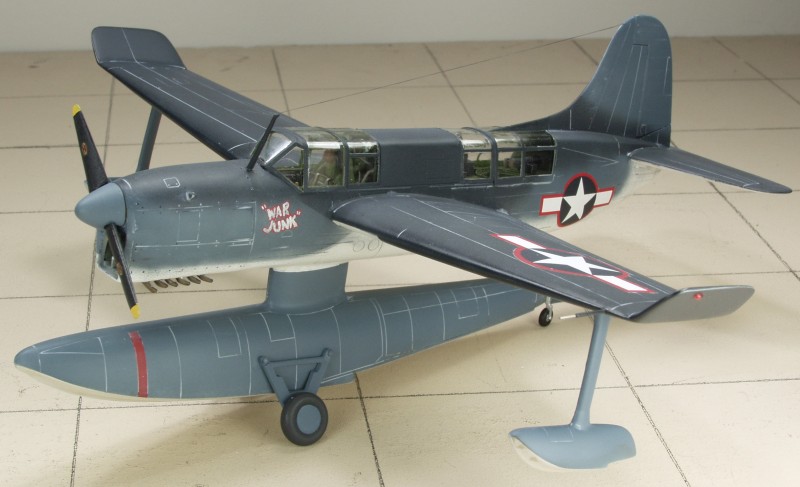
The decals are thin, well registered and have very little excess film. Other than the national insignia the only thing supplied is an aircraft name for one version, propeller manufacturer decals and a very small tail number, The decals provide markings for two aircraft with different paint schemes and there are four tail numbers supplied as the exact tail number of one of the aircraft is not known with certainty. The "War Junk" moniker should have white in the open areas of the letters. When it came time to use these two of the national insignias broke up on me and they didn't respond well to setting solution. I ended up replacing them from a sheet from Eagle Strike. The only kit decal I used was the "War Junk" decal and I filled in the centers with white paint. See below.
The instructions are printed on an 11" x 17" page folded in half to provide four pages. Page one has history and a parts may as well as a photo of the prototype. Pages two and three are assembly diagrams which I noticed makes no mention of the left side cockpit wall. Page four has notes on painting and repeats most of the information that is illustrated in color on the back of the box.
After Market Goodies
There are none to the best of my knowledge.
Conclusions
This is a typical short run kit meaning, no alignment pins, less than perfect parts fit and the need to do a lot of test fitting and sanding and most likely use of fillers. That being said the details and parts provided look very nice and with a bit of work should produce a very nice looking kit of a little know and not very successful aircraft with rather pleasing lines and looks about it. I would only recommend the kit to those with experience with short run multimedia kits.
Links to kit build or reviews
A build / review can be found here.
References
War Planes of the Second World War, Float planes by William Green
Naval Fighters Number Forty-Seven the Curtiss SO3C by Steve Ginter
The Build
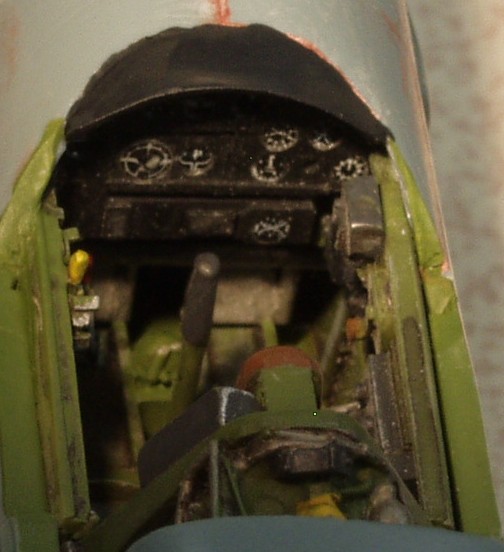
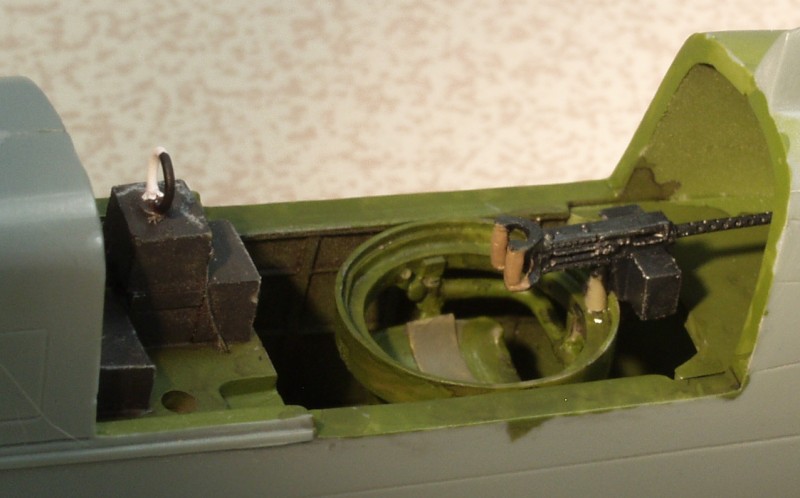
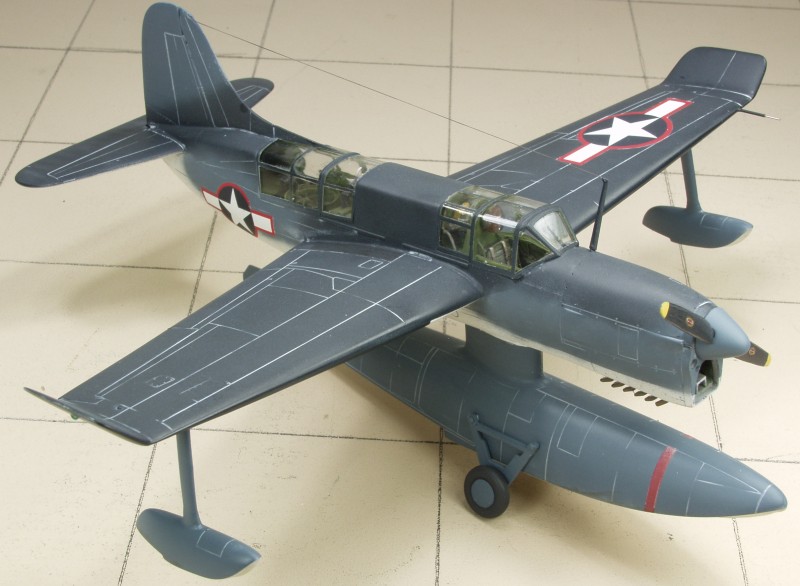
Like most builds it starts with the innards. The kit has a very nice set of resin parts to make up the pilot and radio operator's station, limited only by my lack of talent to paint it. Shown first before being installed into the fuselage then after.
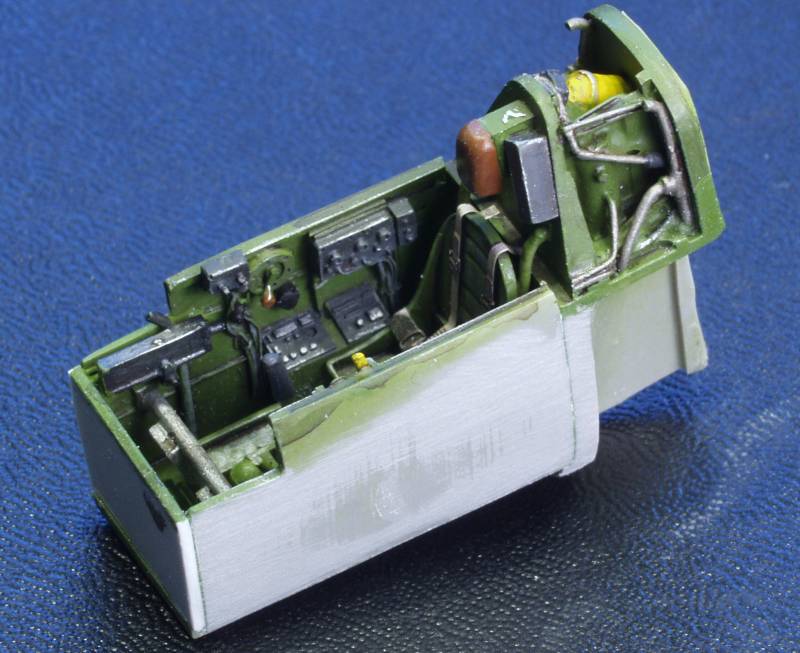
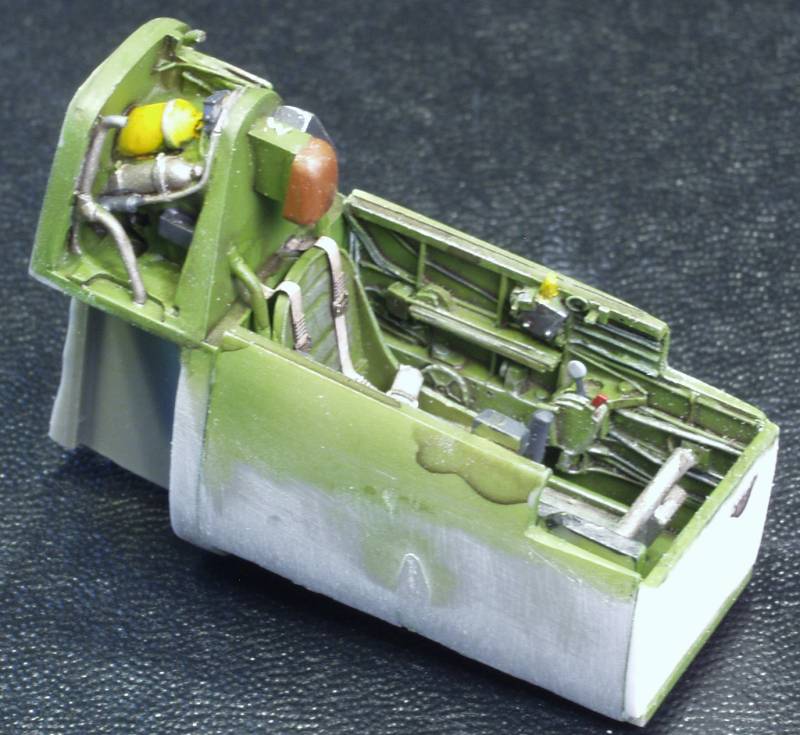
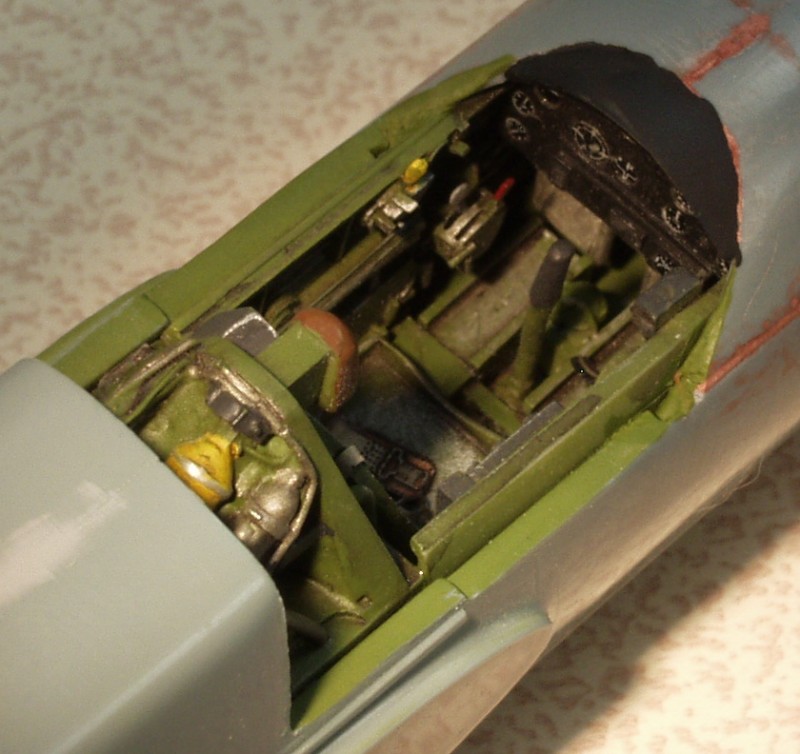
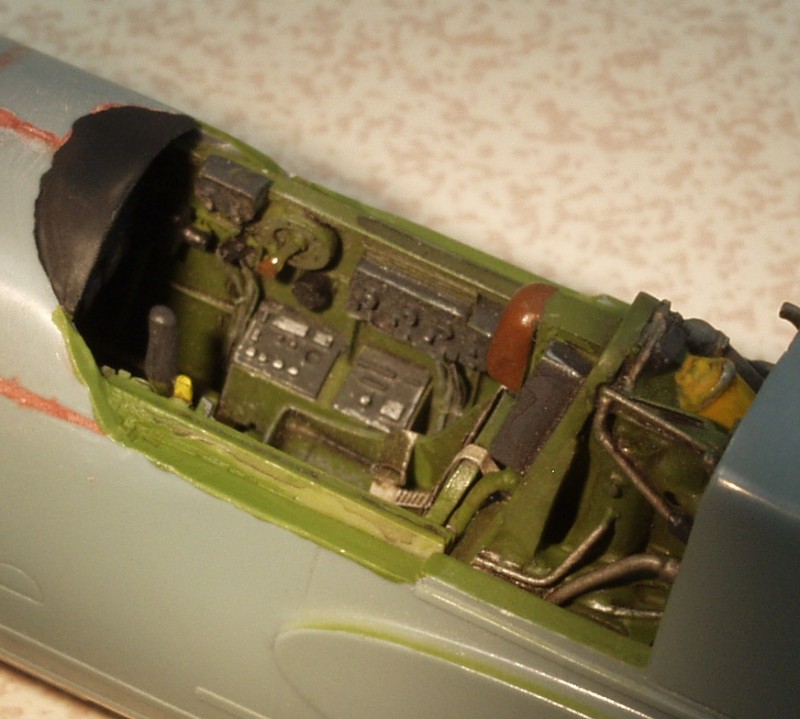
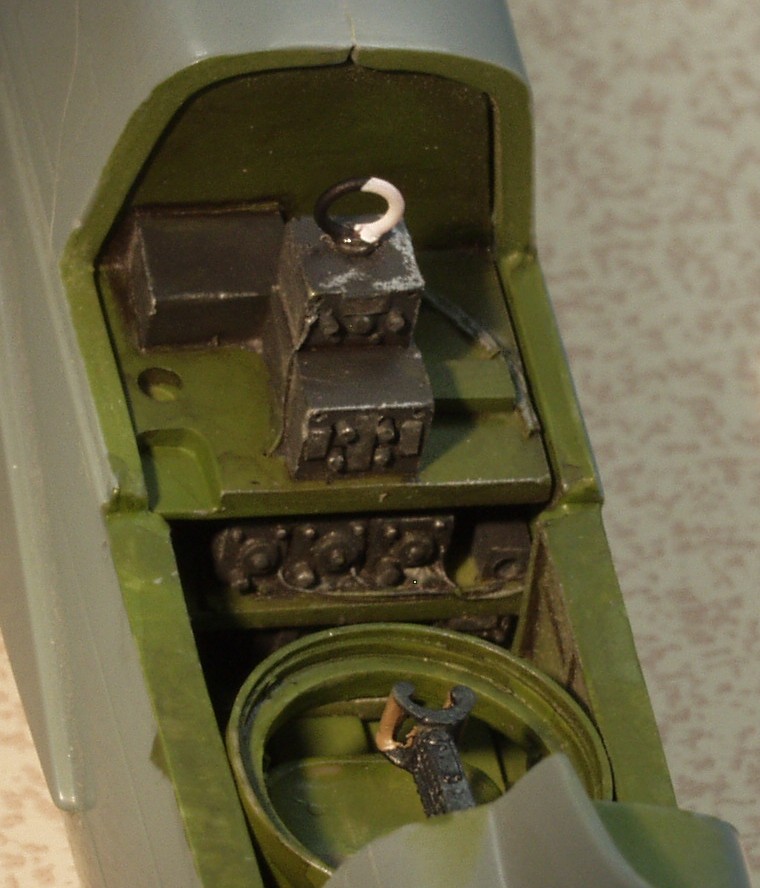
And the radio operator station.
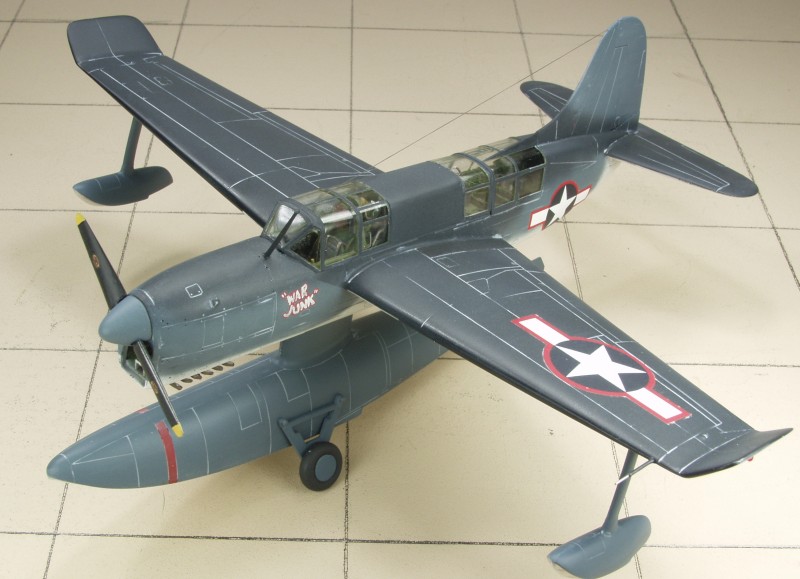
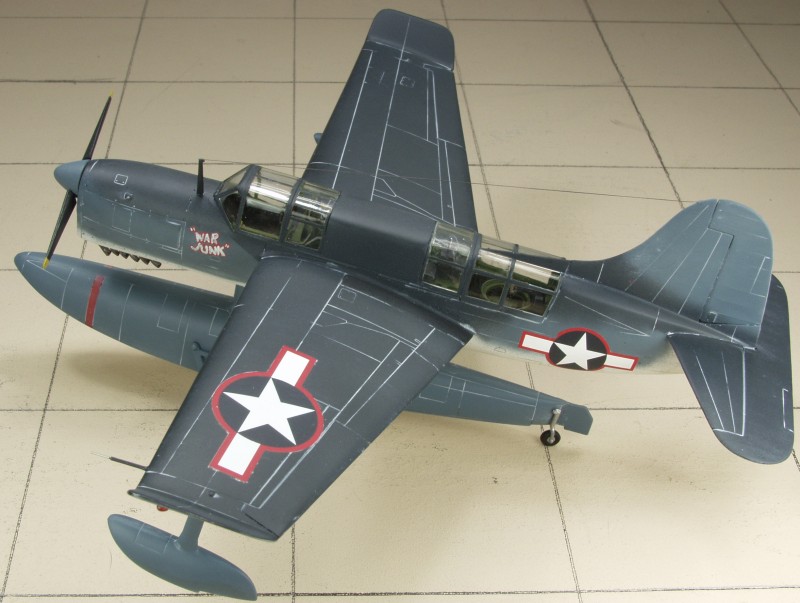
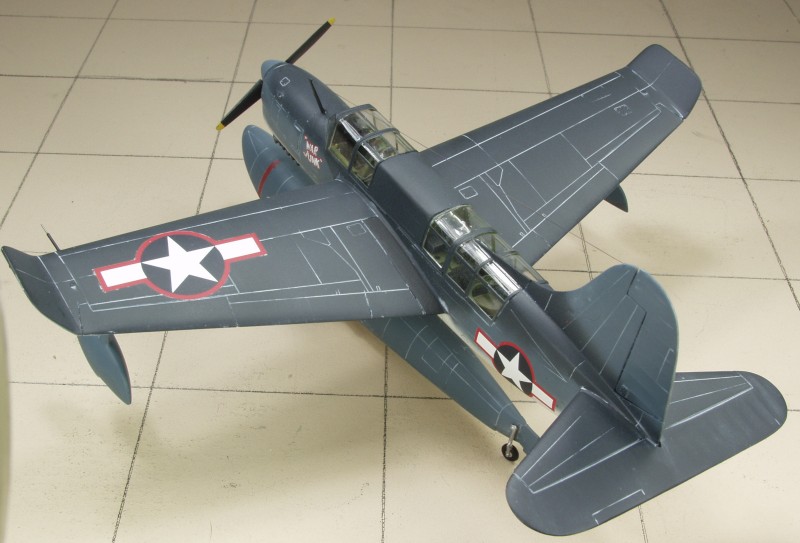
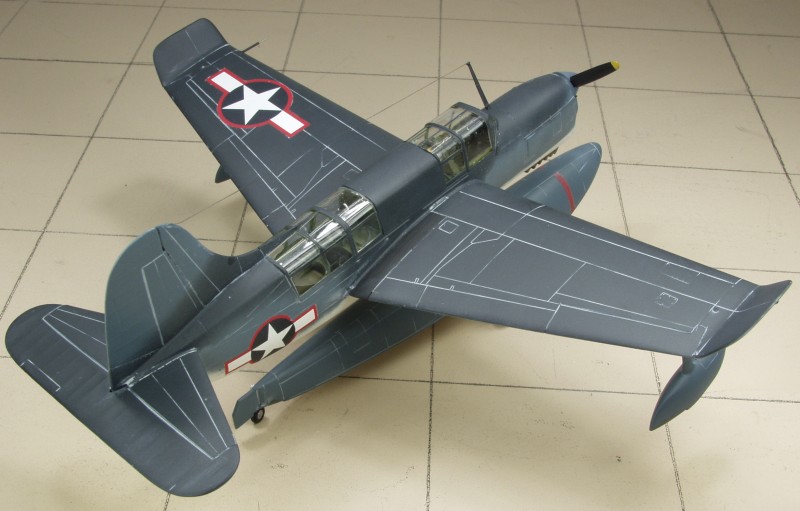
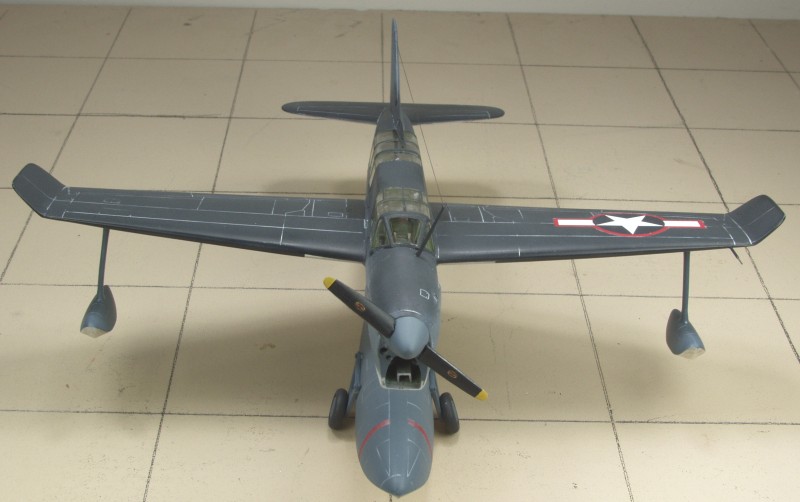
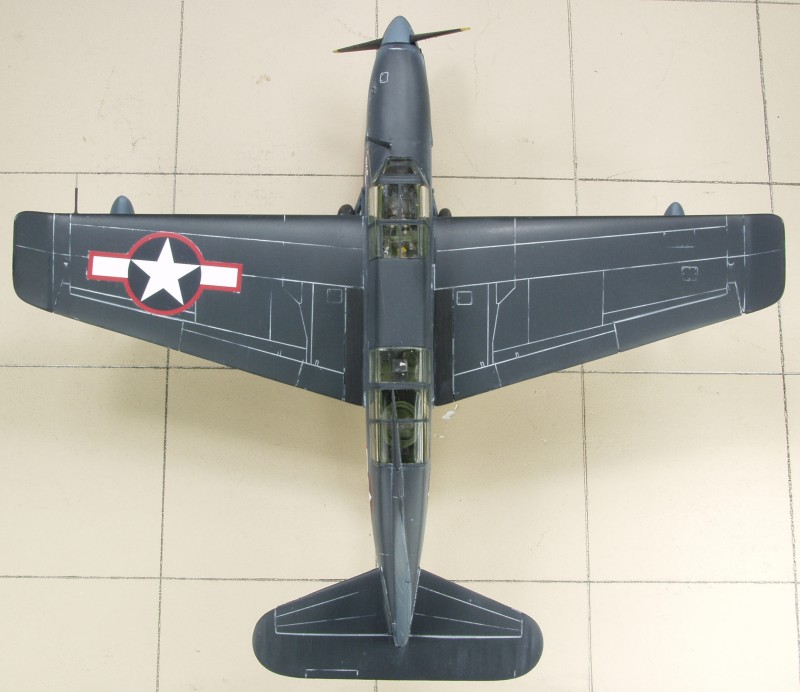
Needless to say this one was on and off the shelf of doom numerous times and it seemed like the kit knew I didn't like it as every time I fixed one issue another one popped up. Anyway it's done now. The kit is marked as an aircraft assigned to the USS Biloxi, a Cleveland class light cruiser. I didn't weather it heavily as in combat zones the average life of them was about three weeks. While interesting looking, the planes were pretty much failures all round and the sad thing was in spite of this the government bought 800 of them anyway, so war junk is a good name. While one might tend to blame Curtiss, they were required to use an engine that never met its performance ratings and suffered from over heating problems.
So there it is, unless you really want one of these I can't in all honestly recommend the kit.