
Shackleton MR. 2

Since there is considerable information available online I'm not going to go into great depth here. For additional reading see the references listing near the end of the review. The Shackleton design was a direct descendant of the Avro Lincoln which itself was a direct descendant of the wartime Lancaster. It used the same wings and undercarriage as the Lincoln but featured a shortened fuselage, Griffon engines and six-bladed contra-rotating propellers. The tail unit was redesigned and although following the Lincoln in having twin fins and rudders these were larger in overall dimensions and the tail plane was moved to a higher position on the rear fuselage. The prototype flew in March of 1949.
The first batch of 29 were delivered in the 1950-51 period. The second production batch of 38 aircraft were modified to take Griffon 57A engines in the outer nacelles and were designated MR. 1A. Although the MR. 1 had a trouble free entry into service there soon appeared a number of areas for improvement. The radar scanner under the nose was not efficiently placed and was vulnerable to bird strikes. The sound proofing in the crew compartment aft of the cockpit left a lot to be desired. Long patrols and the need to wear headsets constantly in order to communicate with the rest of the crew plus the dull atmosphere of the matte black interior led to crew inefficiencies. The Shackleton throughout its career was always known as a noisy aircraft but this was far worse on the early versions.
When
it was decided to build an additional 69 aircraft for Coastal Command
the opportunity was taken to make several modifications resulting in a
substantial change in fuselage shape. The radome was moved to under
the rear fuselage and was made semi-retractable. A transparent tail
cone was fitted with the removal of the top turret and a 10 ft
extension was made to the nose in which two 20 mm cannon were housed.
The fuselage was more streamlined and twin tail wheels replaced the
single units on earlier models. The first MR. 2 made its first flight
in June of 1952. The Shackleton was found to be an extremely adaptable
aircraft when away from their home base. Both the air frame and
engines were subjected to many different stresses due to low level
flying and corrosion from salt water. Yet when away on detachment the
robust Shackleton was almost entirely self supporting and ground crew
were always carried on long distance and landing away flights for
routine servicing. The capacious bomb bay of the Shackleton was
capable of being fitted with panniers into which a large number of
spares could be housed for almost all eventualities.
The Kit

The Airfix Shackleton comes in a large oversize top open tray type box made of heavy cardboard. The box is large enough to contain two Shackleton kits but this seems to be the norm these days with Airfix and some other manufacturers. Inside the box the kit is contained in three large sealed bags, two with three sprues and one with two. One of the bags with three sprues also contains the clear parts sealed in a separate bag. The parts are molded in a pale blue color and feature mostly recessed panel lines and detail with some raised areas where applicable. There is no rivet or fastener detail which is most often over done in this scale anyway. The panel lines on the fuselage appear to me to be a bit heavier than those on the wings and other air frame parts. All are a bit heavy for the scale but this seems to be the norm these days. Scale panel lines would quickly disappear under paint so I suspect that has something to do with it. The only sink marks I found were on the top of the starboard fuselage half in areas where there was something molded on the inside of the fuselage. I did not find any on any of the air frame parts. There are some plastic flow lines on the upper and lower surface of the wings but these will only be an issue if you are doing one in a natural metal finish. The parts were most flash free but there was a hint of it on a few parts. Sprue attachment points were a bit heavy on some parts and mold separation lines were a bit heavier than I would like to see. Ejector pin marks have been placed mostly where they won't be seen although there are some in the fuselage interior and main gear bays that will show. A number of parts in my kit had come off the sprues but were contained by the sprue bags. According to the box the kit contains 269 parts.
The interior is quite well detailed and though I did not count them probably makes up a large percentage of the total parts. Very little of it will be seen when the kit is completed. Several figures are supplied with the kit and I found it amusing that one must amputate the pilots legs to fit them. Either they are too big or the space for them is too small. The two main wing spars are represented as interior detail as well as extending through the fuselage to help support the wings. The interior detail includes a detailed bomb bay as well. Considering the number of parts inside it will pay dividends to do lots of test fitting before attempting to assemble the fuselage.
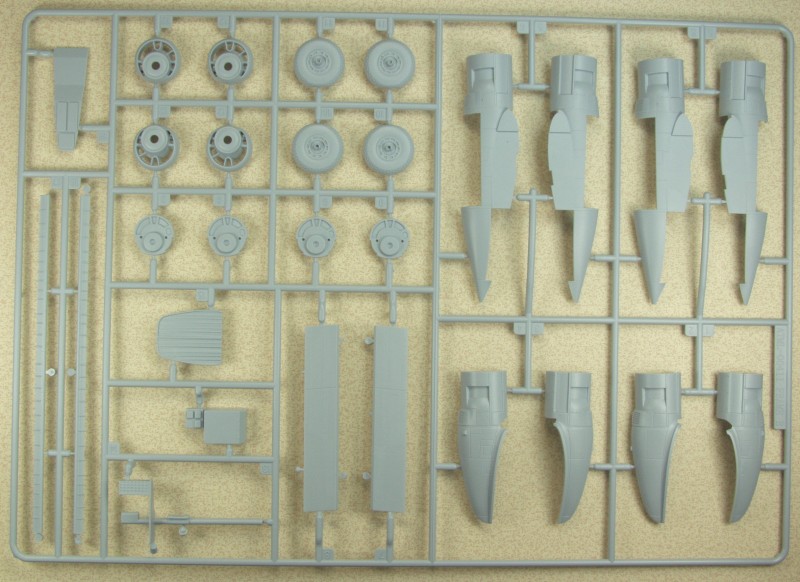
The wings have the ailerons molded in the neutral position but do have separate flaps which can be positioned open or closed and have molded detail on the inside surfaces which are free of ejector pin marks. The tail surfaces have separate control surfaces. The gear bays are nicely detail multi part affairs which include separate oil tanks for the engines. From the looks of things the gear can be installed after painting unless I'm missing something. The bomb bay doors can be mounted in the open position and separate sets of doors are provided, one set with hinge mounting points and one set without. Two each of Mk.30 torpedoes and Mk.44 torpedoes are supplied to be mounted in the bomb bay. The rear crew access door is separate and if displayed open a ladder is supplied. The wheels and tires are nicely molded in halves and feature some subtle weighting that doesn't make the tires look flat.
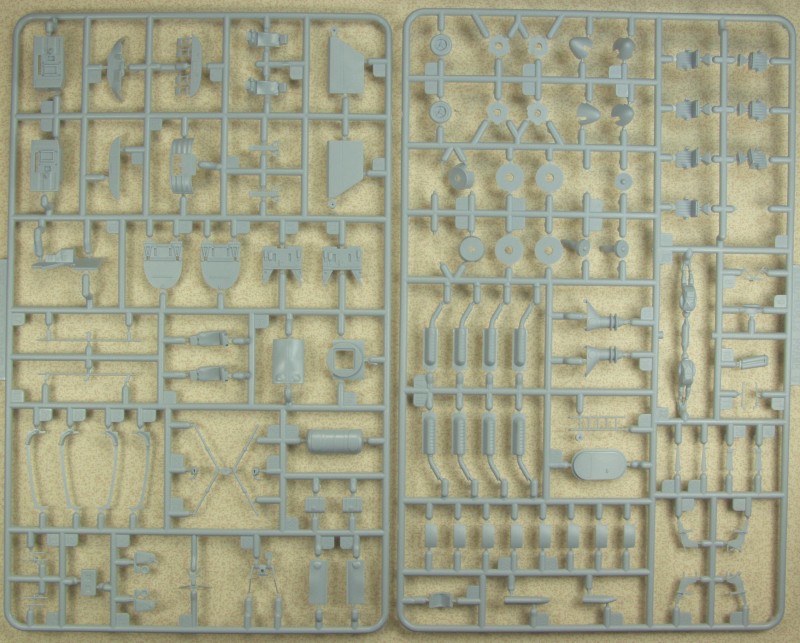
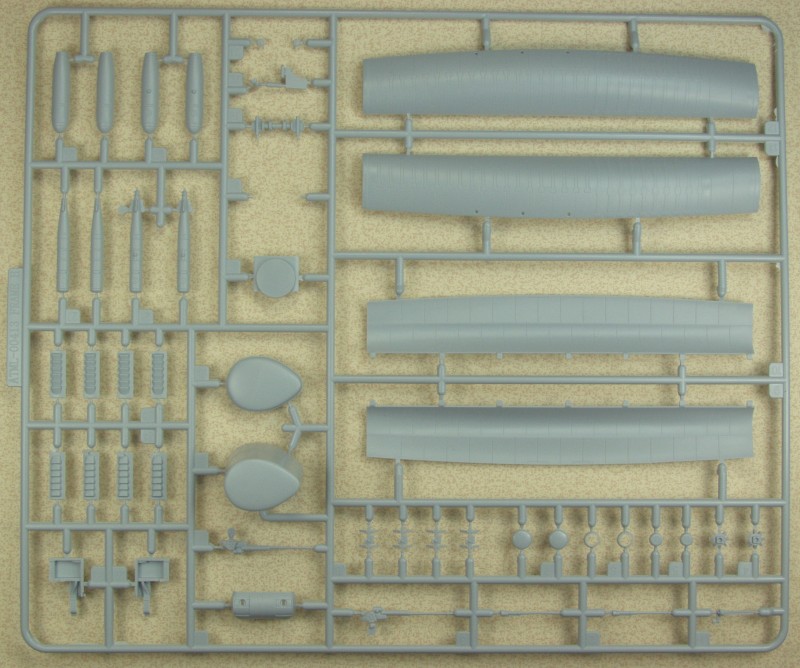
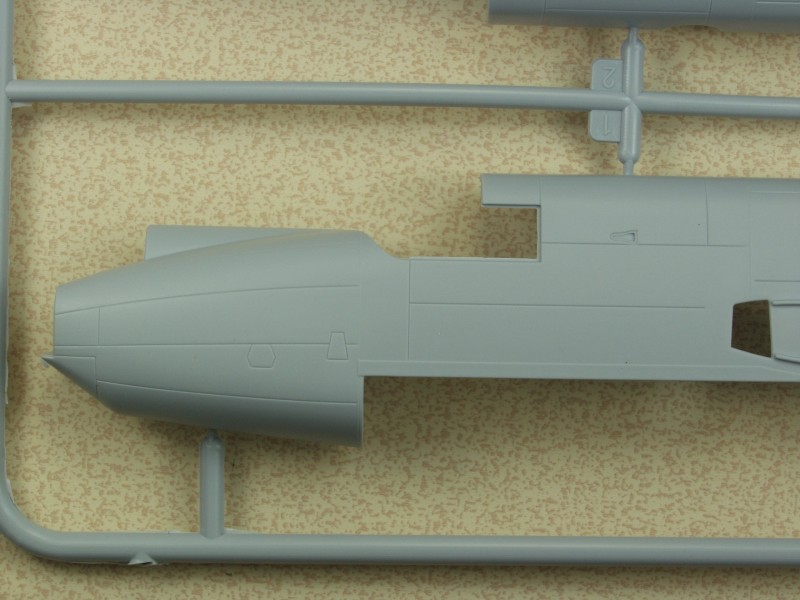
Lets take a
look at the sprues.
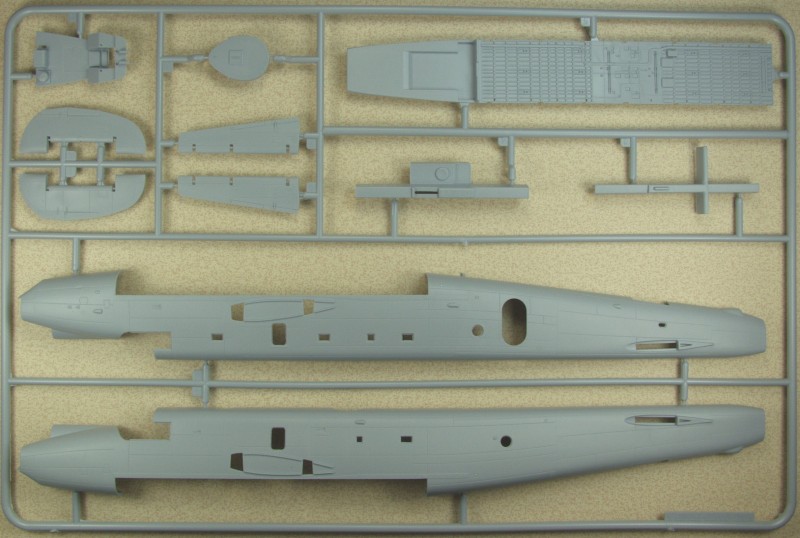
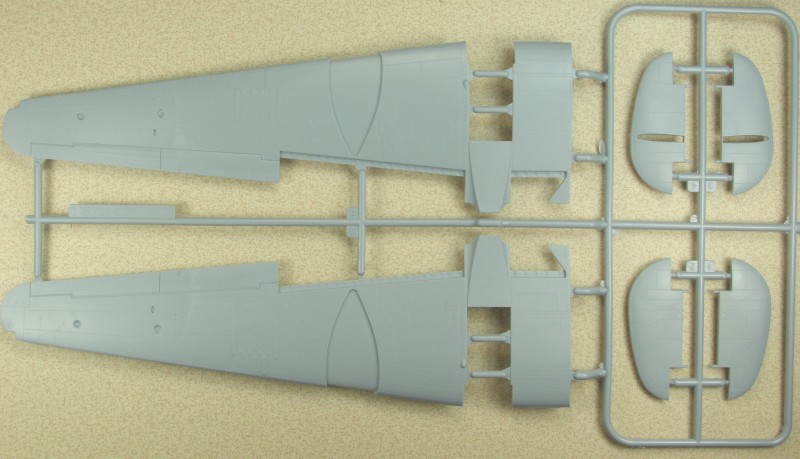
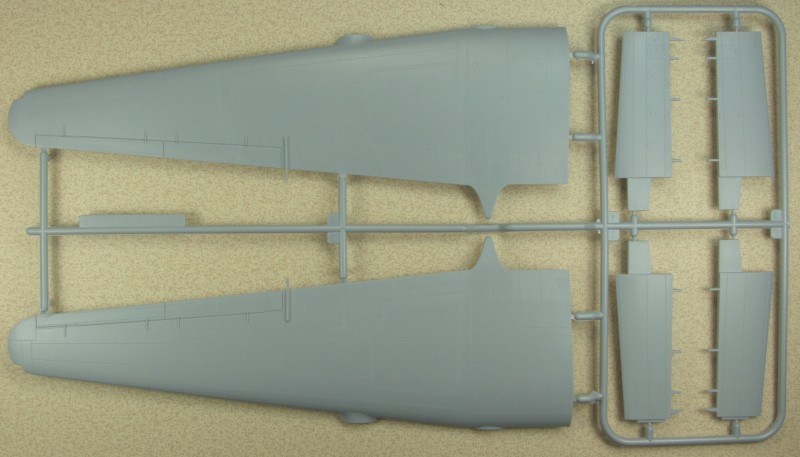
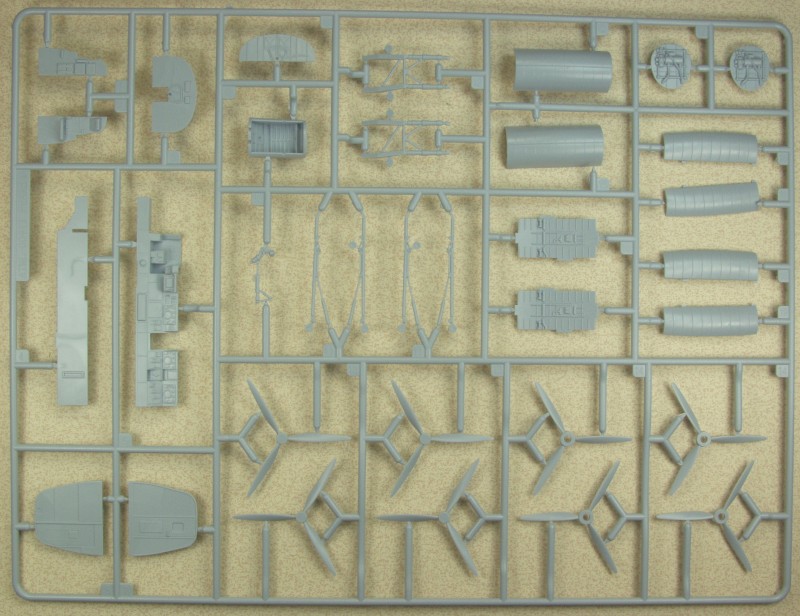
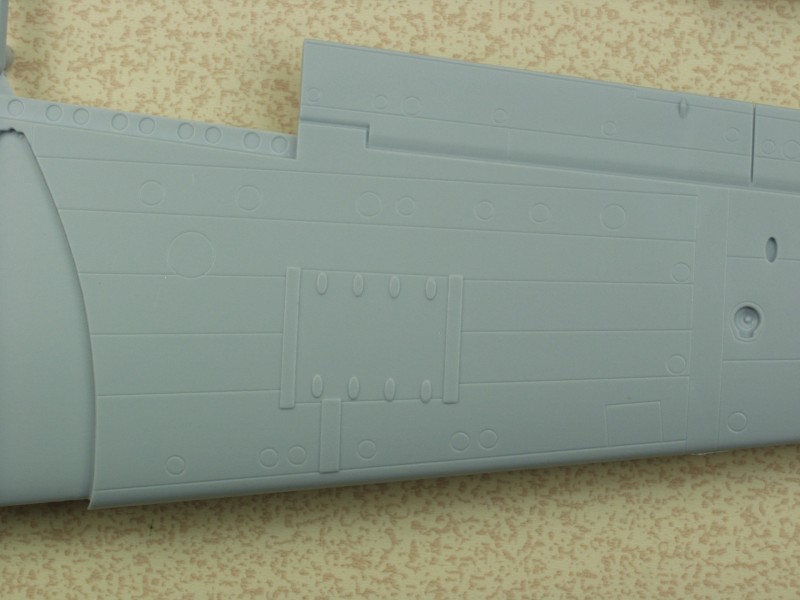
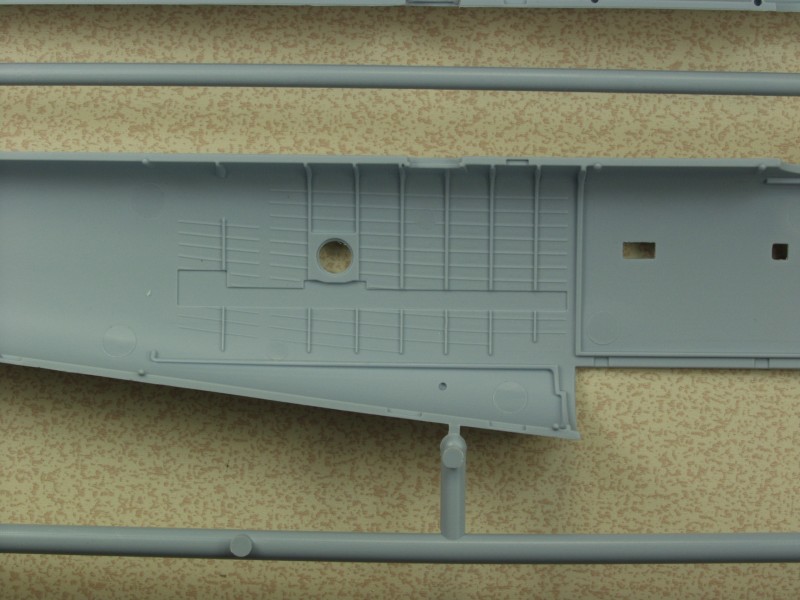
A couple close ups showing the wing and fuselage surface detail.
And one showing the inside fuselage detail.
The clear parts are reasonably thin and clear and have minimal optical distortion. The frames are raised for easy masking.
![]()
![]()
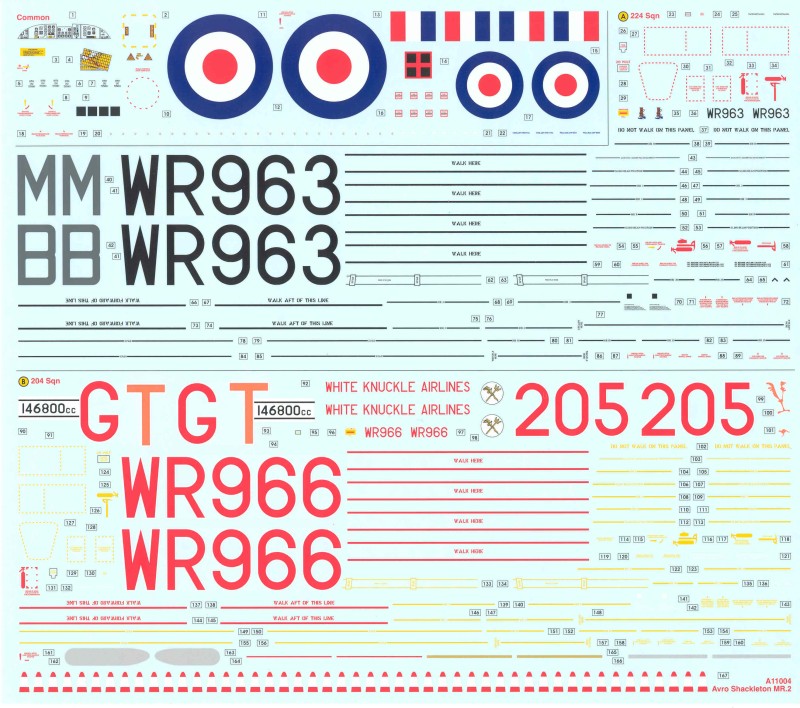
The decals provide marking for two aircraft, one from No. 224 Squadron September of 1967 with top turret and nose guns and one from No. 204 squadron January of 1972 with no nose guns or turret. There are marking instructions provided on a large 12" x 16" sheet with colors listed by name and Humbrol number. The decals are glossy in finish and in register. Individual decals have minimal clear film but the numbers and letters have quite a bit of film around them. There are an incredible number of stencil decals and from what I can see all of the tiny print is readable. There is another sheet the same size as the markings sheet showing the location of all the stencil decals. Decals include one for the instrument panel and enough propeller stripes for both sides of all 24 propeller blades. I can't imagine the time it would take to install all of the stencils.
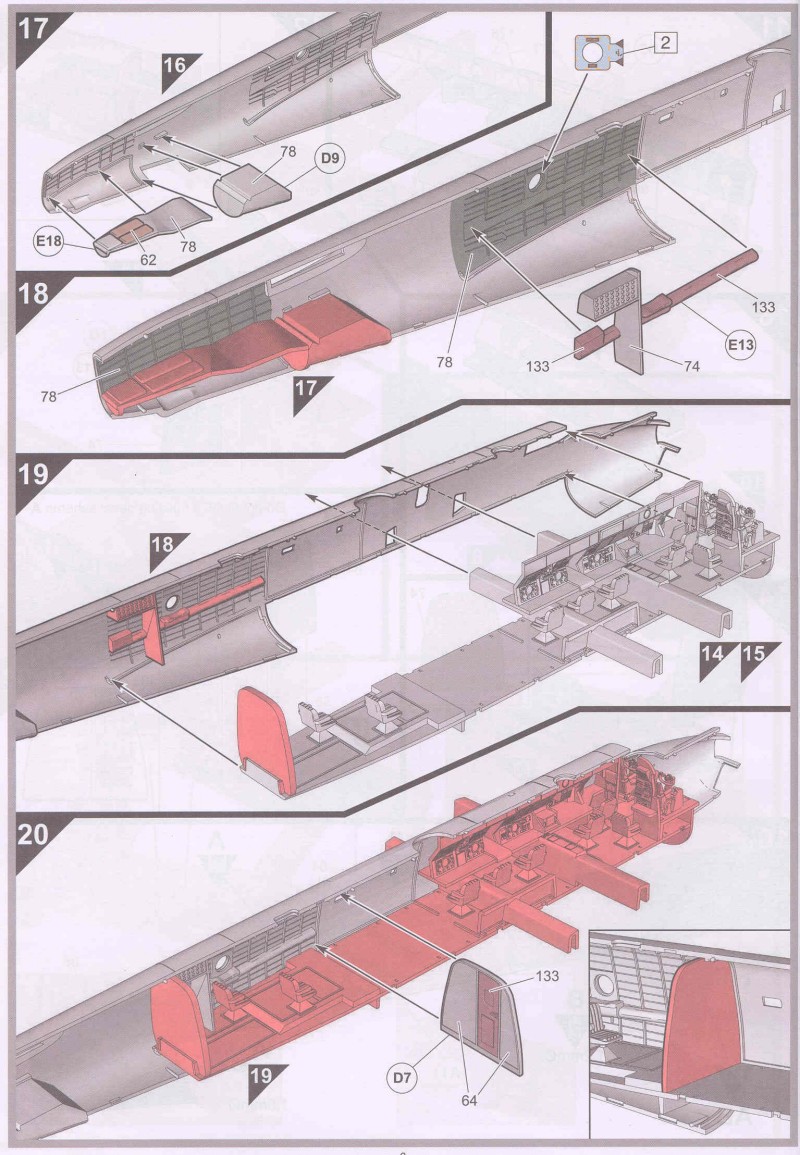
The instructions follow the pattern of all of the late issue Airfix kits, using 3D renderings with color indicating where parts fit in relation to other parts. The instruction booklet in portrait format 8" X 11 1/2" in size and stapled with 19 pages all but two are assembly diagrams of which there are 113 assembly steps. A sample instruction page showing the interior detailing.
After Market Goodies
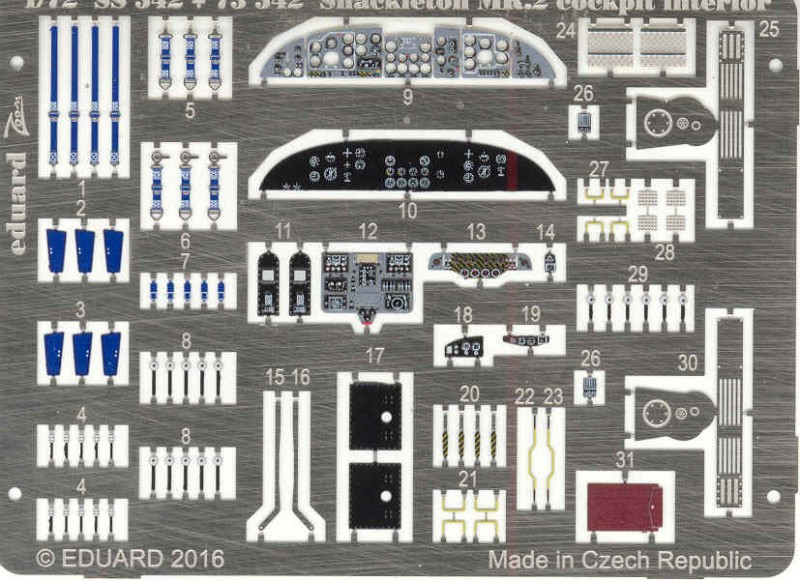
Eduard has done a full suite of sets for this kit but I opted for only the cockpit set [SS542] which is basically the instrument panels, throttle levers and belts and harnesses. I also got a mask set [CX434].
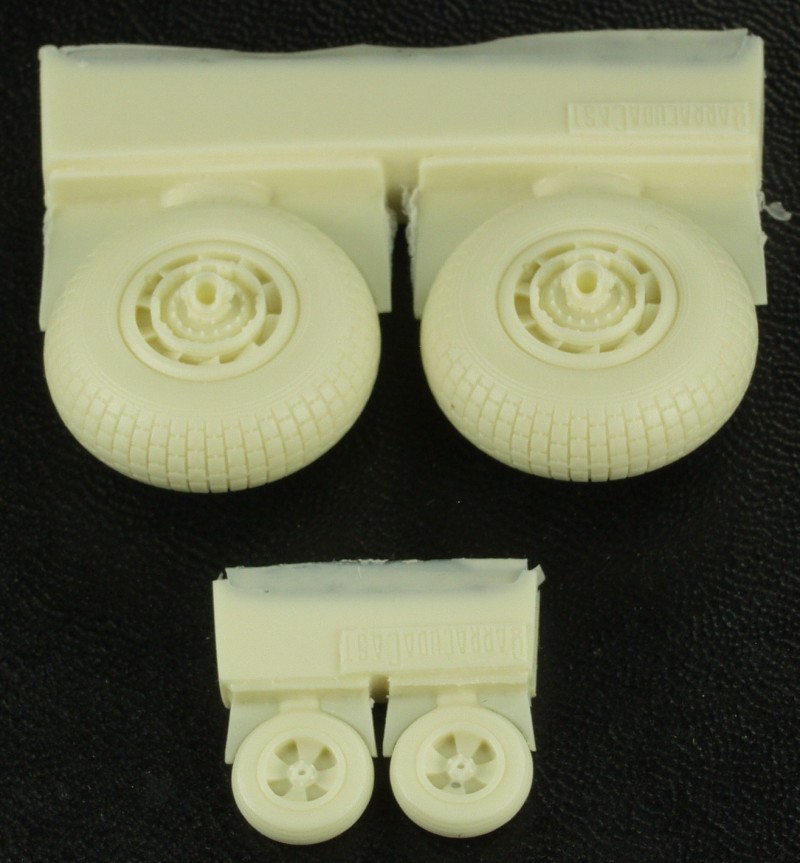
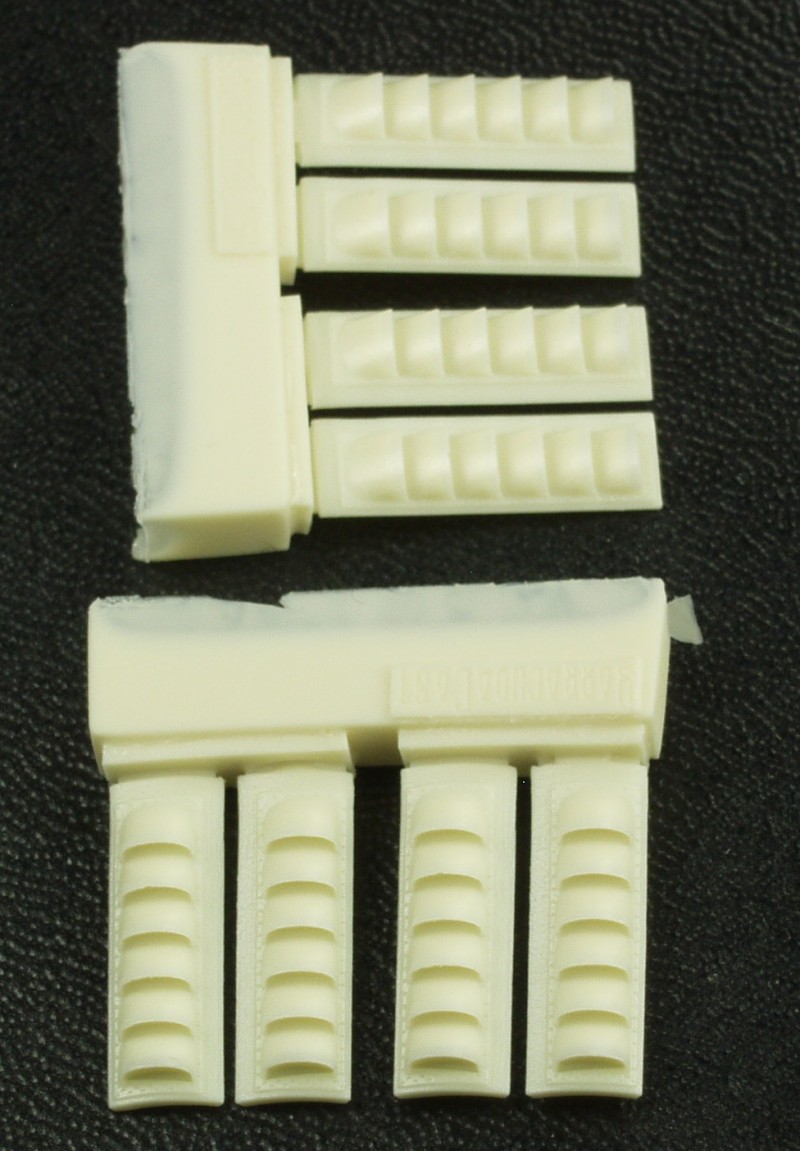
Barracuda Cast has two sets, [BR72274] a wheel set with nicely cast main and tail wheels, both subtly weighted and [BR72275] MR.2 early exhausts which are quite nice with open backs and much better looking than the kit parts.
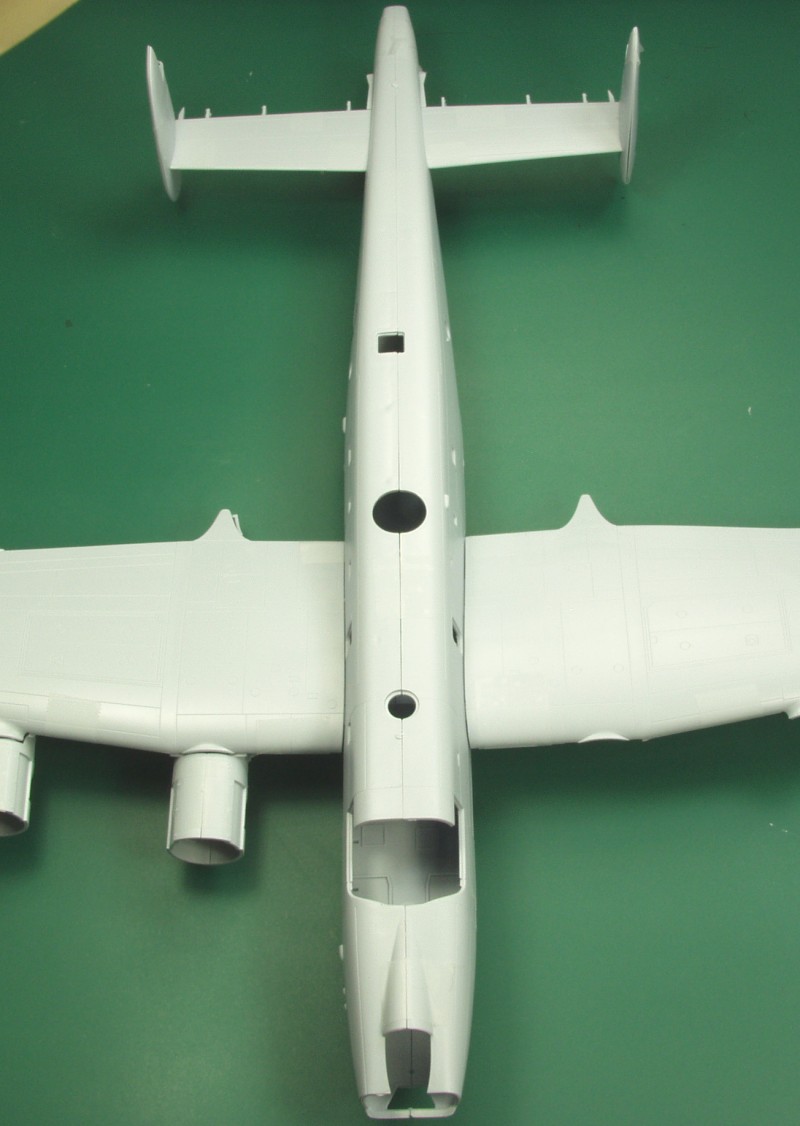
I decided to do a quick bit of test fitting. Without all of the interior parts, just the basic floor and the wing spars fit of the fuselage was quite good, it remains to be seen what it will be like with all of the interior parts. The wings are supported fairly well with the spars and the final fuselage to wing joint should be good once glued. I liked the way the horizontal stabs are inset into the fuselage and the fins. Makes a nice tight joint and snug fit.
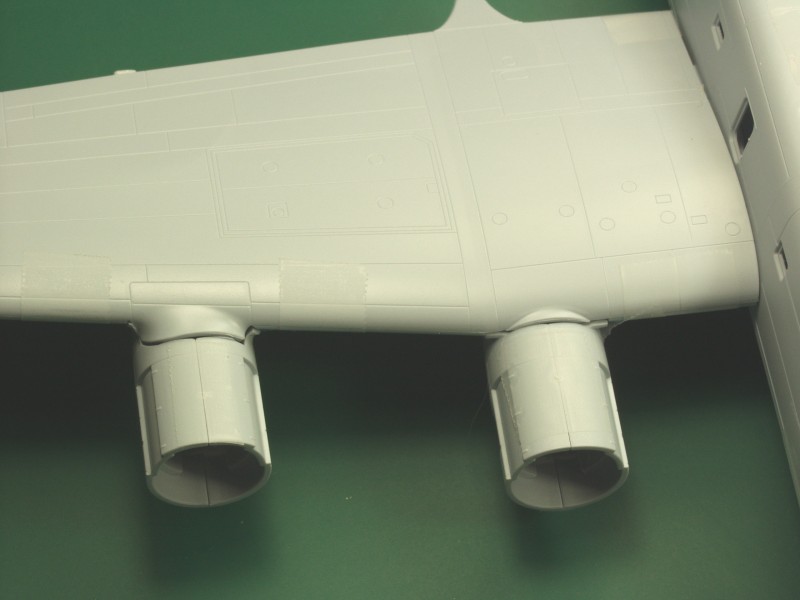
Where the engine nacelles meet the upper part of the wing looks to need to work, maybe a little carving or putty. Note: I couldn't hold them tight for the photo and I believe they will fit better than shown when glued.
Nice tight fit back around the tail.
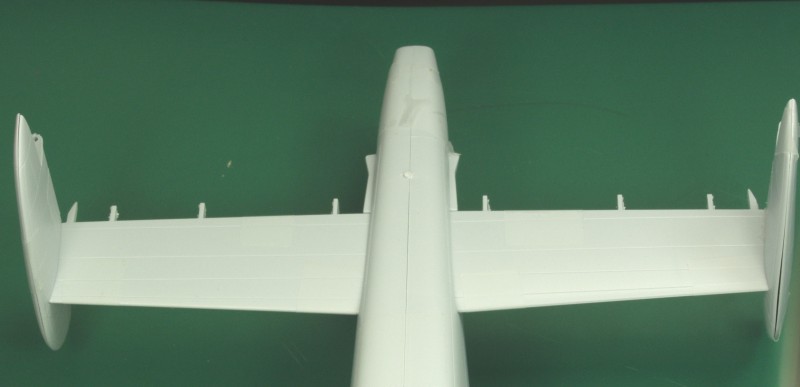
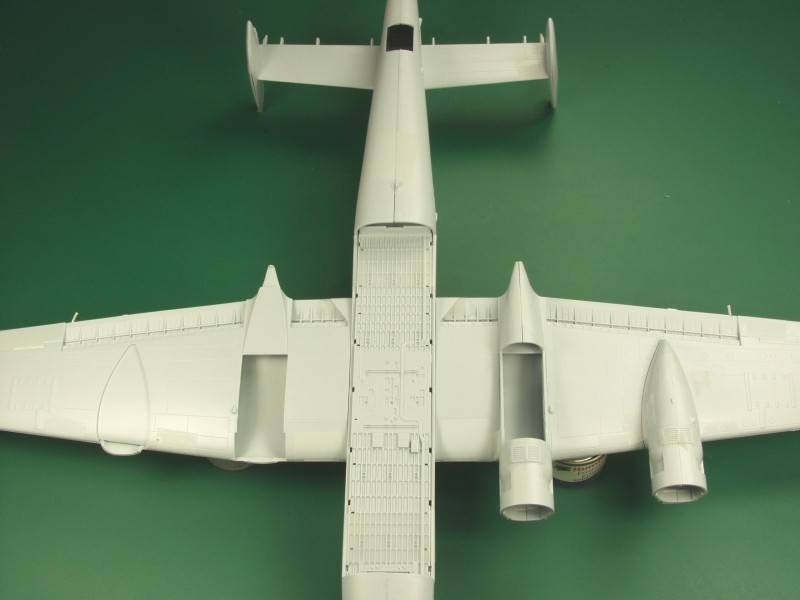
Fit on bottom side.
Conclusions
Overall a really nice kit, certainly light years better than the old FROG kit. It appears that there may be some minor fit issues and with all the interior installed joining the fuselage halves could be challenging. Except for the kit's complexity, I would recommend it for most modelers with a bit of experience.
Links to kit build or reviews
A nice build review can be found here.
References
AVRO Shackleton by Alan Hall, Warpaint Series No. 6
Back to the Miscellaneous
1/72 page