
N1K1 Kyofu (Rex)
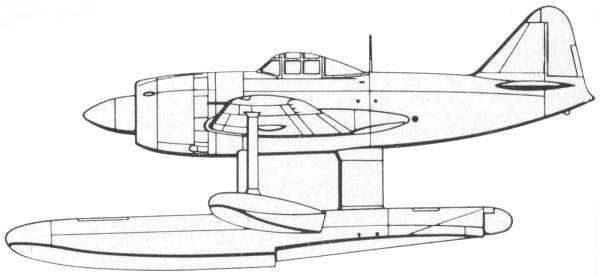
The Kawanishi N1K1 came about as the result of a Japanese Navy prepared specification for a water-based fighter to provide air cover during amphibious landing operations prior to the capture of airfields by ground forces. While Nakajima was given the responsibility of producing an interim float fighter based on the A6M2 Zero-Sen, Kawanishi was awarded a development contract for what was intended to be the most powerful and advanced floatplane fighter in the world. The specification was issued in September of 1940 and eighteen months elapsed before the first prototype was completed and flown for the first time on May 6, 1942. It was powered by a special model of the Mitsubshi Kasei fourteen cylinder radial engine geared for contra-rotating propellers. The use of these was considered necessary to offset the torque of the engine which would cause the aircraft to snake during take off. From the outset, issues with the gearing for the props outweighed any advantages that they offered and the second prototype was modified for a single three-bladed prop. The second prototype was completed in October of 1942 and it was found to suffer from snaking as predicted. It was found that extreme skill was required in correcting for torque during takeoff and the prototype was seriously damaged during one of its first landings when the pilot over corrected. Four further prototypes were completed by the end of the year and two more in early 1943 and most of the serious shortcomings of the design were progressively eliminated although the fighter was to always demand considerable skill in take offs and landings.
In December of 1942 the aircraft was accepted for production and by the following December a total of eighty-nine had been delivered. Unfortunately for Japan the war situation had changed by that time and no matter how good its performance was it was no match for the newer Allied fighters. The Kyofu was allocated to units as a replacement for the A6M2-N as rapidly as possible but their operations were somewhat restricted due to the radically changing combat situation. At the beginning of 1944 production was tapered off in order to concentrate on the land plane version the N1K1-J Shiden and finally terminated in March with delivery of the ninety-seventh machine. During the closing stages of the war some of the N1K1's were operated from Lake Biwa in defense of the homeland.
The Kit
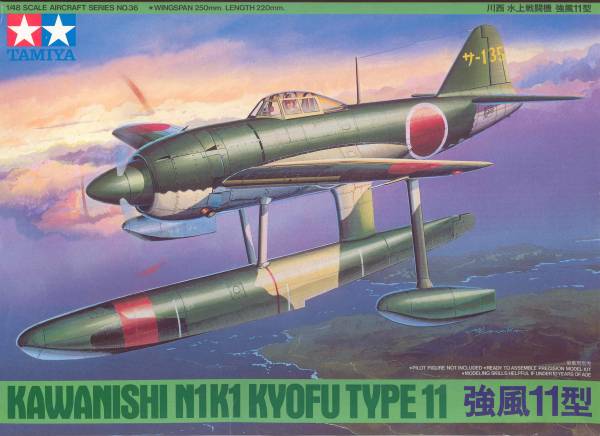
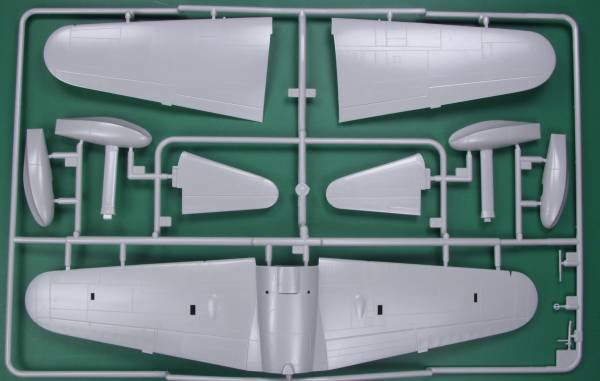
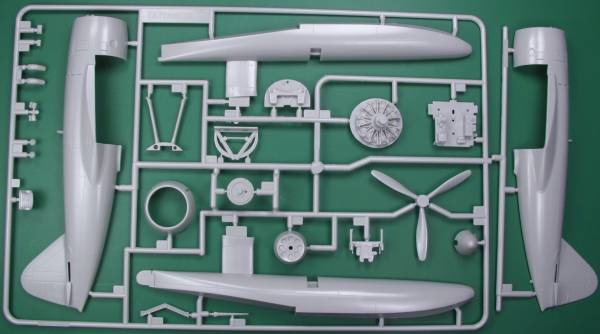
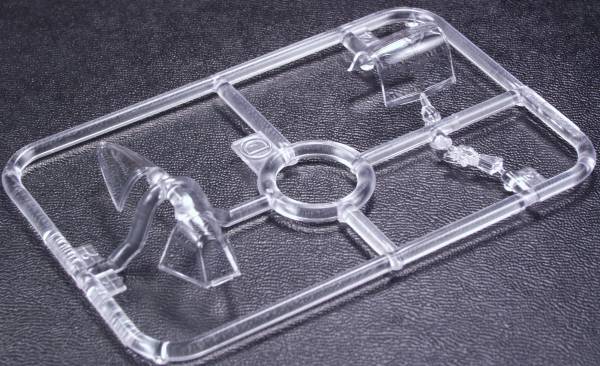
The Tamiya kit comes in a typical Tamiya two part top open box with nice artwork on the top. Inside the box the sprues are contained in three bags, one with two sprues, one with wings tail and wing floats and the other a beaching dolly. The second has all the fuselage parts and main float and the third has the clear parts. The aircraft itself is molded in a light gray plastic with a high quality glossy finish and recessed panel and fastener detail, all nice and crispy done. The fabric areas are very nicely rendered and not over done as is so often the case. There is virtually no flash and only minimal parting lines on some of the smaller parts.The beaching dolly is molded in black plastic. I could find no imperfections on the airframe save for one ejector pin mark that might show in the cockpit area There were a few on the beaching dolly that might need to fixed if you are so inclined. The horizontal stabilizers are one piece moldings and all the control surfaces are molded in place. The engine is only a half rendering but with the tight cowl and large spinner should be more than adequate. some ignition wires would dress it up.There is structural detail molded into the cockpit sides and enough parts to make a decent looking pit. You are on your own for seat belt and harness. The clear parts are thin and clear and the canopy is molded in three pieces so it can easily be positioned open. The kit includes a weight to install in the float to prevent tail sitting. Considering this kit is from 1994 it seems to embody most of the features and detail level found on more recent kits and based on my experience with other Tamiya kits I don't expect any major problems. Total parts counts is 33 gray, 10 black and 4 clear. Photos of the sprues can be seen below.

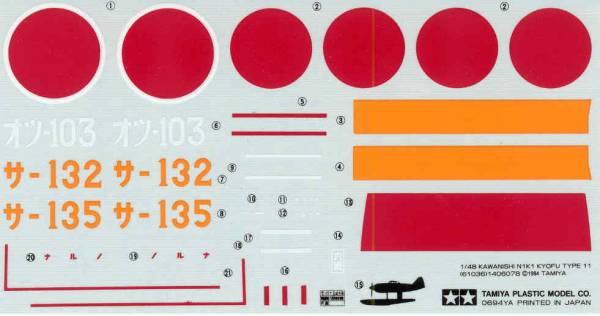
The decals appear to be typical for Tamiya, if anything a bit thick but look opaque. Besides the national markings there are some service markings a builders plate and striping and numerical markings for three different air groups. The sheet can be seen below.
The instructions are typical Tamiya, a large sheet folded to make eight pages with about five pages of assembly instructions a page of multilingual history, a page of painting and marking instructions and the usual warning, precautions and decal installation instructions.
After Market Goodies
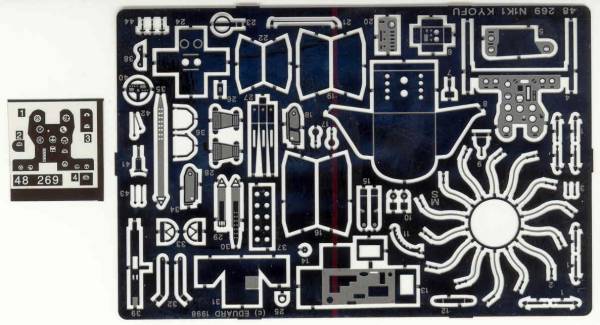
Just one item here, from Eduard [48269] photoetch set for all those details you can't live without. Should do a nice job of dressing up an already fairly nice cockpit. See photo below.
Conclusions
This is a very nice kit and should be an easy build for most any level of experience of what was a significant Japanese aircraft. It certain was most likely the highest performance float plane fighter ever built and the fact that it was adapted as a land plane version certainly bears this out. Unfortunately for Japan it came too late to have any impact on the outcome of the war.
Links to kit build or reviews
A review can be found here, and a build here .
References
"Warplanes of the Second World War Volume Six-Floatplanes" by William Green
Construction
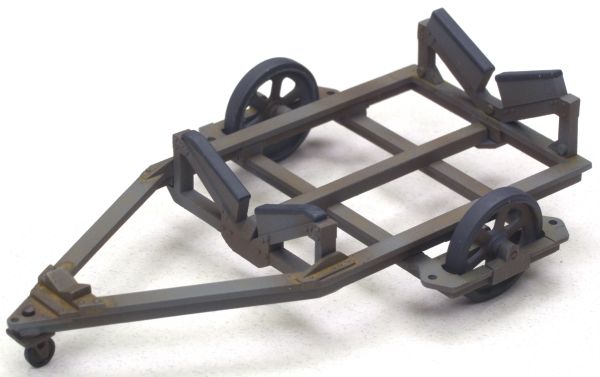
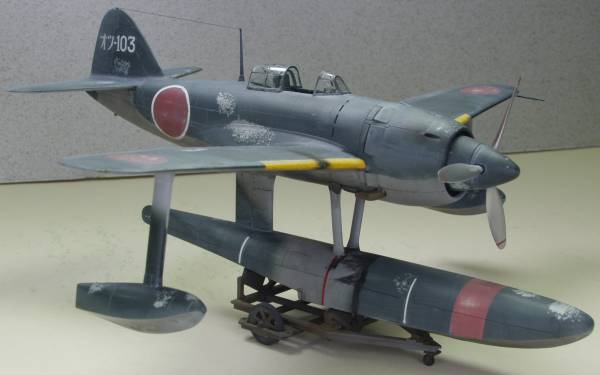
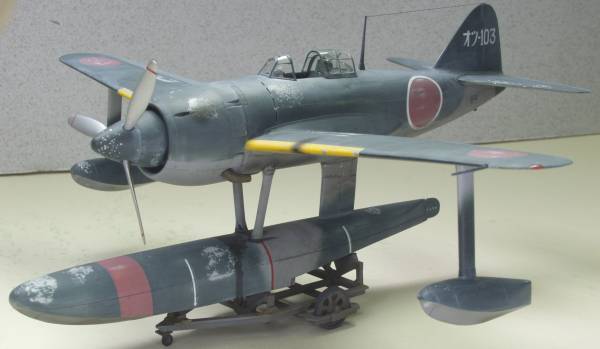
I took a slightly different approach to this build and started with the beaching dolly for no other reason than to have a place to set the aircraft on once the float got attached. I deviated from the color suggested in the instructions and went with a dark gray instead of black for the frame. This was overcoated with Floquil roof brown to give an old rust look to it coating some areas heavy and others with just a mist. This was followed up with a home brew concoction that creates real rust which was applied in areas that I wanted to look freshly rusted. The wheels and rubber areas on the float supports was painted with Floquil grimy black. I didn't like the way the wheels attached so I cut the mounting pins off, mounted the brackets then drilled them out 1/32". I found that 1/16" OD brass tubing just fit in the holes in the wheels, so I cut two pieces and pressed them into the wheel hubs. Once all the painting was done it was a simple matter to slide the wheels in place and insert a length of 1/32" diameter wire to serve as an axle. The completed assembly is show below.
Next up was the cockpit. I had an Eduard photoetch set to use but was somewhat disappointed in it as some of it didn't seem to jive with photos of the real thing and in some cases the plastic pieces were actually closer to reality. I ended up not using some of the parts and combining some of the plastic parts with the PE. I had thought about adding some wiring inside the pit as well but when I found out how little of it would be visable even with the cockpit open I changed my mind. Based on information gleaned over on the J-Aircraft.com website I used an interior green with a bluish tint for the interior and used a light gray wash on it. The completed assembly can be seen below.

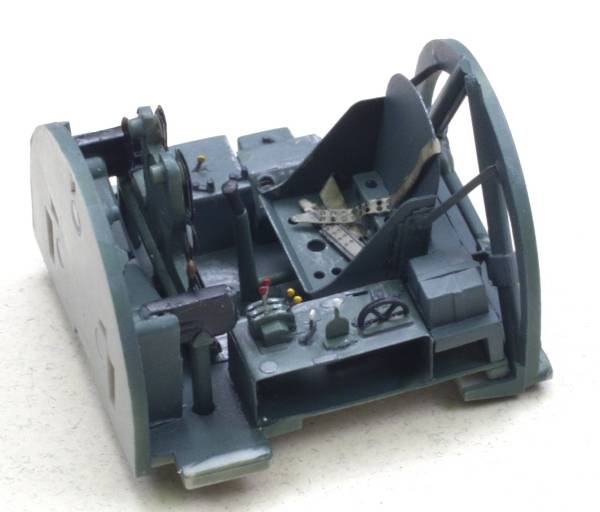
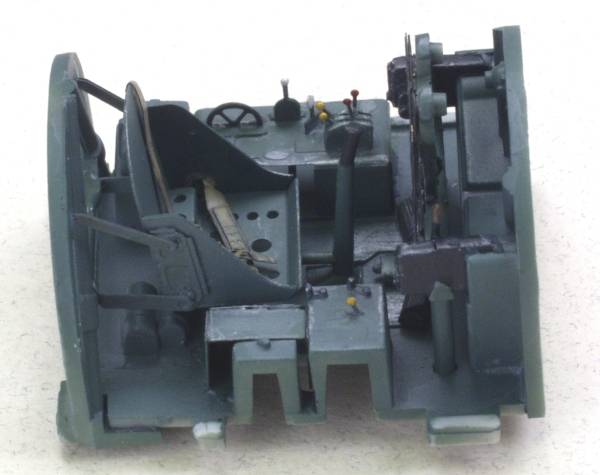
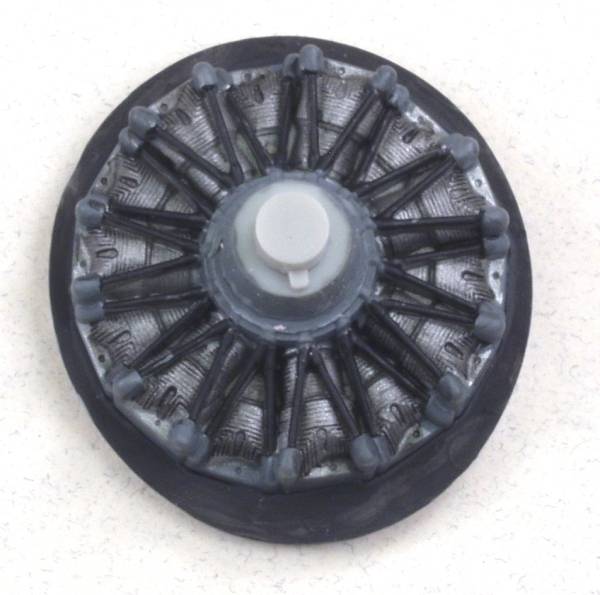
Another item that needed to be completed prior to fuselage assembly was the engine. It had nice depth to the detail and painted up nice. I made an attempt to use the PE harness but couldn't get it to look right to my eye and ended up scrapping it. Very little of the engine shows through the tight cowl with the large spinner attached. See below.
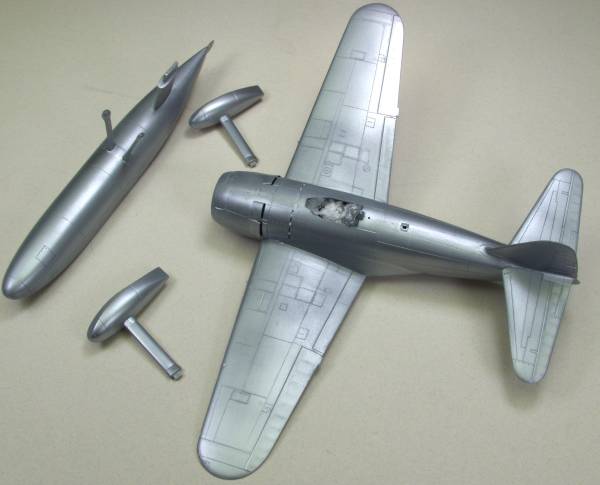
The next photo shows the main assemblies after build up, seam filling priming and a couple coats of Alclad II white aluminum. I had some dust issues on the wings and fuselage and used micromesh to sand it down to remove it. It took the Alcald down to the primer in a couple of places but since it only needs to show where paint peeling is occurring I did not touch up these spots.
The next step is to add salt where I want chipping then paint the yellow bands on the wing leading edges and paint the areas for the Hinomaru as shown in the next photo.
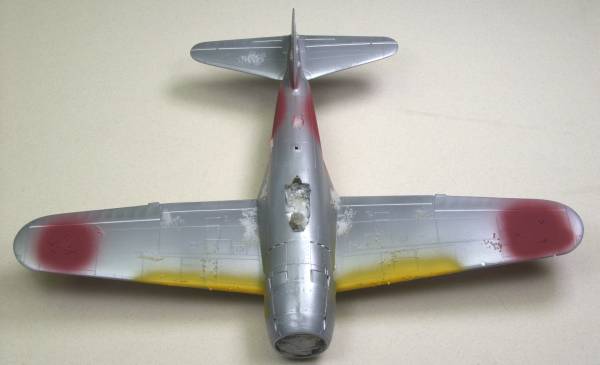
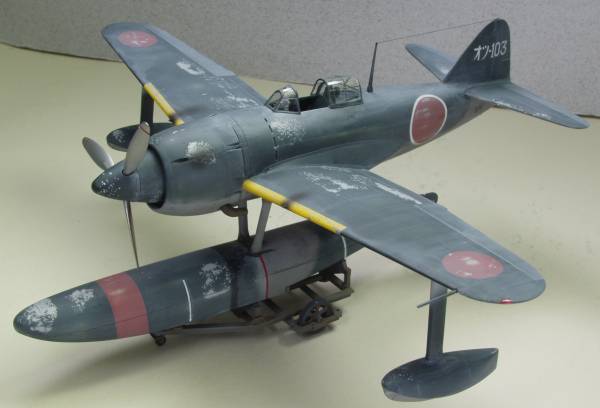
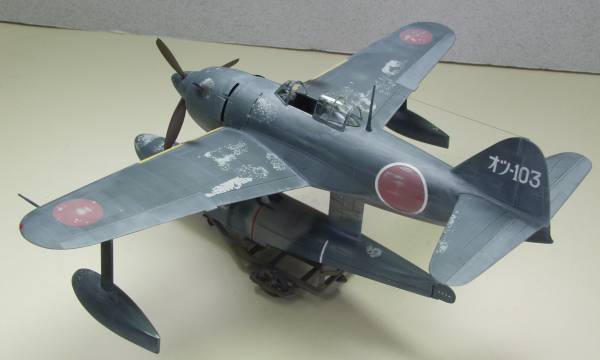
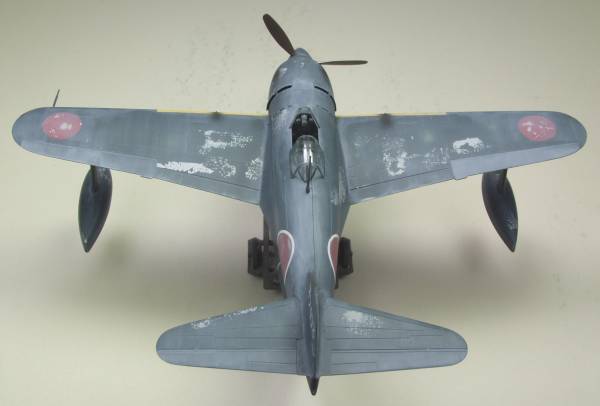
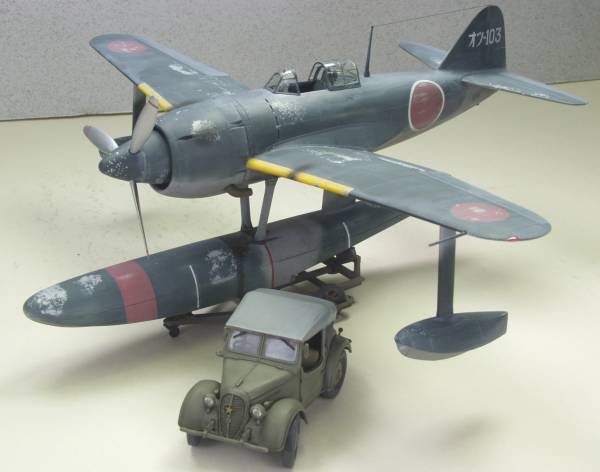
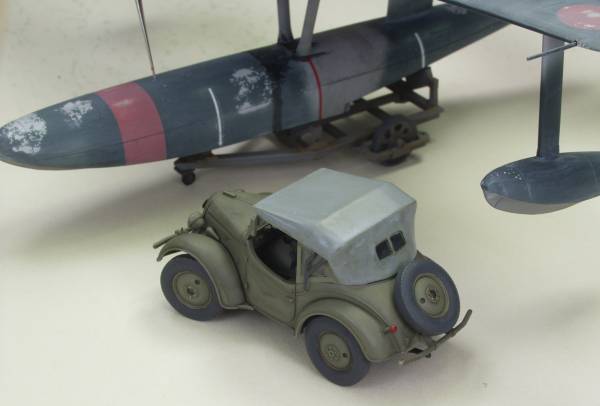
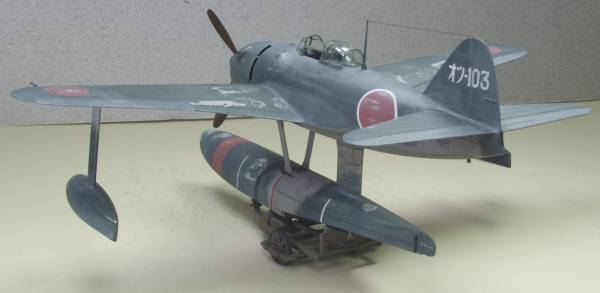
From this point the bottom and top colors were applied, the salt was removed and the necessary decals installed. Once those had time to set everything was sealed with a coat of flat Future (Future with Tamiya flat base added) then is was time to dirty things up a bit. The upper fuselage got a heavy wash, more like a filter to lighten the paint and give it a faded salt sea weathering. The light areas were given a darker color wash. Once I was happy with all of that the rest of the assembly was done, any glitches were touched up and it was considered done. The photos below show the final results along with a Tamiya Kurogane that I built in parallel with the kit.
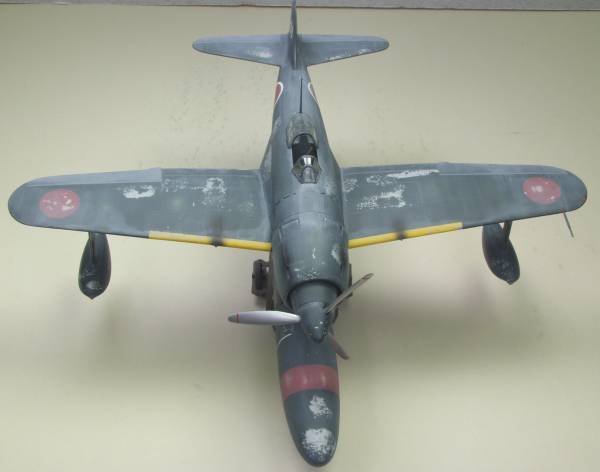
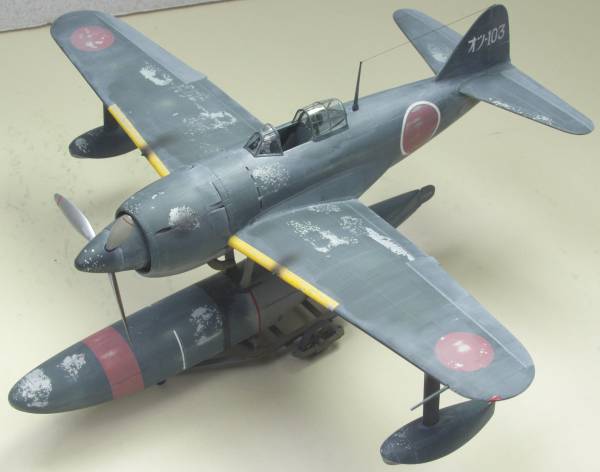
In conclusion I give this kit very high marks, the fit of the wings and tail planes to the fuselage required no filler and I only used a hint of it on the fuselage. The couple of fit issues I had were my own fault. This build was a test bed for trying out some new techniques and I was for the most part happy with the results and would highly recommend the kit to modelers of all skill levels.
Updated 5/3/08