
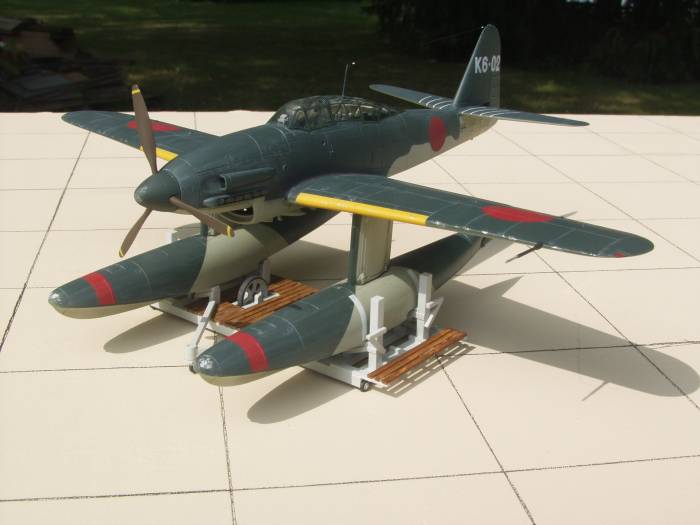
M6A1 Seiran
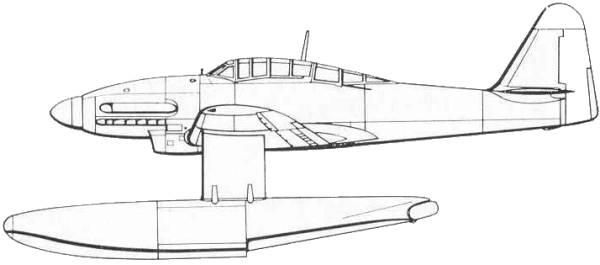
The Aichi M6A1 was designed to a 17-Shi specification for an aircraft capable of being carried and launched from the extremely large I-400 class submarines which were being constructed for surprise attacks on targets far outside the normal radius of action for Japanese aircraft. They were to be carried in a cylindrical watertight hanger mounted on the deck of the submarine. The specification was issued to Aichi under the utmost secrecy. The design of the M6A1 was initiated in June of 1942. The first prototype was completed in November of 1943. The wings swiveled on the rear spar so that they could be folded back along the fuselage for stowage in the submarine hanger. The tip of the rudder folded to the starboard side and the horizontal tail surfaces folded down at approximately quarter span. The wings were extended hydraulically and it took four trained personnel approximately six minutes to prepare the aircraft for launch. The first prototype was completed in November of 1943 and an additional seven prototypes were built. Numerous difficulties were being encountered in the construction of the I-400 submarines while the M6A1 was under development and as a result of the delay several I-13 class submarines were converted to carry two M6A1's each and together with ten Seiran floatplanes, four converted I-13 submarines equipped the 1st Submarine Flotilla in early 1945.
From the outset of development of the M6A1 the Japanese Navy had nurtured the idea of using the aircraft for an attack on the Panama Canal with the aim of blocking this vital supply route. The plan called for launching the M6A1's each carrying a 1,760 pound bomb from the submarines within range of the canal. Crews that were to undertake the attack underwent intensive training using large scale models of the canal zone but by the time this attack was virtually ready to launch, Japan capitulated. A total of twenty production M6A1's were completed during 1944-1945 a few of these had retractable undercarriages as M6A1-k for training and the remaining having provision for detachable floats.
The Kit
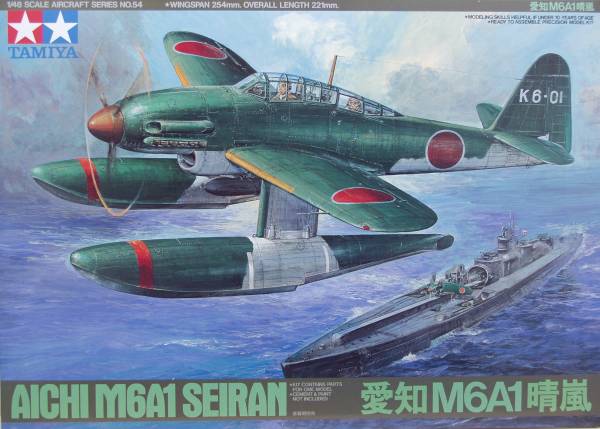
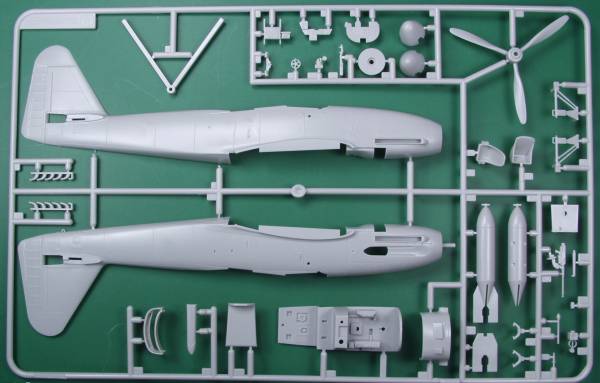
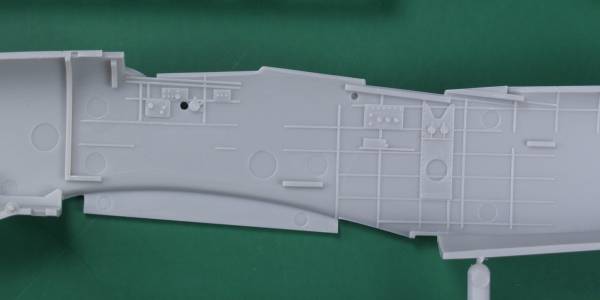
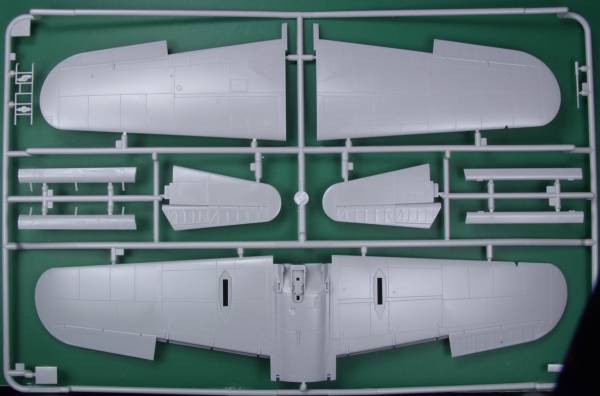
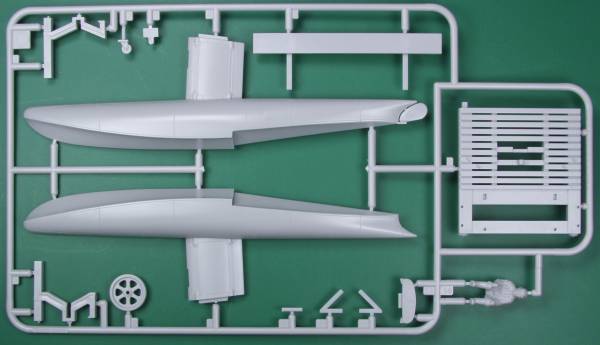
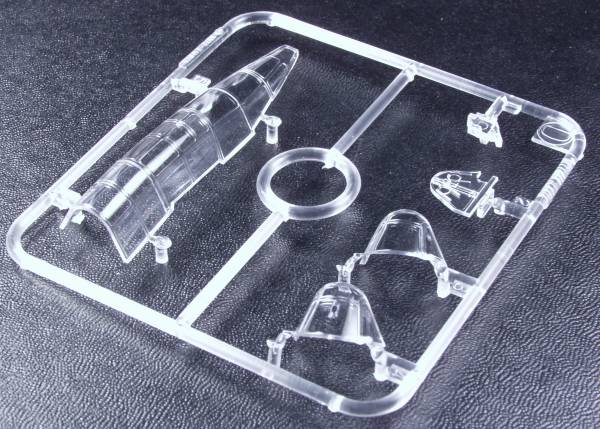
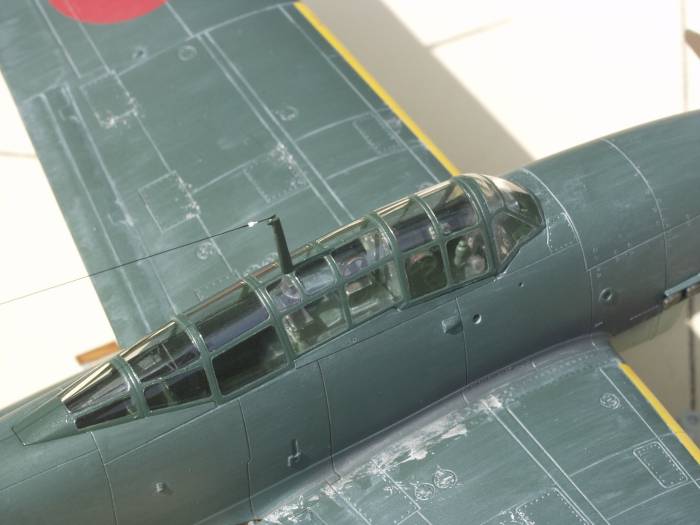
The Tamiya kit is one of their later offerings and is first rate kit. I was drawn to it by its sleek lines and was not put off by the fact that it was never used in combat. Since reviews seem to be a bit scarce for this kit lets take a look at what is in the box. The kit comes in a nice two part top opening box with nice artwork on the top. Inside there are three plastic bags. Two of them have one set of sprues and the third has two identical sprues which are for the floats and beaching dolly. The clear parts are bagged separately and are included in on of the single sprue bags. The parts are molded in a light gray plastic with crisp fine recessed panel lines and raised detail where applicable. The fabric surfaces may be a tad over done but they look OK to me. I could not find any sink marks or flaws in the any of the exterior parts. The cockpit is very well detailed with lots of add on parts. The inside fuselage has structural and other detail molded into the cockpit sidewalls but unfortunately there are about a half dozen ejector pin marks that are that area and some of them will undoubtedly show when the kit is complete. The clear pieces are thin and clear with well defined frame lines. The canopy is molded in two pieces, the windscreen, of which two are suppled, and the balance, which means it will need to be cut to display in the open position. The windscreen has both a solid one for use with the reflector style gun sight and one with a hole in it for a telescopic type gun sight. Also included with the kit is a metal weight which goes inside the forward end of one of the floats to prevent tail sitting. All the control surfaces are fixed except the flaps which can be positioned up or down. There are also two different spinners included, one slightly more pointed than the other but there is no information regarding usage of one over another. Two nicely molded crewmen are included but they are both identical. A beaching dolly is included and it's a nice model itself. One bomb as an external load is included. All together there are 74 pieces in light gray and 5 clear pieces for a total of 79 plastic parts. See photos of sprues below.
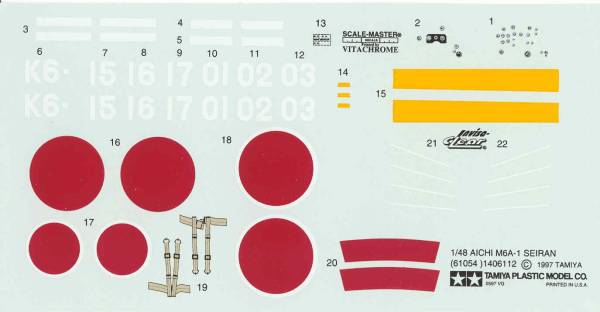
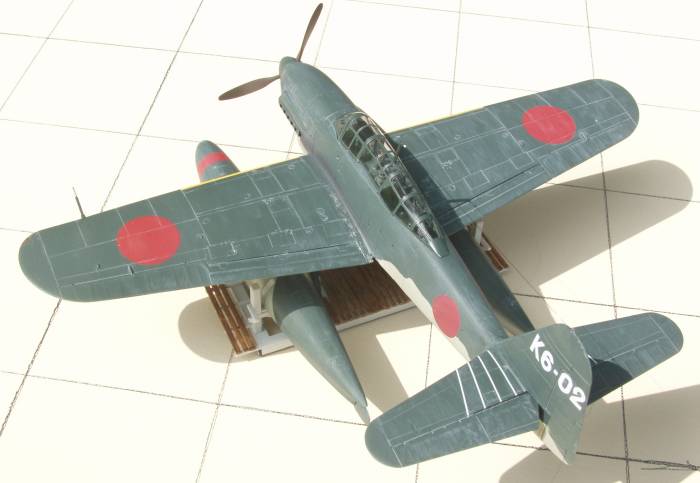
The decals supplied allow you to build anyone of the six aircraft that were actually dispatched on a mission. Besides the national markings and aircraft numbers the sheet includes a serial number plate, seatbelt/harness decals, instrument panel and various striping that goes on the floats. One set of stripes supplied is not show in the instructions or the box top but are shown on the tops of the horizontal stabilizers in the photo of the assembled kit on the front of the instruction sheet. The decals are by Scale-Master and printed by Vitachrome and appear to be thinner than some Tamiya supplied decals. The most noticeable problem with them are the red national markings with white surrounds, the red is not centered in the white. These would probably be best replaced or painted on. See sheet below...
The instructions are typical Tamiya and consists of a long sheet folded to create 10 pages. The first two provide history in four languages. The next page includes safety precautions, tools required and a list of Tamiya paint callouts. the next five and a half pages cover assembly and a page for painting and markings. The last page covers some details showing how the aircraft was stowed on the submarines, decal instructions and a replacement part order form.
After Market Goodies
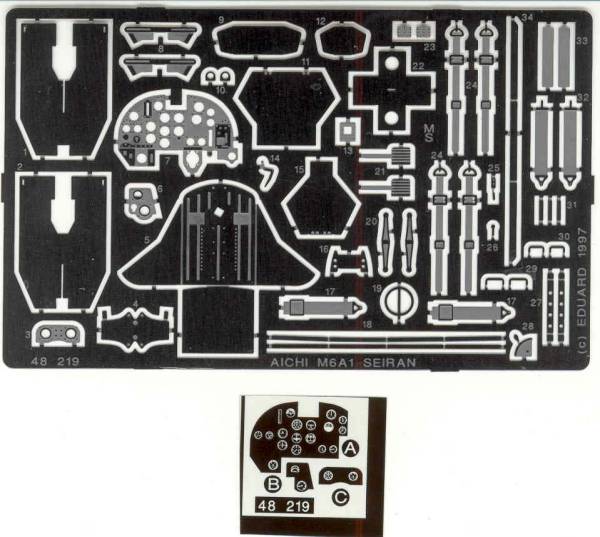
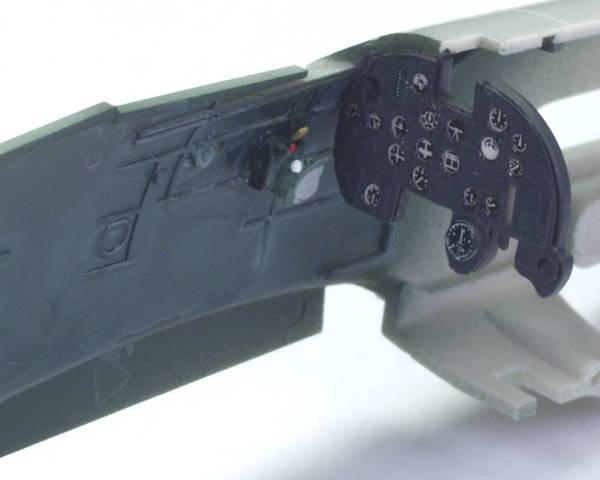
As for after market, Eduard makes a photoetch kit [48219] with an instrument panel and various dress up pieces for the cockpit including rudder pedals, throttle quadrant, harnesses and belts for both crew members, grab handles for the canopy and machine guns parts, externally there are some replacement vent openings, replacement bomb fins, lift rings and a few other external details. See photo below.
Squadron makes a vacuform canopy [9608] which might be a better choice if you want to open up the cockpit.
Conclusions
This looks to be an excellent kit with a high level of detail and typical Tamiya engineering and craftsmanship. Although somewhat obscure and never used in combat the aircraft is still an attractive airframe and certainly worthy of building. It certainly is no more obscure than many German aircraft that have made it to kit form.
Links to kit build or reviews
A brief review can be found here
References
"Monogram Close-Up 13, Aichi M6A1 Seiran" by Robert C. Mikesh
"Warplanes of the Second World War Volume Six-Floatplanes" by William Green
The Build
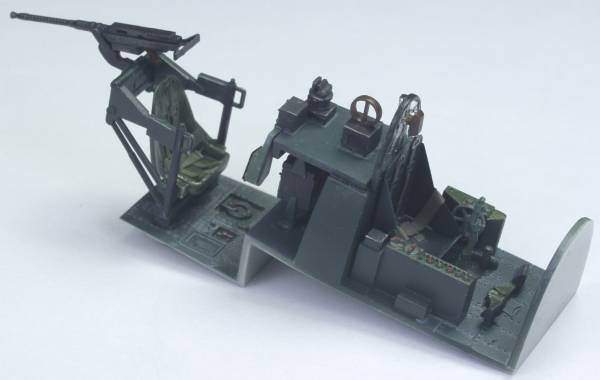
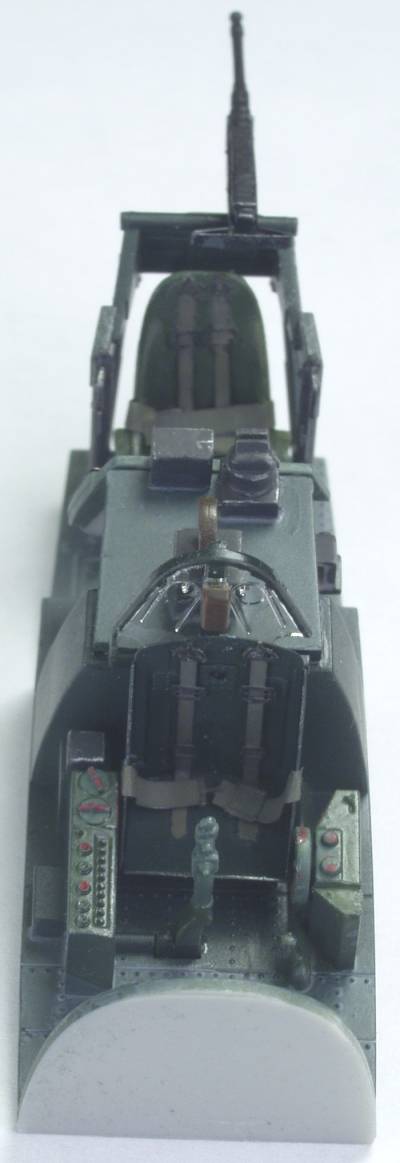
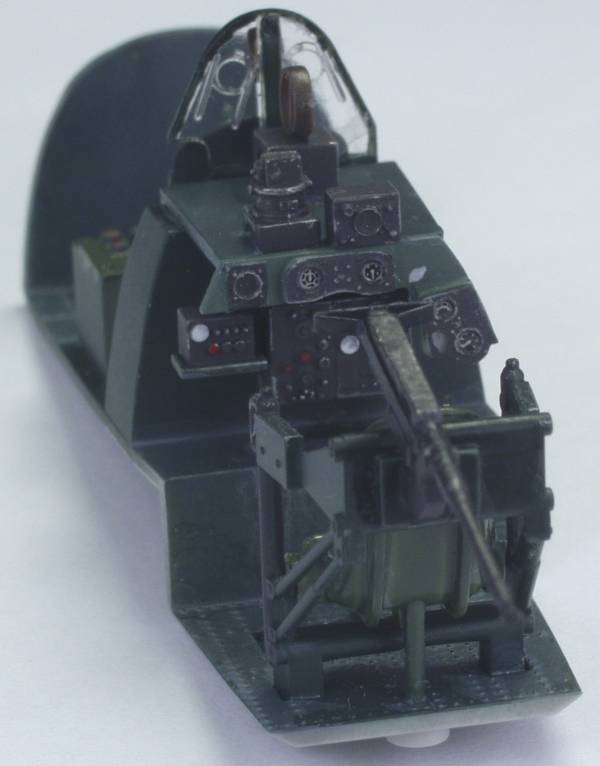
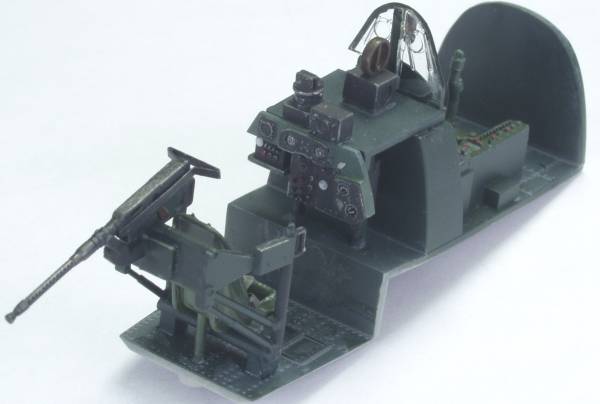
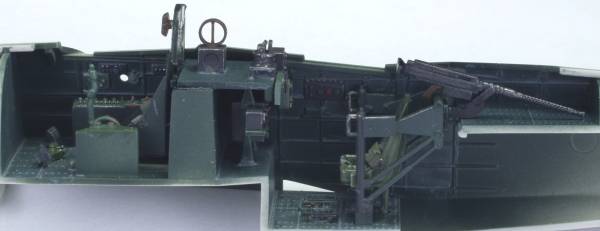
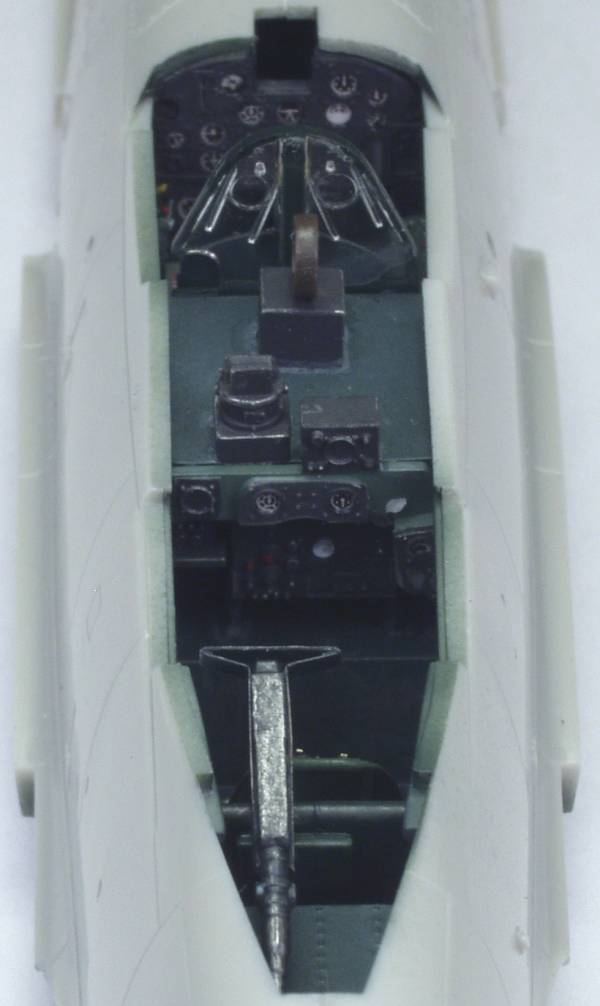
Like most planes this starts with the cockpit. I used the Eduard set but was not all that pleased with it. Three instruments were missing from the panel and one of those was most prominent. The concept for this kit was to build it as it is displayed at the NASM Udvar Hasey Center. Fortunately I found a photo online of the cockpit which I assumed to be after restoration as the instrument panel had been restored and installed. While the cockpit was obviously cleaned up it wasn't restored to new condition which allowed me to do a bit of minor wear and tear to the inside parts. I also like the variety of colors used and used three different shades of green on mine. Shown below are some photo's of the completed cockpit.
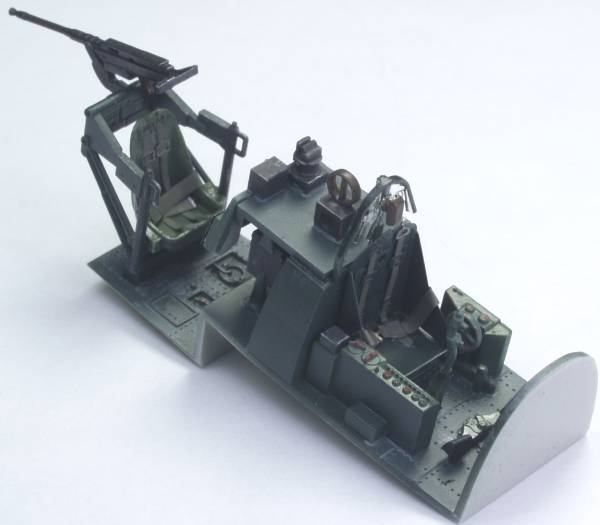
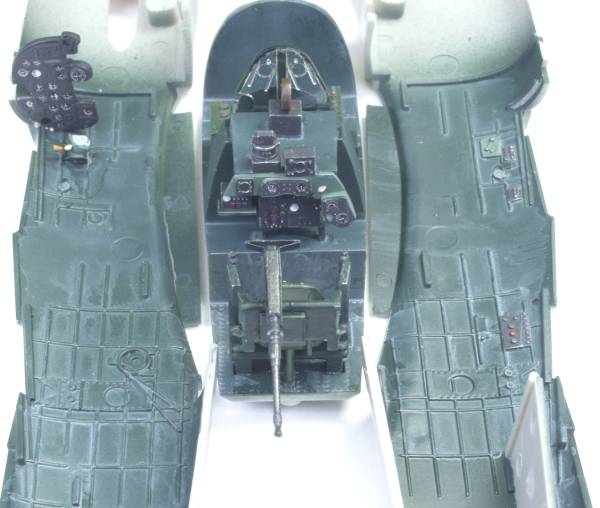
The cockpit was installed into the right fuselage half.
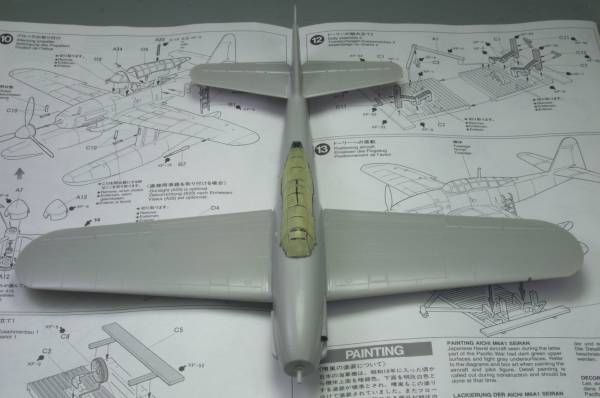
The the fuselage was joined.
With the fuselage buttoned up the wings, tail planes and a few other exterior bits and pieces were added. The canopy was masked (thank you Eduard) and installed. Seams were cleaned up and polished and she's ready for the paint shop.
This kit was built as part of a museum group build on Swanny's Forum and as a result I did my best to complete the kit as the one in the Smithsonian. This aircraft has no unit markings and a pristene paint job. The only real issue I had was with the hinomaru which were very thick and brittle and did not want to conform to the surface. It took multiple coats of Champ decal setting solution, one of the strongest on the market to finally settle them in. In spite of that one of the fuselage hinomaru cracked and the other had a chip out of it. Anyway here are some photos of it as a museum aircraft.
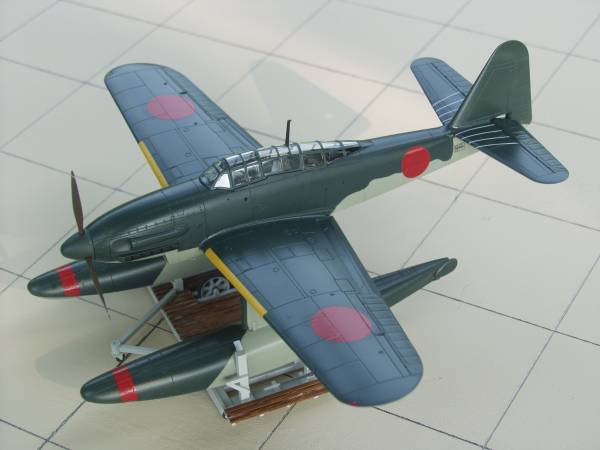
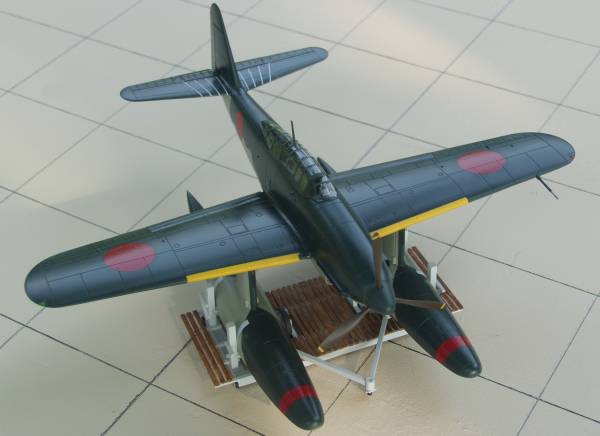

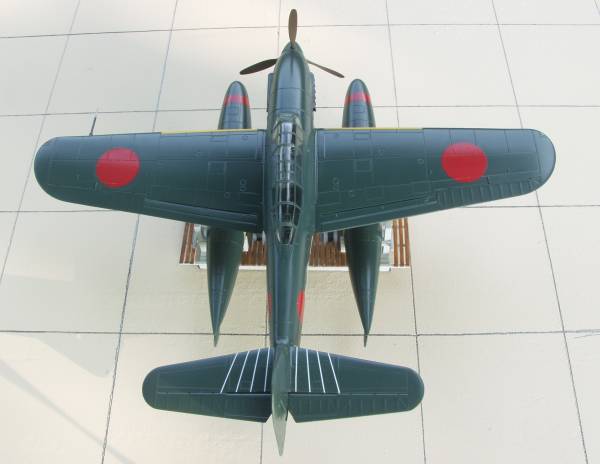
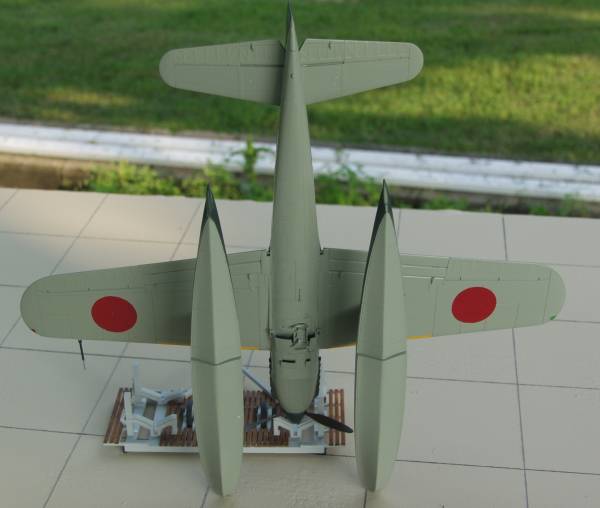
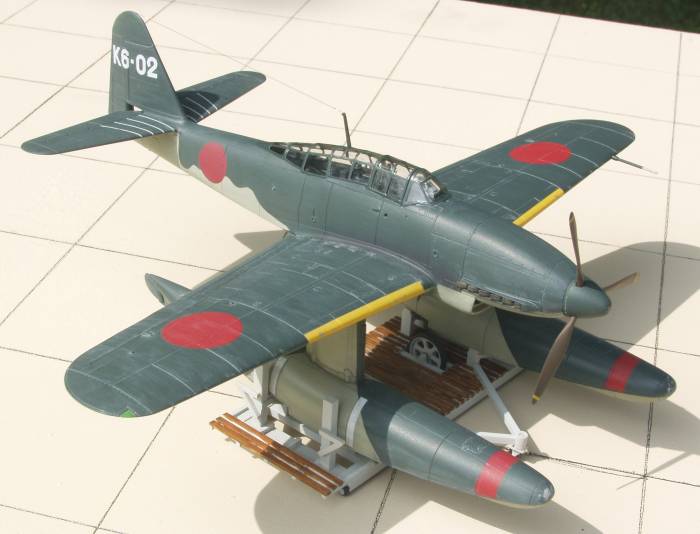
For my parting shot I'd like to say that this was probably the best fitting model aircraft I have ever had the pleasure to build and if it hadn't been for some stubborn decals would have been problem free.
Updated 8/26/08