
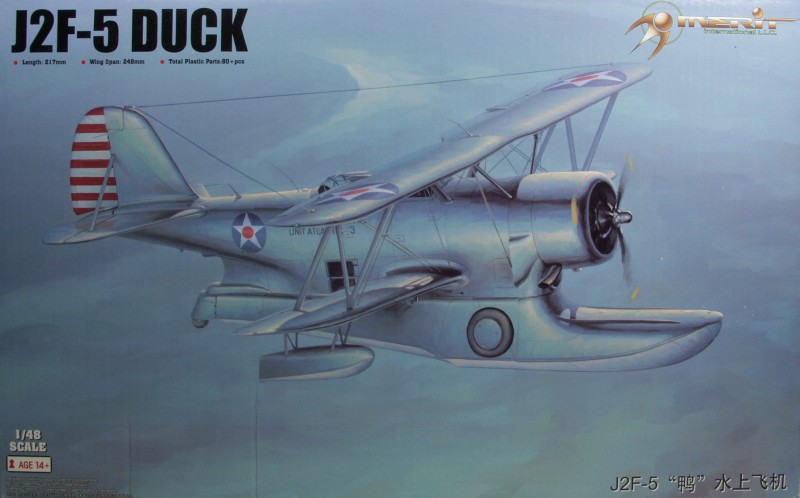
J2F-5 Duck
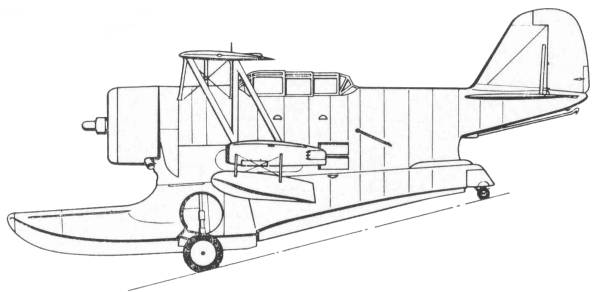
The Grumman company in late 1929 developed a practical aircraft float that included a retractable wheel undercarriage. First tested on the Chance Vought O2U-1 biplane, it was then used in a design to meet the U.S. Navy requirements under the designation XJF-1. First flown on May 4, 1933 the XJF-1 was an equal span, staggered wing single-bay biplane with a metal fuselage and fabric covered metal wings. Its single step float was faired into the fuselage and the wheels retracted into recesses in the sides of the float. Space was provided in the fairing between the float and fuselage for wireless and photographic equipment or for a stretcher. It was powered by a Pratt and Whitney R-1535-62 Wasp engine and the success of the initial trials resulted in an order from the Navy for twenty-seven production aircraft under the designation JF-1.
The JF-1 differed from the prototype in having an R-1830-62 engine rated at 950 hp. The first Navy unit to receive aircraft was VS-3 aboard the U.S.S. Lexington which received eighteen of them, using them for photographic, target tug, rescue and ambulance duties. Fourteen similar aircraft but powered by the Wright R-1820-102 Cyclone engine were supplied to the U.S. Coast Guard. under the designation JF-2. The U.S. Navy also acquired five Cyclone powered aircraft in 1935 as JF-3's.
As a successor to the JF series, Grumman evolved an improved version specifically for use from carriers and equipped with arrester gear and catapult points. Designated the J2F-1 and known popularly as the "Duck" the new model flew for the first time on June 25, 1935. Eighty-nine of this type were supplied to the Navy. The J2F-1 was powered by the R-1830-20 engine and weighed about one thousand pounds more than the JF-3 fully loaded. Tandem cockpits were provided for the pilot and observer and provision was made for accommodating two additional crew members in a lower compartment. The first armed version to be supplied to U.S. services was the J2F-2 with thirty delivered to the Marines. Twenty-one J2F-3's were supplied to the Navy with R-1820-36 engines featuring increased supercharging and thirty-nine J2F-4's for target towing duties followed in 1939-1940.
These completed production of the "Duck" until 1941 when orders were placed for a further 144 of the amphibians under the designation J2F-5. Several of these were diverted to the Coast Guard for air-sea rescue duties and one was delivered to the Air Force for evaluation as the OA-12. Grumman completed sixty-nine J2F-5's in 1941, delivering the remaining seventy-five in 1942 when production was transferred to the Columbia Aircraft Corporation. The Columbia built version designated J2F-6 featured some aerodynamic improvements including a long-chord cowling and production deliveries began in 1943 with thirteen aircraft, 198 being delivered in 1944 and 119 in 1945 before production was terminated. Total production of the "Duck" was 653 machines. In addition to the aforementioned tasks the J2F-6 could also serve as an anti-submarine patrol aircraft with two 325 pound depth bombs on under wing racks.
The Kit
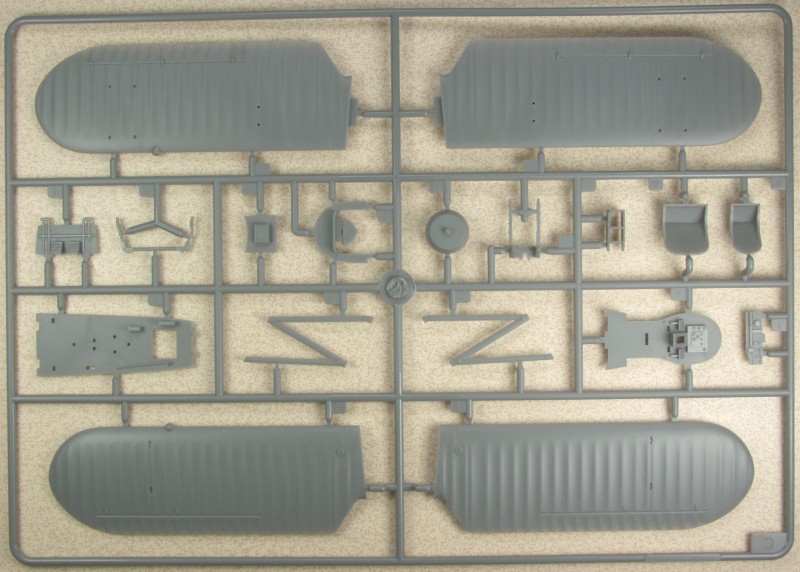
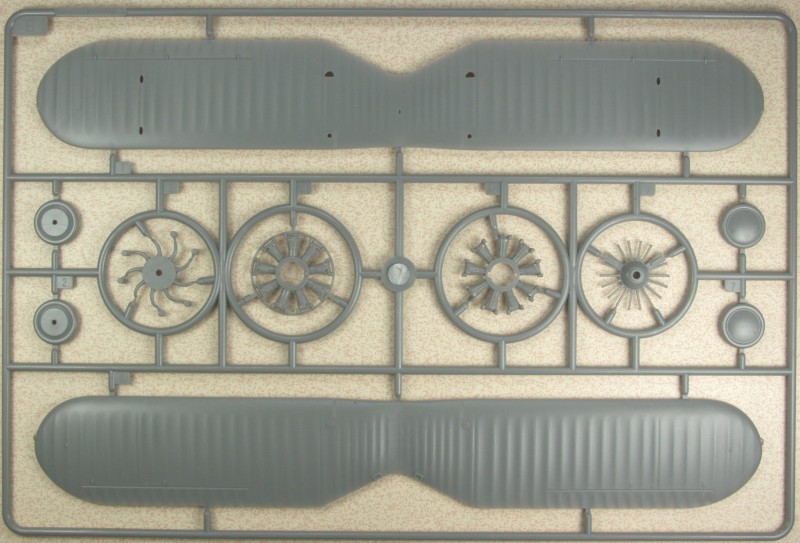
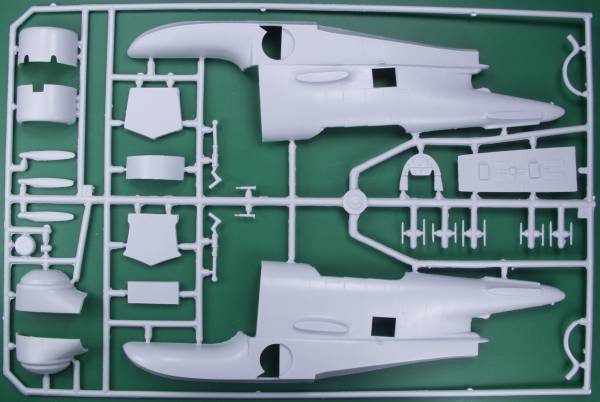
Merit has ties with Trumpeter and Hobbyboss and this kit looks very much like a Trumpeter kit. The Merit kit comes in a sturdy two part tray type box with both the top and bottom made from corrugated cardboard. The box has an inner divider that provides a space to house the cowling which is on a separate sprue and the clear parts. The cowl is bagged separately from the clear parts which also have some protective foam wrapped around the sprue. Extra points for some careful packaging. Each sprue is separately bagged and everything in my kit survived delivery intact. The kit is molded in a gray color and the surface detail consists of some really fine recessed panel lines and rivet and fastener detail. The fasteners are slightly larger than the rivets and both are nothing like what is seen on some Trumpeter kits. The surface is matte and smooth with little or no flash to be seen. The mold separation lines are a bit heavier than I would like to see but not much different than seen on other main stream kits. The cockpit detail is adequate and not a lot of it will be seen through the small opening. The engine looks pretty good with separate intake and exhaust manifolds and a casting for the front with push rods. Some ignition wiring will set this off and make it look more complete. There are a few ejector pin marks but I found none that will show. I also did not find any obvious surface flaws. The propeller is a single piece casting which is a nice relief from all the multi part props that kit makers seem to like to use to boost the parts count. OK, lets look at the parts.
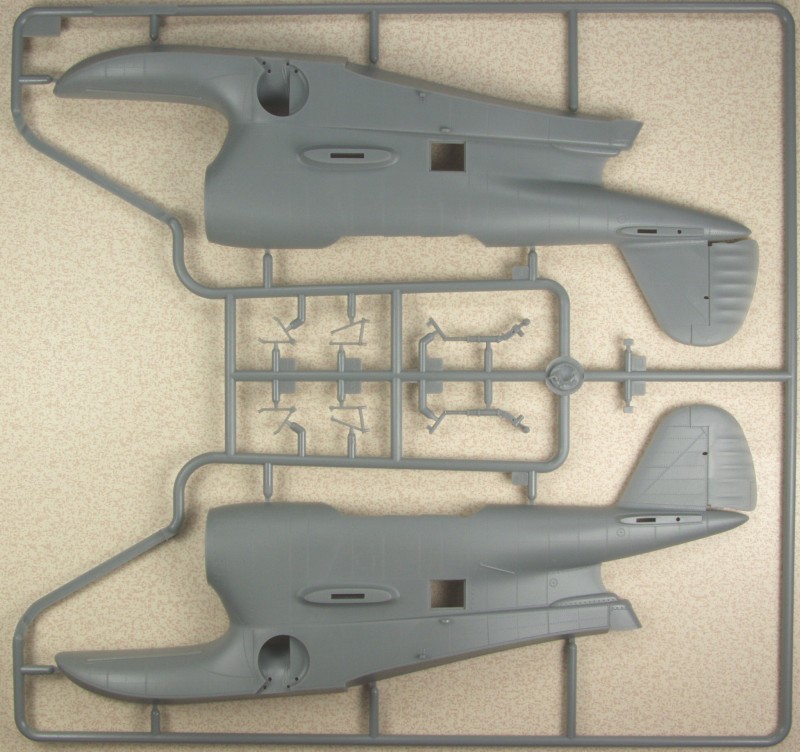
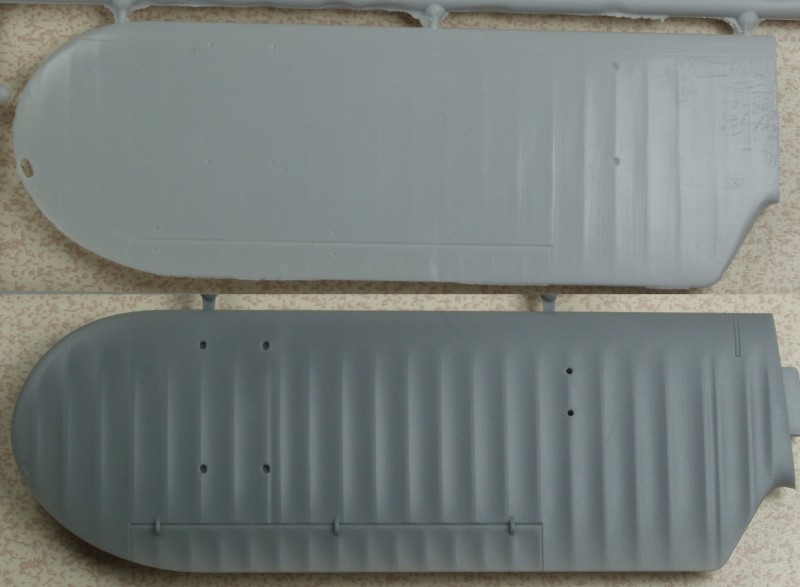
A bit closer shot to show the surface detail.

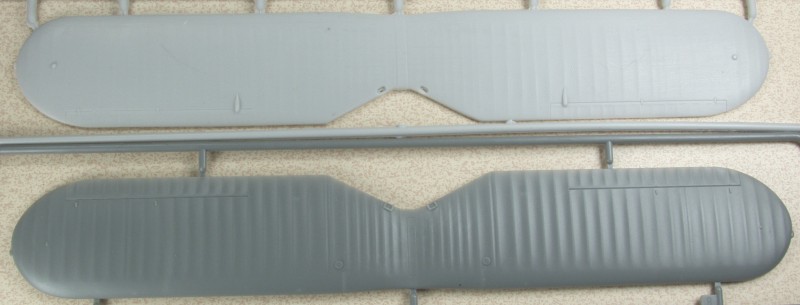
The fabric surfaces are a bit over done but not all that much different from many other kits these days.
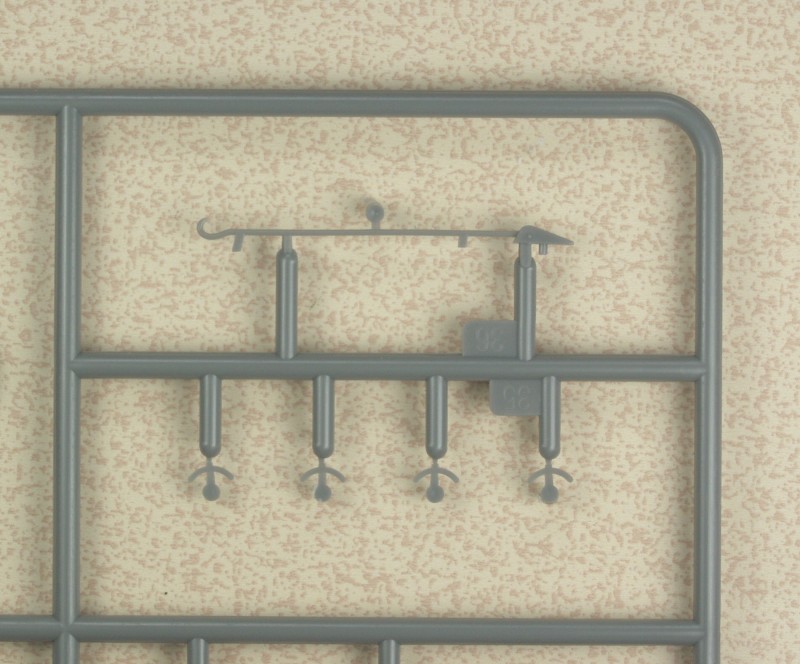
Note the protected area on this sprue, as seen in the next photo, it protects some delicate parts.
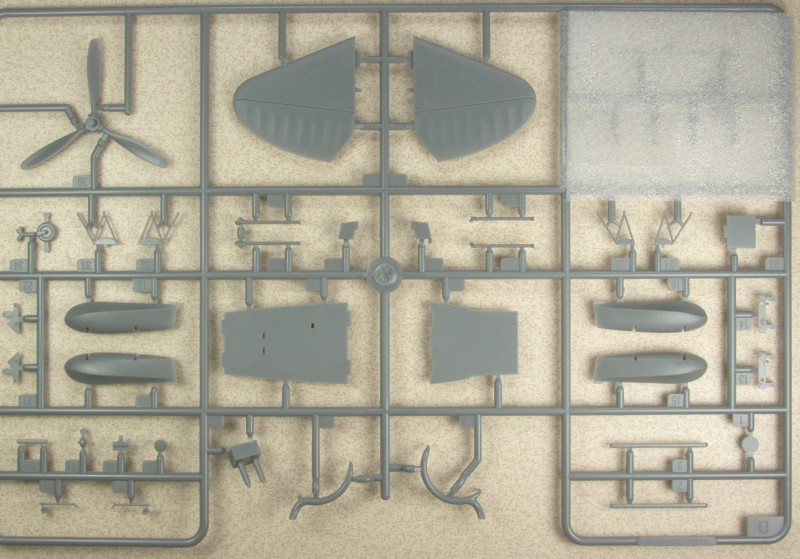
The cowling has its own sprue.

Clear Parts are thin and extremely clear and were also protected by a foam wrap.
![]()
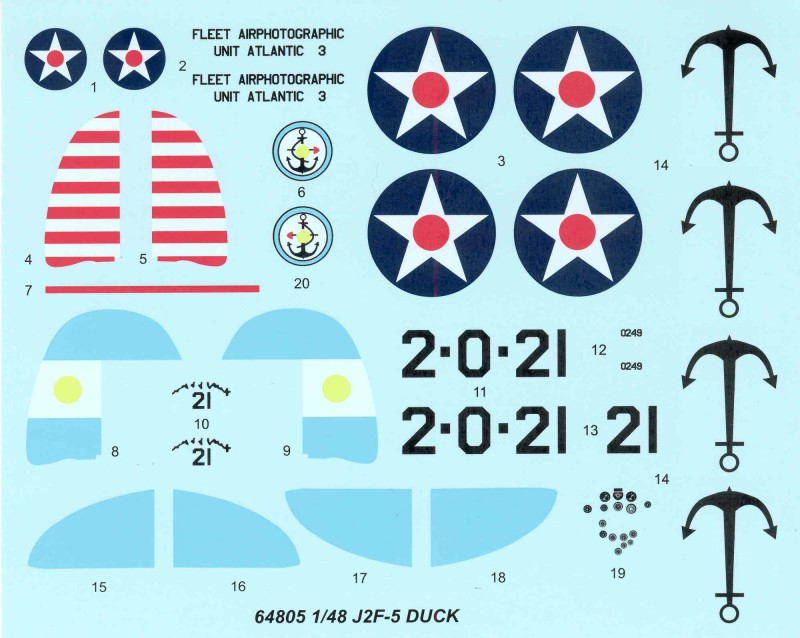
The decals look good on the sheet but it's hard to tell how opaque the light colored ones are. Registration is good but there is a bit more excess clear film than I like to see. The sheet provides markings for two aircraft. One for Fleet Airphotographic - Unit Atlantic 3 and the other for Argentine Naval Aviation
After Market Goodies
As often happens Eduard provides some photo etch. For me the Zoom sets provide just enough to jazz things up without going overboard.
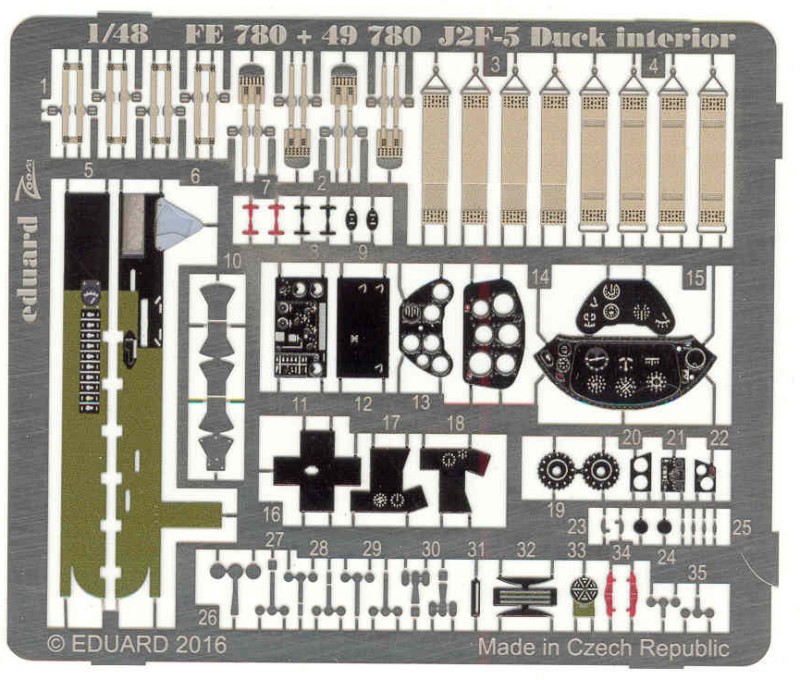
The Instructions are sheets folded into an A4 size and stapled and presented in a landscape format. Eight total pages. The front page has all of the usual warnings, decal instructions and an icon chart. Page two has a parts map. Pages three through eight are assembly diagrams in ten steps. There are color call outs but a lot of parts do not have them, so a reference would be handy. Painting and marking instructions are provided on a separate glossy sheet printed in color. There is a paint chart there as well with colors referenced to five manufacturers.
Before I get to my conclusions on this kit the $64 question is... Is this kit better than the Classic Airframes kit ? Well to some extent it comes down to different strokes for different folks. The CA kit was a limited run kit and predates the Merit kit which was just released recently. In terms of surface detail it's a mixed bag. The fuselage on the Merit kit has much finer surface detail including rivets and fasteners whereas the CA kit is primarily just panel lines. The fuselage on the CA kit has a separate forward section ahead of the cockpit and behind the engine as well as a separate vertical tail whereas the Merit kit fuselage has these parts molded integral. Fewer seams and fit issues to deal with. The fuselage break down of the CA kit can be seen in the next photo...
The fabric surfaces on the CA kit are much more subtle as seen below and look better to my eye and the same areas on the Merit kit are a bit over done, although that seems to be pretty common on main stream kits these days. A couple of detail differences can be seen as well. On the CA upper wing there are aileron actuators that are not on the Merit wing. On the CA wing the two hand hold openings are actually open . On the Merit wing they are there but need to be opened up.
Looking at the bottom side of these parts one notices that the Merit has nice large holes for the 'N' struts and the cabane struts, on the CA wing there are locating holes for the 'N' struts but only faint indicators for the locations of the cabane struts.
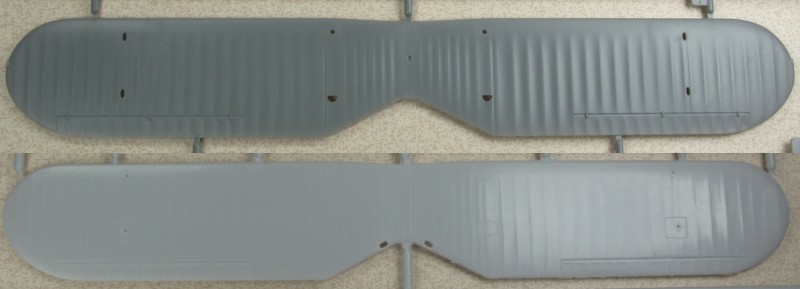
Looking at the lower wing there are some differences as well. CA molded in openings for the hand holds near the ends of the wings, Merit did not model these at all. The aileron is not as well indicated on the CA wing and the Merit wing shows wing hinges that the CA wing does not. Again the mounting holes for the wing float and the bomb rack are generous on the Merit wing and more like hints on the CA wing. If one wanted to use the CA wings on the Merit kit the main issue would be on the bottom wings where the wings meet the fuselage. The CA wings are square cut whereas the Merit wings have an angled mating surface. One would need to do a dry if to see if the airfoil of the CA kit would match the mating surface on the Merit kit. I did not want to remove the wings from the sprues of the CA kit in case I decided to sell it.
If the over done fabric areas bother you that much I think the CA wings could be substituted assuming you have the CA kit collecting dust in your stash or find one for a bargain price. It would require some work on the bottom wings and you would either need to enlarge all of the strut holes to use the Merit struts or use the CA struts which will require a lot more clean up and guess work when it comes to the cabane struts. Plus you would need to deal with the differences in the wing to fuselage mounting of the lower wing. All of which depends on the level of pain you want endure. The CA kit does provide some rigging instructions although not complete. On the Merit kit all you have to go with is what is on the box top.
Many of the molded smaller parts on the CA kit are not as crisply molded and will require more clean up than those on the Merit kit. The CA kit has most of the interior detail parts plus the engine in resin. Some parts are obviously better represented in resin but to me the engine does not look any better than the one in the Merit kit, plus you need to remove most of the resin parts from pour blocks and clean them up. Much of the benefit of the finer molded resin parts is lost as it will be difficult to see them through the small cockpit opening.
The CA kit is out of production but still available on ebay and other places. I found the Merit kit to be a bit hard to find as most of my usual sources showed them as out of stock, I ended up getting mine from a dealer on Amazon.
Since I have not yet built either of these kits I can't say for certain but based on other CA kits I have built, I'll wager that the Merit kit will be better fitting and an easier build. I suspect either will build into a nice representation of a Duck but I'm going to go with the Merit kit. I can live with the slightly over done fabric areas as a trade off for an easier simpler build.
Links to kit build or reviews
At this time few reviews are available but some can be found through links from here.
References
"Warplanes of the Second World War Volume Six-Floatplanes" by William Green
Updated 11/21/16