
H8K2 Emily
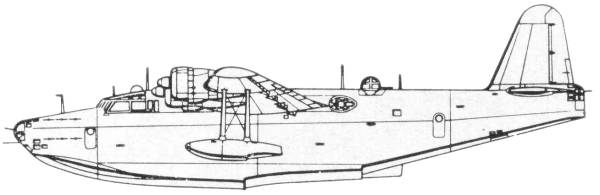
The Kawanishi Type 2 flying boat was probably one of the finest Japanese warplanes to see operational service during WWII. It was the fastest flying boat to serve with any of the combatants and its hydrodynamic qualities were superior to those of the British, American or German contemporaries. It was also well armored and carried a heavy defensive armament and was treated with respect by Allied fighter pilots. Designed as a replacement for the Type 97, it was developed to meet a 13-Shi specification that required a thirty percent increase in speed and a fifty percent greater range as well as greater maneuverability. The prototype, designated H8K1 was completed in December of 1940. It was powered by four 1,530 h.p. radial engines and had provisions for a defensive armament of five 20 mm. cannons and three 7.7 mm. machine guns. Initial water handling problems lead to a series of modifications and the second and third prototypes seeing additional modifications as well until handling was brought to an acceptable standard. The H8K1 made its operational debut with a night attack on Oahu Island in March of 1942. Unfortunately for the three boats participating in the raid the island was obscured by clouds and the attack was aborted. The eighteenth Type 2 Flying Boat was fitted with 1,850 h.p. engines as the first H8K2. This model was equipped with 5 20 mm. cannons and one 7.7 mm. machine guns and had a top speed of 290 m.p.h. It had fully protected fuel tanks, effective armor protection for the crew members and surface search radar. By the end of the war a total of 167 Type 2 Flying Boats had been produced.
The Kit
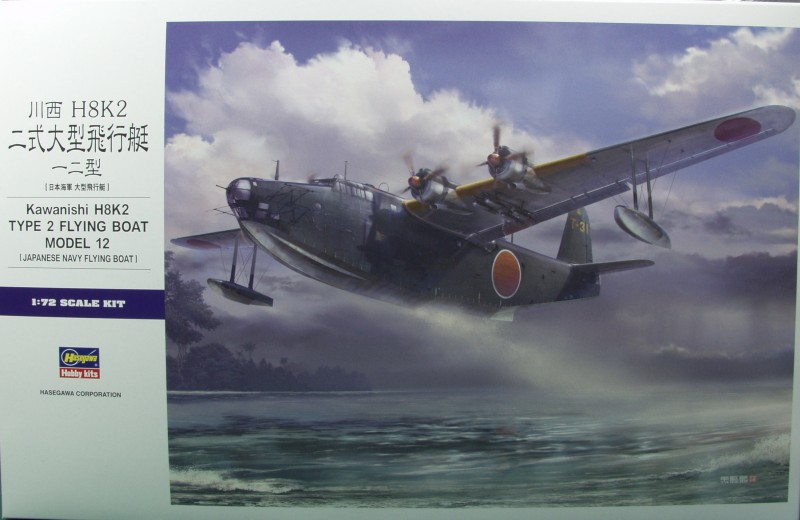
Hasegawa released its first kit of the Emily back in 1967. It was pretty crude by today's standards and was festooned with rivets that even back then were considered the size of grapefruit. Fast forward 50 years and Hasegawa has finally released a new tool kit of this aircraft so lets take a look. The kit comes in a large box with Hasegawa's very nice art work on the top. The box is huge for a 1/72 kit but this is a large aircraft and the parts pretty well fill the box. The box is a top open tray type with a corrugated bottom half and a thinner top half. Inside the box There are two large plastic bags with several sprues in each one. I really hate to see this especially on kits with large parts like this one. A smaller cellophane bag contains two sprues of clear parts separated by a piece of paper, four polycaps and a sheet of precut masks for the clear parts. The large decal sheet was packed in the bottom of the box with the instruction booklet.
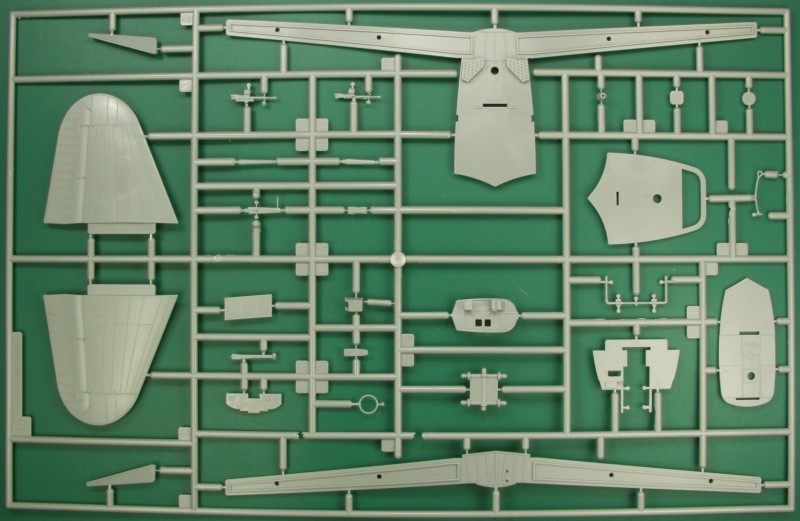
Opening the first large bag one finds five sprues, one with the fuselage (hull) halves, one with the upper wing and tail halves, one with the lower wing and tail halves and the other two have mostly interior parts, wing spars, bulkheads, floors instrument panel and the vertical tail. Inside the other large bag are six smaller sprues, the first two are duplicates except one has an extension on it that contains the nose section of the fuselage. The balance of the two contain a variety of parts including the wing floats and struts, a torpedo, under wing racks and some miscellaneous other parts. The remaining four sprues are also duplicates and primarily contain the engines, cowls, propellers and other parts pertaining to the engines as well as bombs, some internal parts and four crew figures, each with separate arms and heads, three seated and one standing. Quite a full box of parts, a total of 283 according to the box. Due to the packaging arrangement a few of the smaller parts were loose in the bag and I hope I didn't lose any removing the sprues from the bag.
The parts are molded in light gray and the surface on most parts is smooth but not glossy. Surface detail is rendered with recessed panel lines with a few recessed rivets here and there. Fabric detail is rendered very subtle and has a matte finish to it, almost as if it were blasted with a very fine grit. I don't think this will show all that well through paint but it may provide a bit of texture difference between the metal and fabric areas. This not only includes the control surfaces but the trailing edge of the wing outboard of the engines. The panel lines are a little heavier than I would like but not as bad as the trenches seen on some of the recent Italere and Airfix 1/72 kits. The control surfaces are all molded in the neutral position. I did not find any molding anomaly's on the air frame parts in my kit but there was plenty of light scuffing on some of the parts due to the parts shifting in shipment. Nothing that some light buffing shouldn't cure. The parts were all but flash free. The balance of my comments on the parts will be made as we go through the sprue photos.
The first sprue shown contains the fuselage (hull) halves. I don't know if it was a size issue or the need to use a different nose for a different version that drove the choice to divide the fuselage this way. Not shown on the back side the area above the floor features structure detail and is unfortunately covered with a lot of injector pin marks, most down between the structure. Fortunately they are all pretty light and except for a half dozen in each fuselage half in the cockpit area, the balance will be difficult to see. Also not shown well in the photo is some raise panel line detail on the planing surface of the hull. I'm not sure why but maybe to represent some sort of sealing used in that area.

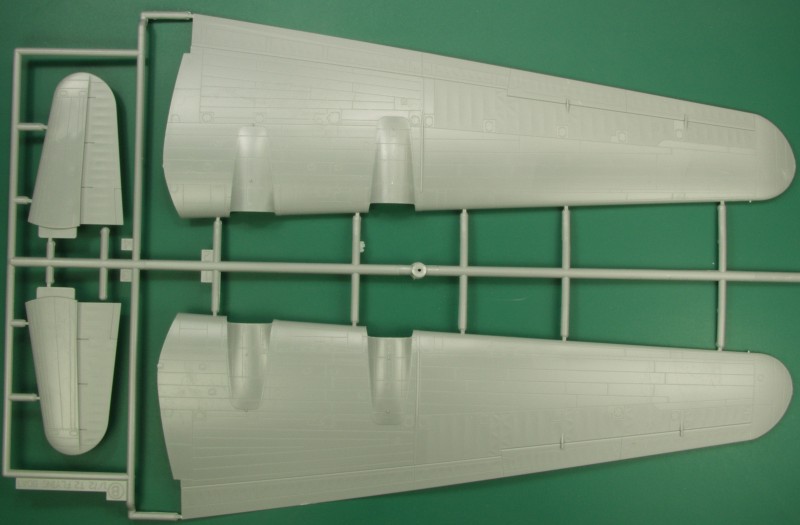
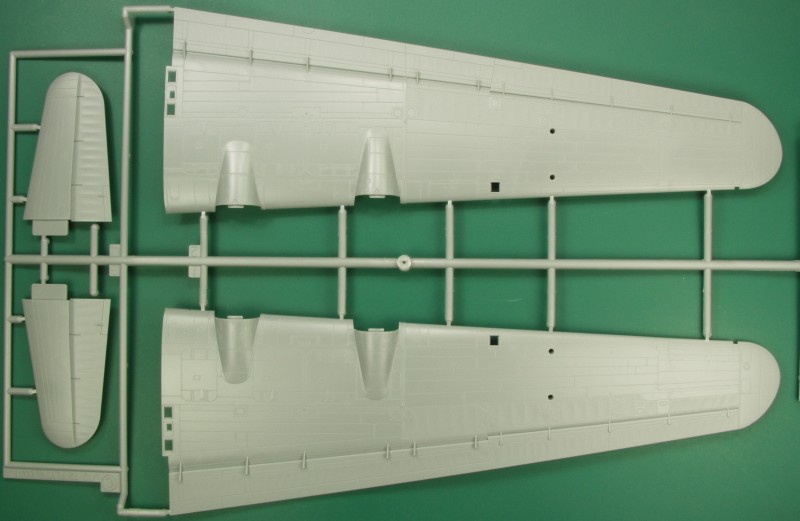
The surface detail on the wings and tail were noted earlier. The demarcation of the control surfaces is nicely done.
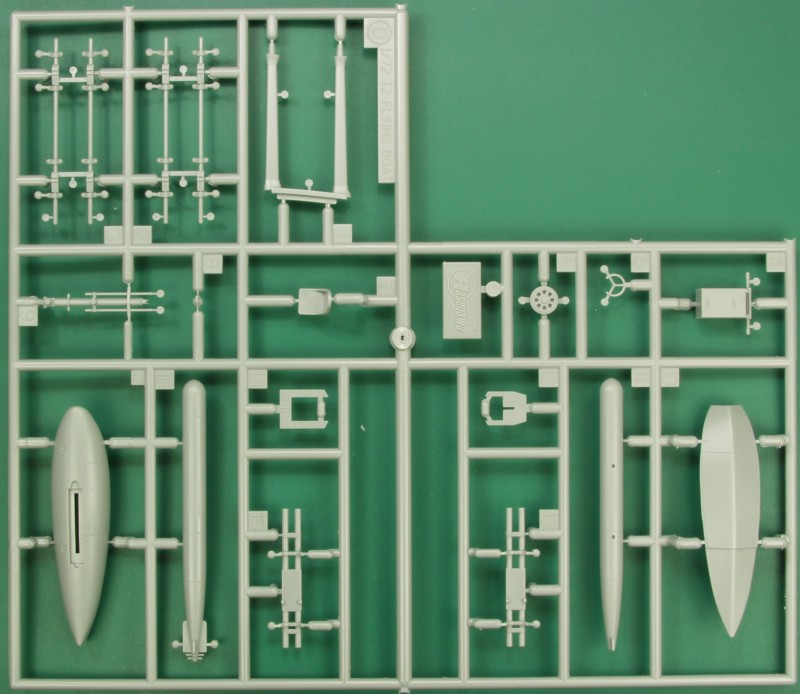
The next sprue contains the two wing spars which are quite substantial and slide into slots on the inner sides of the wing. These combined with the way the wings key into the fuselage should insure a solid wing joint and correct dihedral. Besides internal bulkheads the sprue also contains the vertical tail, the instrument panel, DF loop, two guns and some other interior parts.
The last sprue from the first bag contains the interior floors, some interior parts, turret parts and the chines that attach to the planing surfaces on the bottom of the hull.
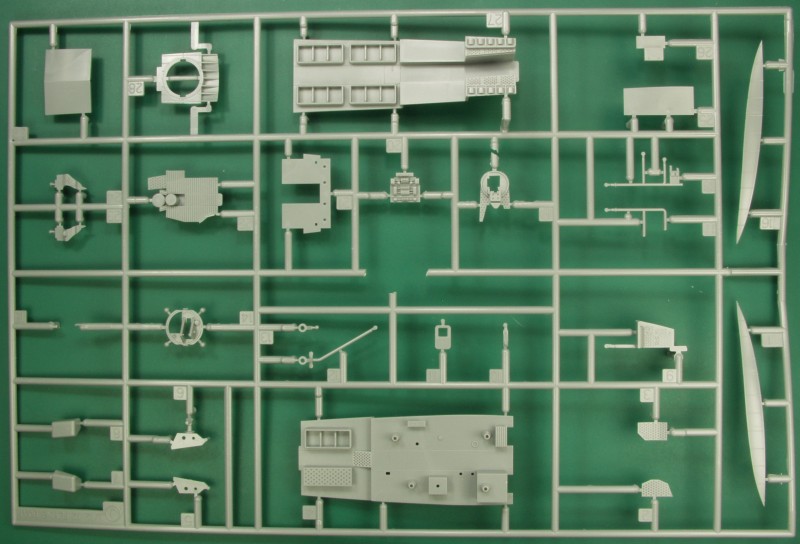
Starting with the second bag, the first two are identical except for the addition on the first one below which contains the forward section of the fuselage. Like the main fuselage this section has structure molded inside along with the pesky ejection pin marks. Again however except for those in close proximity to the clear part of the nose none of them will be easy to see. Also included on this one are torpedo halves, top and bottom parts of the floats, float struts, control wheels, antennas, bomb racks and parts for the beaching gear.
Same as above only without the nose parts.
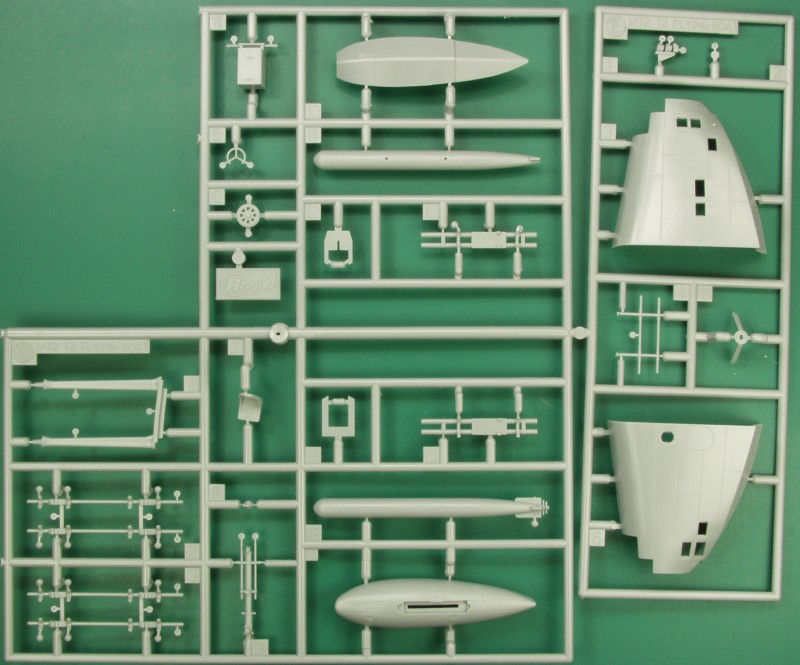
There are four identical sprues of the one shown next. Primary parts are for the engines, front and rear banks of cylinders, separate crankcase,exhaust manifold and two parts that the engine mounts onto and the cowling itself. The engines look OK for the scale and have push rods molded on. Also on this sprue are bombs, some interior seats, more beaching gear parts and four figures with separate arms and heads and one gun. The figures are actually quite nice for the scale, not like the globs you get with some kits. There are three different sitting poses and one standing. Since according to the instructions you only need 11 of them you have five spares to play with, all you need is the patience and skill to assemble and paint them up.

The clear parts are a mixed bag of sorts. The main canopy was a bit thicker than I would have liked to see on a state of the art kit and not all that clear either. The smaller pieces seemed a bit thinner but not all that much clearer. I hope a dunk in Future will improve them some.
![]()
![]()
![]()
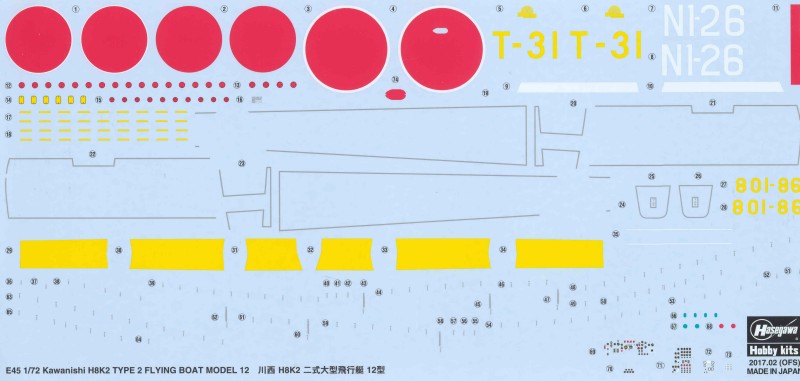
The decals come on one large sheet and have a matte finish. my sheet had numerous creases in them from parts shifting around on top of them even though the parts were bagged. The decals are in register and appear opaque on the sheet. The sheet provides marking for two aircraft and includes a lot markings for fuel fillers, station markings, wing walks and yellow ID markings. The wing walks are on huge sheets of clear film and the station marking which run the length of the bottom of the hull are on one long strip. Unless you have better luck with decals than I do I would cut these out separately, at least on the wing walk markings. Decals are also supplied for the instrument panel and engineers station. A lot will depend on just how well these behave when installed. I have had mixed results with Hasegawa decals in the past.
The Instructions consist of an A4 sized booklet 16 pages long and stapled at the seam. The front page has history and specifications in Japanese and English. Page 2 has a parts map and color chart giving Gunze numbers and generic color names. Pages 3 - 12 are assembly diagrams in 28 steps. At the top of page 3 is an icon chart. In a somewhat different way than the norm assembly begins with the engines and wings before proceeding to the internal fuselage parts. Pages 13 - 15 are the painting and marking instructions, and the back page has generic decal applying methods and the usual safety warnings. The assembly drawings are large and not cluttered and should be easy to follow. Some holes must be opened for different options and some of the color call outs require mixing of multiple colors.
After Market Goodies
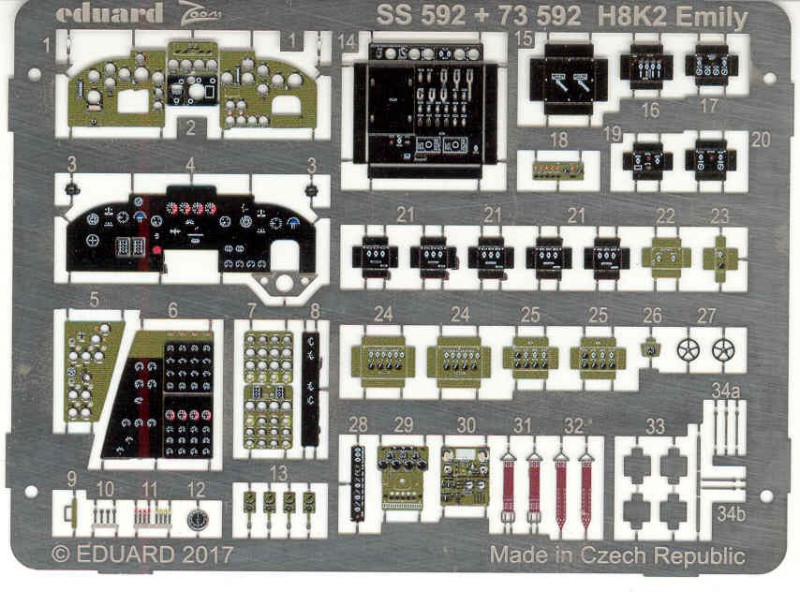
I didn't see a need for much on this kit but bought the Zoom set from Eduard anyway. Most should be visible through the cockpit canopy. I guess only the pilot and copilot rate seat belts.
Links to kit build or reviews
None found at the time of this review.
References
Warplanes of the Second World War, Volume Five, Flying Boats by William Green
Updated 12/10/17