
Ju 290A-5

The Junkers Ju 290's history is convoluted having started out as the Ju 89, an entry in the Ural bomber program, which when canceled was morphed into the Ju 90 using the Ju 89 wings and tail and replacing the original bomber fuselage with a transport style fuselage. The Ju 90 went through a period of gestation in which the wings were redone, the vertical tails were enlarged, more powerful engines were installed, the fuselage lengthened and a hydraulic loading ramp installed in the rear portion of the fuselage. With all of these changes the designation was changed to the Ju 290. As these changes were taking place a variety of defensive armament was also added to the air frame. The first production A-0 aircraft was completed in October of 1942. This, a second A-0 aircraft and five A-1's were completed as transports and armed similar to the V8 aircraft. These were rushed into service flying supplies to Stalingrad. Most of these aircraft were lost or heavily damaged in this operation.
The decision to convert the 290 to that of a maritime role resulted in a demand from the Fliegerfuhrer Atlantik for a replacement for the Focke-Wulf Condor which was proving too vulnerable in this role. The Ju 290A-2 was a straightforward adaptation of the A-1 apart from an increase in navigation equipment, the provision for a second turret mounting a 20-mm MG 151 and large capacity fuel tanks in the fuselage. The first A-2 was completed in the summer of 1943 and two similar aircraft were delivered in July. These were followed by three A-3's which were similar except for using a low drag rear turret and modified rear gunners position. An additional three were built with more powerful engines. Five A-4's that followed these differed only in having the low drag turret used in both positions.
The A-5 version was the result of recommendations for heavier defensive armament, increased protection for the pilot and co-pilot, and facilities for fuel dumping in an emergency. The A-5 was equipped with improved protection for the fuel tanks, heavy gage armor for the pilot and co-pilot and the aft lateral gun positions were aerodynamically improved and the guns were upgraded to 20-mm Mg 151's. The crew compliment was increased from seven to nine. A total of 11 A-5 aircraft were built.
The Kit

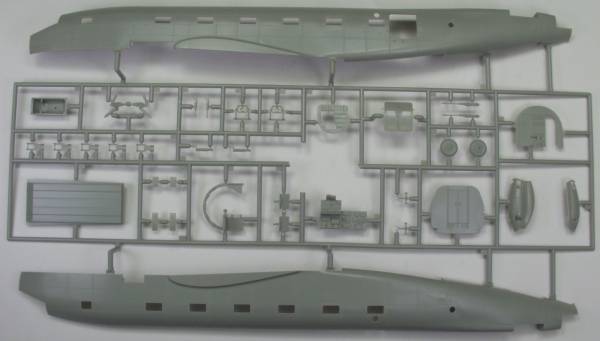
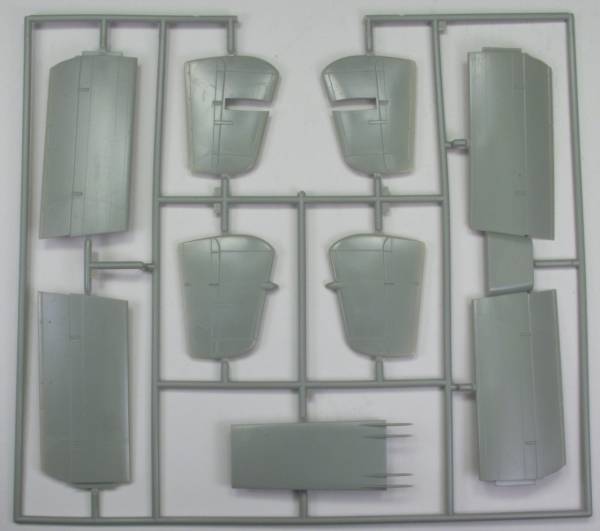
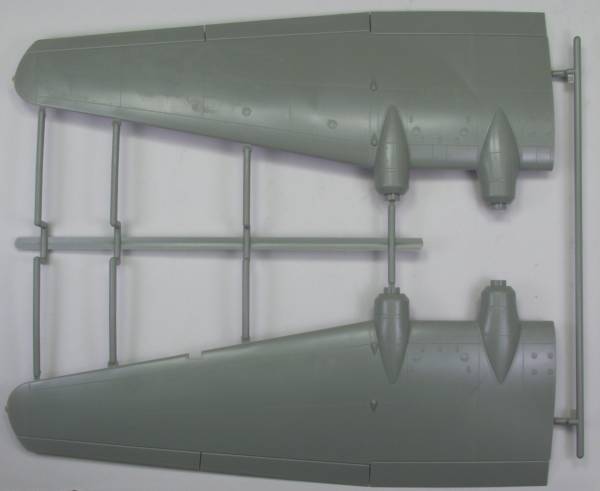
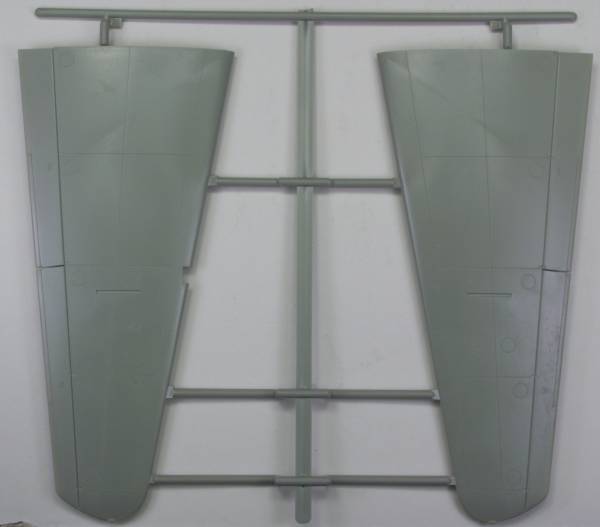
The Revell kit comes in a large and rather flimsy end flap opening box with a rather nice rendition of the Ju 290 on the front. Inside the box is one large bag containing all the sprues with an inner bag that contains the clear parts. The decals in my kit were tossed in with the rest of the parts and suffered because of this, see comments concerning decals. Not the best packaging I've seen but everything was pretty much intact, no parts off sprues but there was scuffing on some of the parts from shipping. The parts are molded in a light grayish green very similar to RLM 02 in color. The parts are cleanly molded with virtually no flash and feature recessed panel lines which are uniform if perhaps a bit large for the scale but not enough to distract from the appearance. I found no sink marks on the air frame surfaces and only one or two ejector pin marks that may be an issue. A nice touch is an open slot between the flaps and ailerons and flaps on the wings. The control surfaces are all molded in the neutral position. One thing I didn't like was the sprue attachment points which are all quite large and heavy for a 1/72 scale model. I have seen smaller attachment points on 1/32 scale models. Care needs to be taken when removing parts from the sprues and in some cases sawing them free might be an option to sprue cutters.
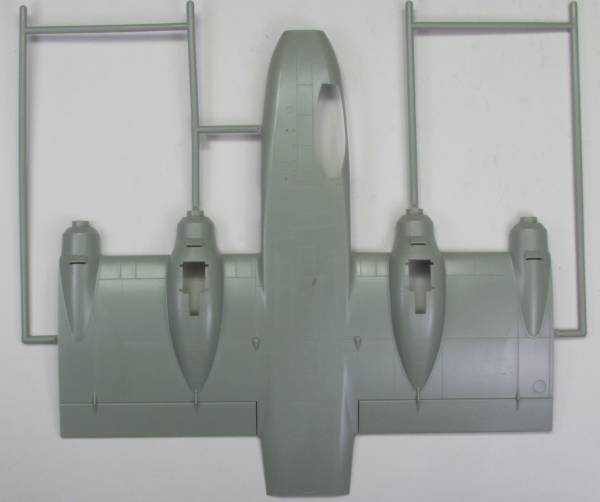
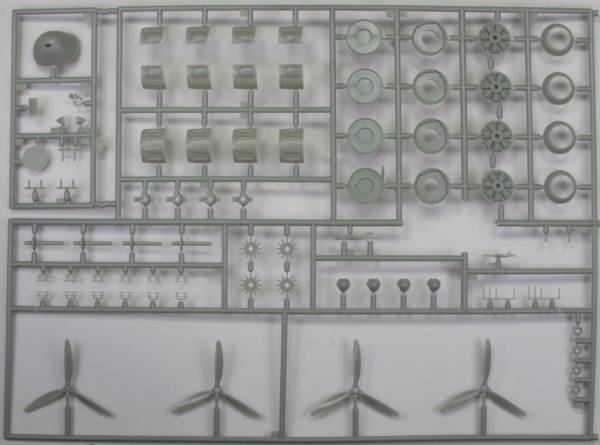
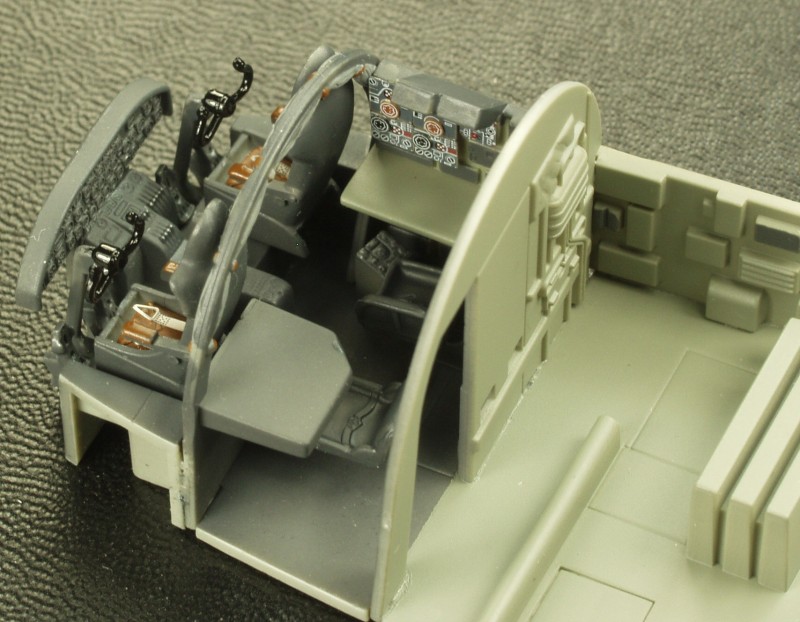
The cockpit is reasonably well detailed for the scale with rudder pedals, control columns, a nicely molded instrument panel with instrument detail molded into it. The pilot seats are a bit strange being split down the middle. The seat cushions have belts molded in but no harnesses are supplied. There are bulkheads to divide the forward fuselage area into the various areas for the radio operator and other crew positions. The floor extends all the way to the rear of the fuselage but except for some fuselage structure opposite the rear side door and the weapons positions there is little other detail. The upper deck of the fuselage is molded separate so it can be removed to view the detail that otherwise won't be seen much once the fuselage is closed up. The rear ramp is separate and can be installed either open or closed. The gear bays are enclosed but there is no detail to see. The landing gear itself is nicely done and the wheels have separate hubs for easy painting. The tires are not weighted. The engines are a bit one dimensional but once in the close fitting cowlings with a fan in front of them they won't be very visible anyway. Parting line flash is minimal. The bottom wing center section is molded integral with part of the fuselage making the wings a five piece affair that should provide a solid structure when glued up. The radar antenna are typically too large for the scale and delicate as well and might be best replaced with some scratch built antenna from fine wire if you have the patience. By my count there are 225 gray parts. See photos below.

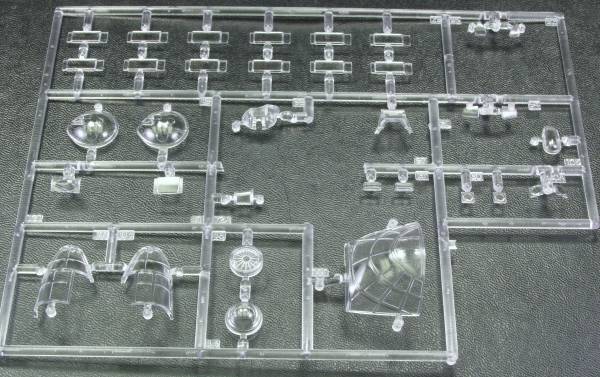
The clear parts are nice and clear with a few showing some stress marks from the molding process. I suspect these will disappear when coated with Future. The cabin glazings are separate rather than in a continuous strip as often seen which will be helpful if you plan on doing any additional detailing in there. There are 35 clear parts for a kit total of 260 parts. See photo below.
The decals are thin and well registered and include markings for four aircraft, not bad considering only 11 of this variant were built. A fair amount of stenciling is included as well as decals for the instrument panel, intended as an overlay and fronts for some of the radio equipment. There are even readable BMW logos for the engine cowlings. A decal is supplied for the instrument panel but the instruments on the decal do not correspond to the instruments on the panel which is a bit odd but in this scale it probably won't be that noticeable. The bad news it that the sheet was pack in the bag with the rest of the parts and had creases and some of the decals had chips of paint missing. While they looked nice on the sheet, see my comments in the build section for my experience with these. See photo below.

The instructions are contained in a 24 page booklet. The first page is history and specifications, page two contains general instruction in eighteen languages, page three is a symbol chart and safety notices, page 4 is paint colors with Revell numbers only and color names in eighteen languages, page 5 and half of six are parts maps and from that point through page 17 is assembly instructions. Pages 18 through 21 are painting and decal placement and pages 22-24 are blank. While the parts are all numbered and there is a parts map I found it a bit annoying that all to often parts that go together while consecutively numbered are on different sprues and the sprues themselves have no identifying letters on them. This results in a lot of hunting for parts.
After Market Goodies
Very little is available except an Eduard set for external parts and antennas and a mask set.. Actually very little is needed, for its scale it is very well detailed.
Conclusions
This
is
a very nice kit, well detailed and well engineered and except
for the parts count should be doable by modelers of most skill
levels.
It might be a bit intense for a beginner.
Links to kit build or reviews
Another in box review can be found here.
References
"Monogram Close-Up # 3 Junkers 290" by Thomas Hitchcock
"Warplanes of the Third Reich" by William Green
Back to Miscellaneous 1/72 page
The Build
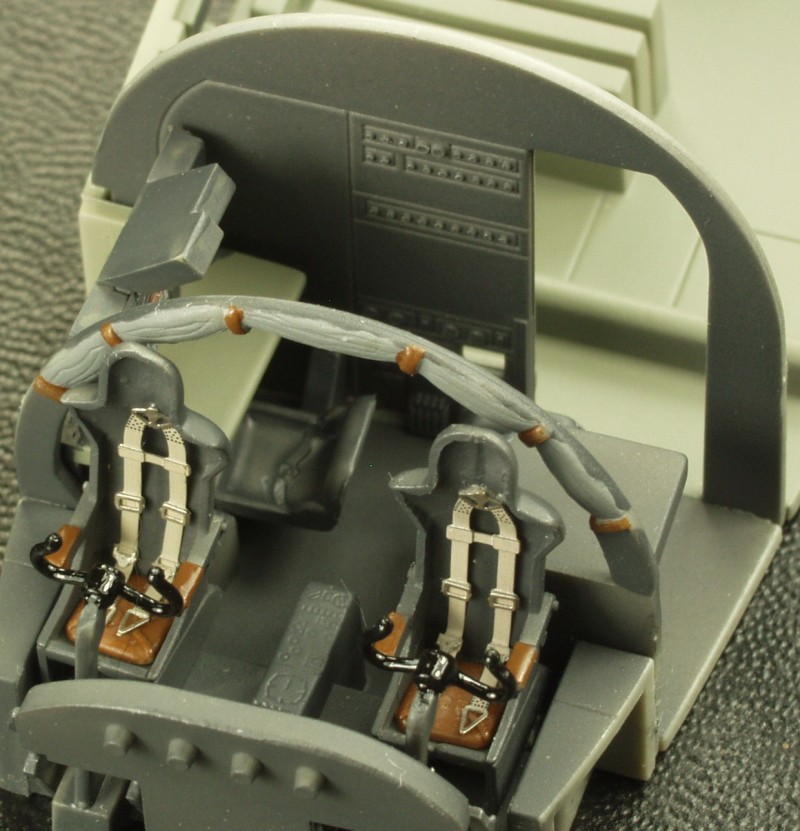
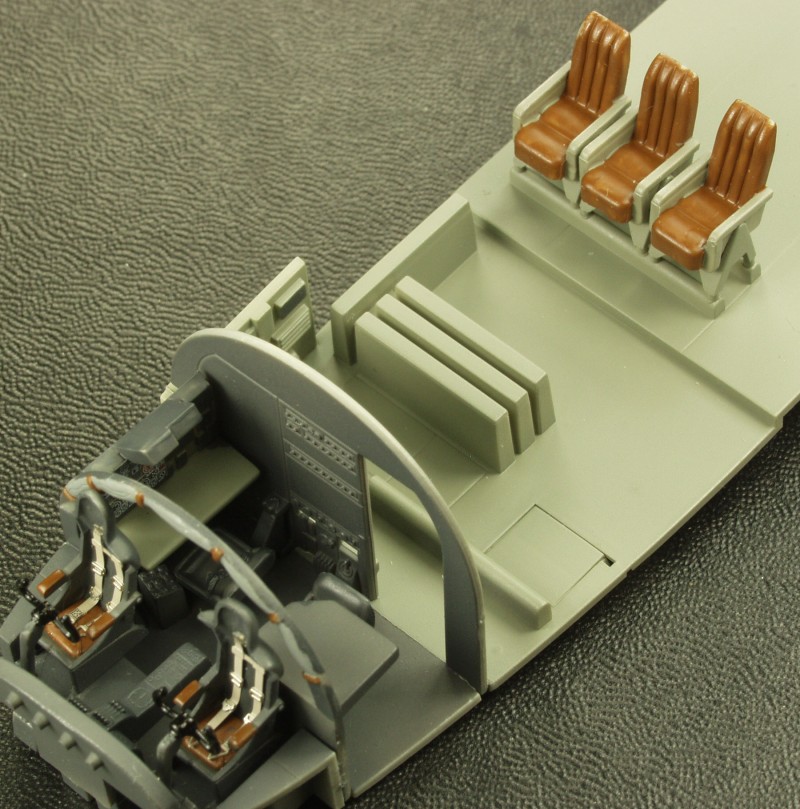
Like most aircraft things start off with the interior. Because little of it will be seen I didn't go too crazy with the interior, No photo etch was available and the instrument panel is pretty much hidden so I didn't spend any effort on it. I did add belts and harnesses to the seats and had some PE radios from a generic set that were added to the radio operators position...

The fuselage halves were joined, the fit was quite good with only a minimal amount of filler used, at this point the tail pieces are just press fit in place...
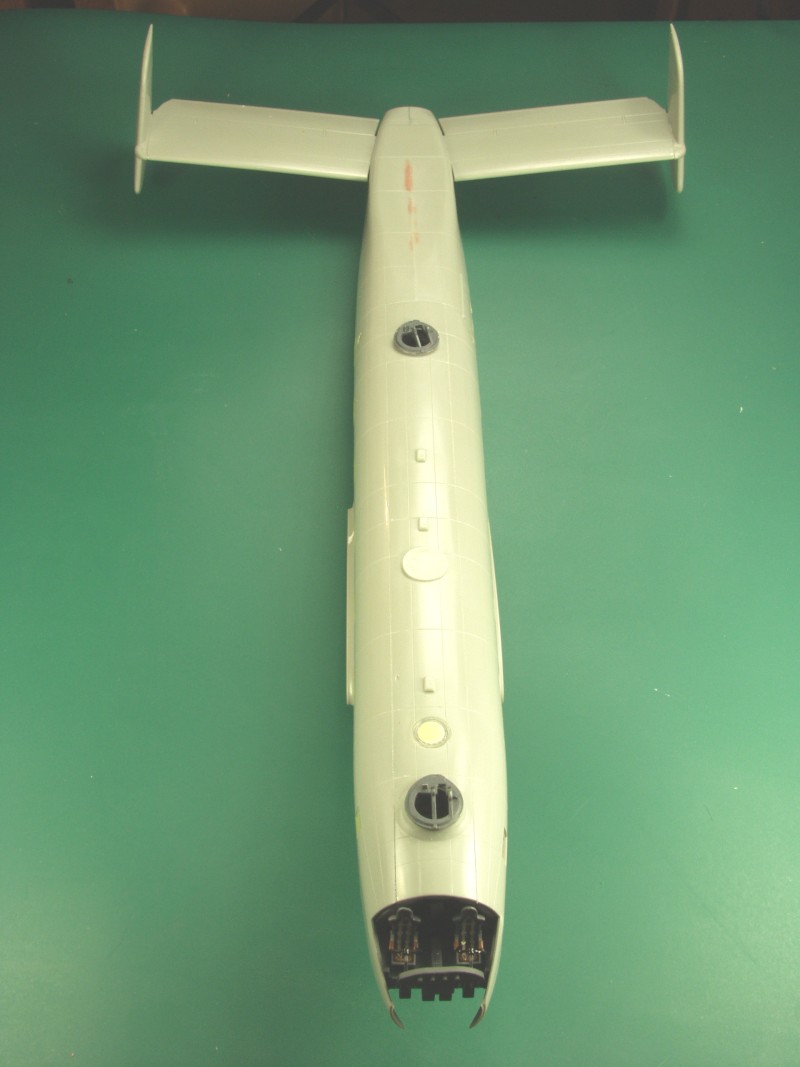
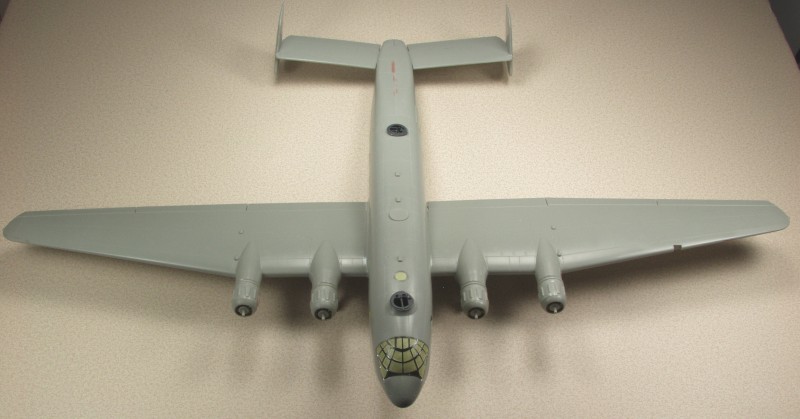
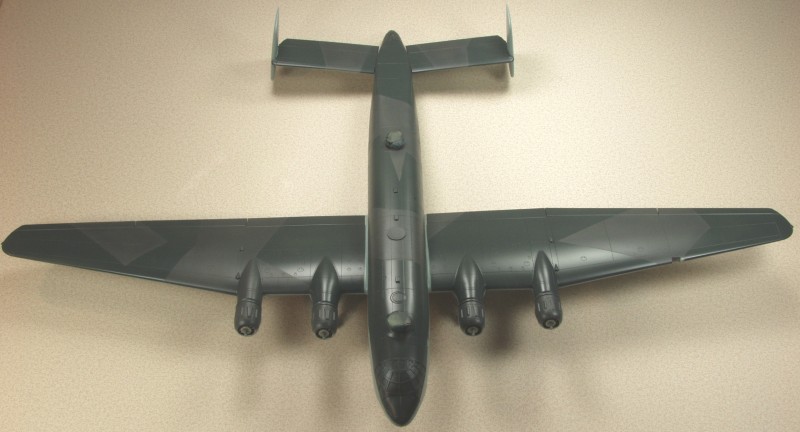
The wings and engines have been attached. So far the only fit issues were the 3 part engine covers which were a bit fiddly but they weren't all that bad to deal with. Just need to add the rudders, do some masking and a little touch up sanding and we'll be ready for paint.
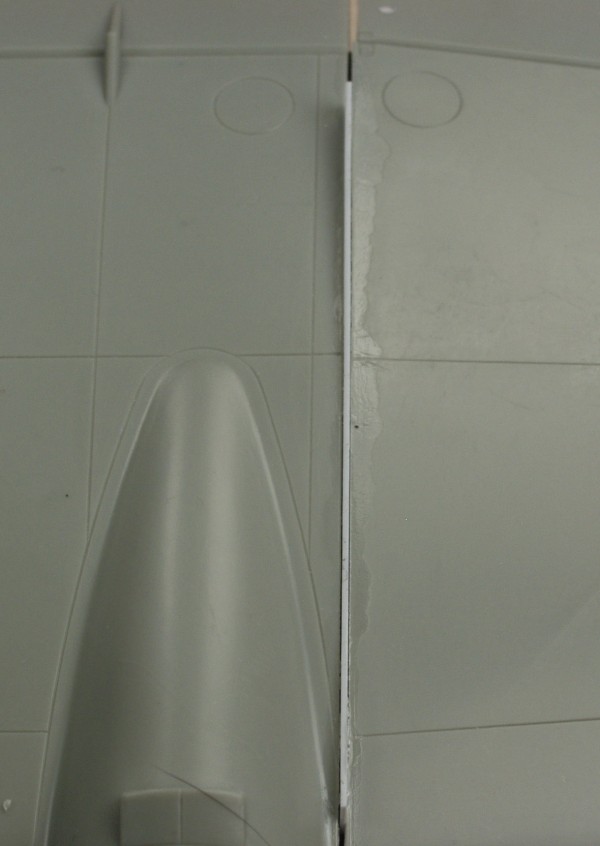
While setting up to photograph this I noticed the starboard wing looked lower than the port. I don't always trust the Mark II eyeball so I broke out my height gage. sure enough the starboard wing was over 1/4" lower...
Port Starboard
However when I checked at the outboard engines I found them to be spot on...
Port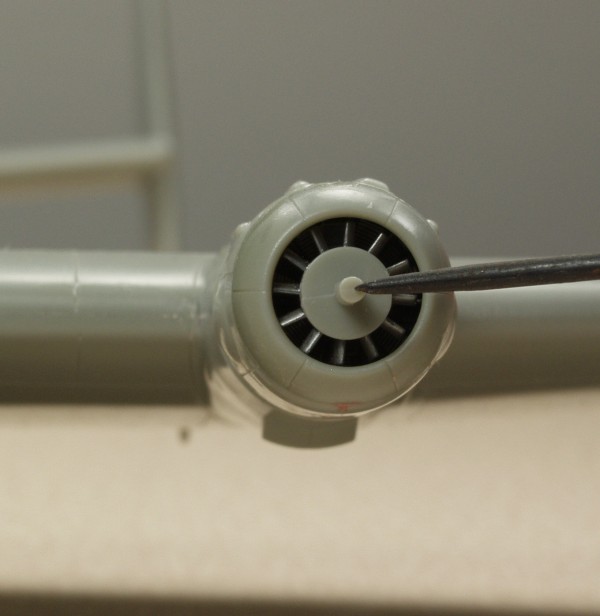 Starboard
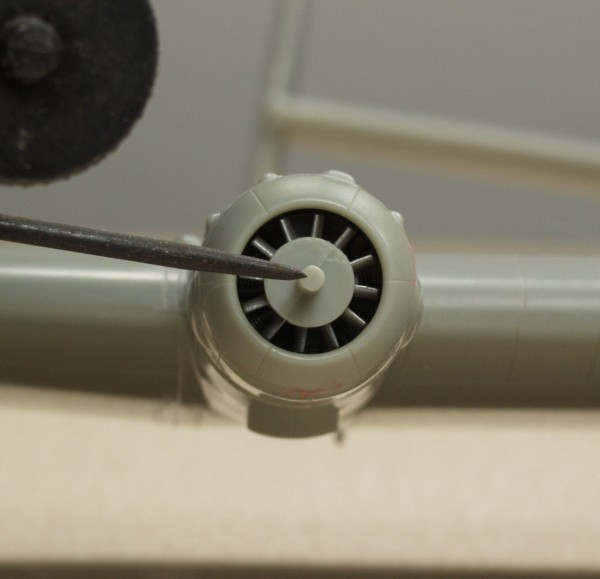
The outboard wing joints on the bottom were both tight. I held my breath, put pressure on the top of the wing over the joint and gradually pulled up on the starboard wing. With a resounding pop the bottom joint opened up very cleanly.. I found by trial and error that a strip of .015 styrene in the joint brought the wing up to within an eyelash of the port wing...
Oddly enough the starboard wing now appears to have slightly more dihedral so I'm assuming the port wing must have a bow to it that starts out gradual and increases towards the tip. In any event it is not that noticeable compared to having one wing over 1/4" lower.
With that taken care of the painting was done, I used WEM colorcoats RLM 72 and 73 on the top and Model Master RLM 65 on the sides and bottom. Some minor touch ups to do and a couple days for the paint to cure then on to clear coat. The beast ate up a lot of masking tape and a lot of paint as well and was challenging to handle during the painting process.
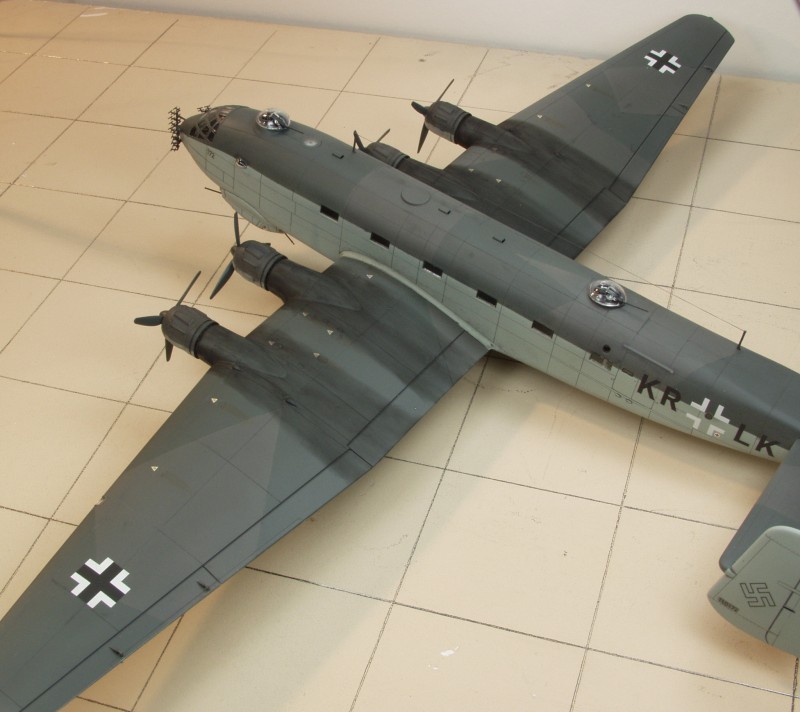
After the clear coat had been applied and allowed to cure the decals were applied. The Revell decals have a matte finish and always give me fits with silvering which meant that this portion of the build has been anything but enjoyable. The upper wing crosses from the kit sheet were unusable so I replaced them with some Eaglecals, which normally work well for me but these wrinkled up when I applied setting solution and would not lay flat regardless of solution used so they were stripped off and replaced with some Techmods which worked great. The under wing markings went on OK but will need to be touched up as they had some chips on them. The decals supplied for the fuselage were the same size as the under wing markings and were way to large to fit as shown in the instructions. I ended up scanning and resizing the letters and printed my own decals and sourced a smaller cross from another sheet. The kit supplies close to 100 stencils but by this time I had about had it with the Revell decals and only used the fuel and oil filler markings on the upper wing, work numbers and first aid compartment decals. Many of the others were dark red stenciling that would go on dark green surfaces and hardly visible except for the ever present silvering. The wing walk markings were way too fragmented to use and scale wise were way too wide anyway. No Swastikas were supplied so those needed to be sourced elsewhere as well...
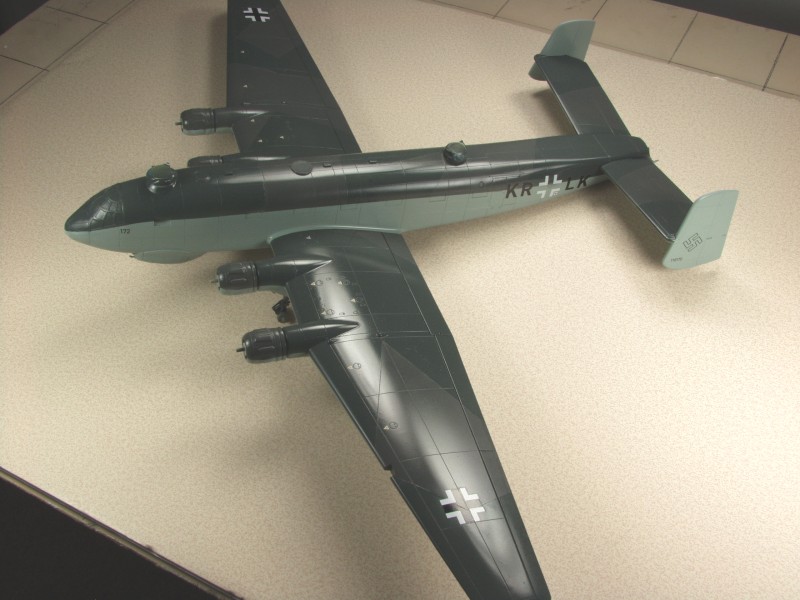
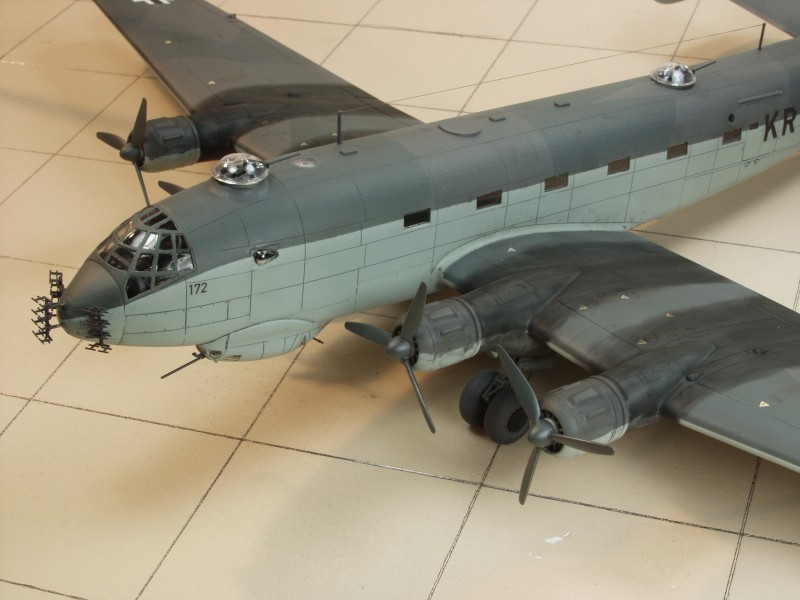
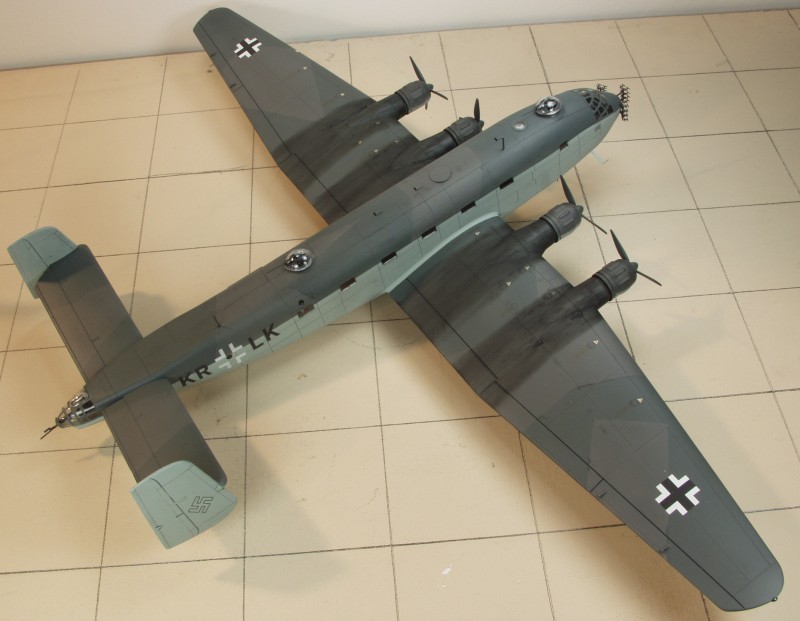
All finished now. This kit I think sets a record for the number of fiddly bits to be added at the end. Counting the antennas, control hinges, actuators and mass balances there were close to 30 parts on the bottom alone. Elsewhere there were the turret clear parts, landing light lens, pitot tube, front and rear guns, antenna masts top side for the clothes line antenna and the nose radar antennas. The latter are way over sized for the scale and to me the photo etch parts were way too one dimensional. I tried making something up using fine wire but the parts were too small and close together for me to deal with so in the end I used the kit parts. Even these were a challenge to clean up and assemble. Looking at photos much of the outside detailing is oversize an to make it in scale would probably be beyond the capability of injection molding and the parts would be too small and delicate to handle as well. Anyway below are the final photos.
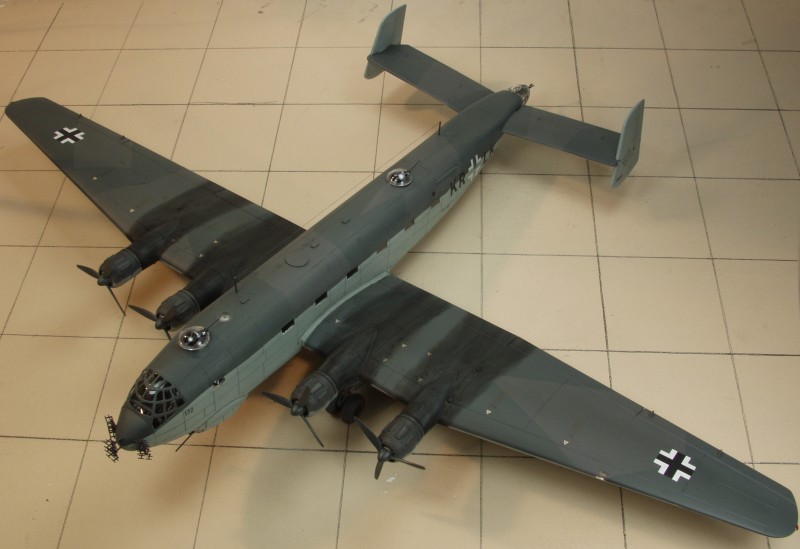
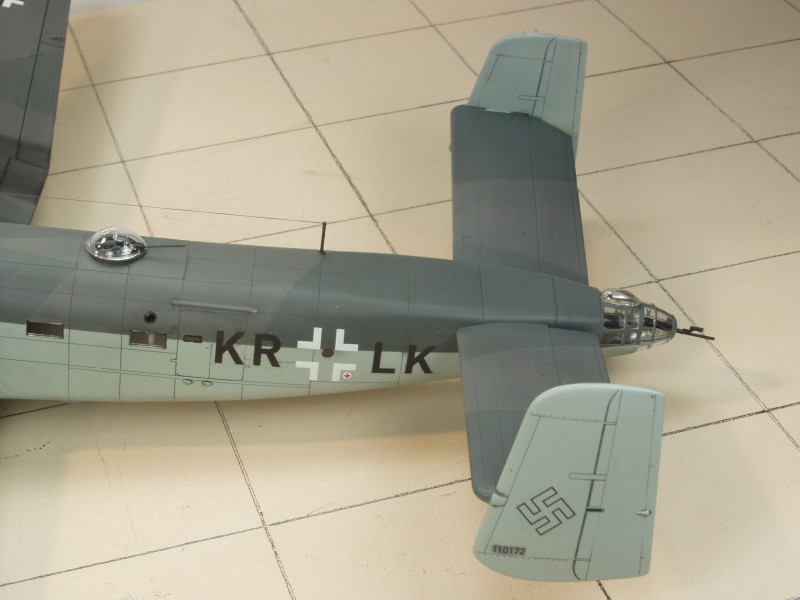
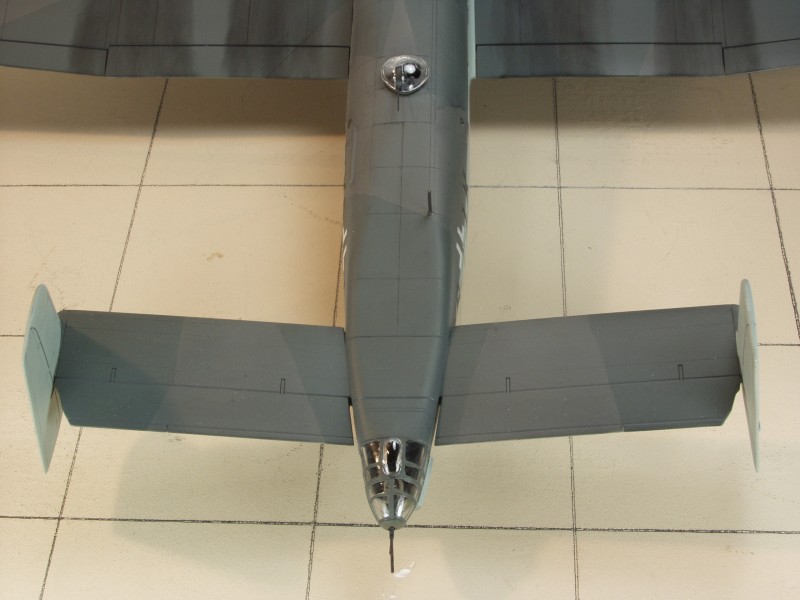

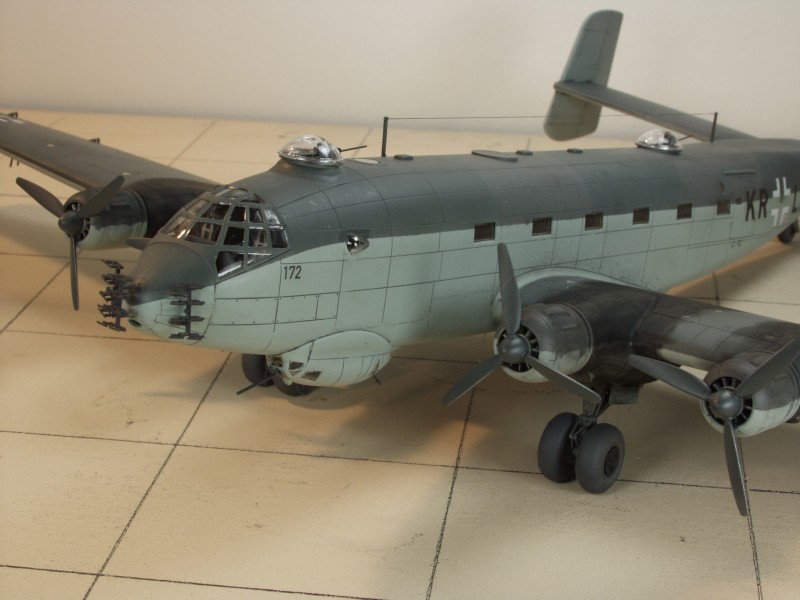

And for those who think I might have gone over board on the exhaust staining...
This was for the most part an enjoyable build. It is a handful when it comes to painting, applying decals and weathering due to its size but it does make an impressive model when complete.
Back to Miscellaneous 1/72 page
Links to kit build or reviews
Another in box review can be found here.
References
"Monogram Close-Up # 3 Junkers 290" by Thomas Hitchcock
"Warplanes of the Third Reich" by William Green
Back to Miscellaneous 1/72 page
The Build
Like most aircraft things start off with the interior. Because little of it will be seen I didn't go too crazy with the interior, No photo etch was available and the instrument panel is pretty much hidden so I didn't spend any effort on it. I did add belts and harnesses to the seats and had some PE radios from a generic set that were added to the radio operators position...
The fuselage halves were joined, the fit was quite good with only a minimal amount of filler used, at this point the tail pieces are just press fit in place...
The wings and engines have been attached. So far the only fit issues were the 3 part engine covers which were a bit fiddly but they weren't all that bad to deal with. Just need to add the rudders, do some masking and a little touch up sanding and we'll be ready for paint.
While setting up to photograph this I noticed the starboard wing looked lower than the port. I don't always trust the Mark II eyeball so I broke out my height gage. sure enough the starboard wing was over 1/4" lower...
Port
Starboard However when I checked at the outboard engines I found them to be spot on...
Port
Starboard The outboard wing joints on the bottom were both tight. I held my breath, put pressure on the top of the wing over the joint and gradually pulled up on the starboard wing. With a resounding pop the bottom joint opened up very cleanly.. I found by trial and error that a strip of .015 styrene in the joint brought the wing up to within an eyelash of the port wing...
Oddly enough the starboard wing now appears to have slightly more dihedral so I'm assuming the port wing must have a bow to it that starts out gradual and increases towards the tip. In any event it is not that noticeable compared to having one wing over 1/4" lower.
With that taken care of the painting was done, I used WEM colorcoats RLM 72 and 73 on the top and Model Master RLM 65 on the sides and bottom. Some minor touch ups to do and a couple days for the paint to cure then on to clear coat. The beast ate up a lot of masking tape and a lot of paint as well and was challenging to handle during the painting process.
After the clear coat had been applied and allowed to cure the decals were applied. The Revell decals have a matte finish and always give me fits with silvering which meant that this portion of the build has been anything but enjoyable. The upper wing crosses from the kit sheet were unusable so I replaced them with some Eaglecals, which normally work well for me but these wrinkled up when I applied setting solution and would not lay flat regardless of solution used so they were stripped off and replaced with some Techmods which worked great. The under wing markings went on OK but will need to be touched up as they had some chips on them. The decals supplied for the fuselage were the same size as the under wing markings and were way to large to fit as shown in the instructions. I ended up scanning and resizing the letters and printed my own decals and sourced a smaller cross from another sheet. The kit supplies close to 100 stencils but by this time I had about had it with the Revell decals and only used the fuel and oil filler markings on the upper wing, work numbers and first aid compartment decals. Many of the others were dark red stenciling that would go on dark green surfaces and hardly visible except for the ever present silvering. The wing walk markings were way too fragmented to use and scale wise were way too wide anyway. No Swastikas were supplied so those needed to be sourced elsewhere as well...
All finished now. This kit I think sets a record for the number of fiddly bits to be added at the end. Counting the antennas, control hinges, actuators and mass balances there were close to 30 parts on the bottom alone. Elsewhere there were the turret clear parts, landing light lens, pitot tube, front and rear guns, antenna masts top side for the clothes line antenna and the nose radar antennas. The latter are way over sized for the scale and to me the photo etch parts were way too one dimensional. I tried making something up using fine wire but the parts were too small and close together for me to deal with so in the end I used the kit parts. Even these were a challenge to clean up and assemble. Looking at photos much of the outside detailing is oversize an to make it in scale would probably be beyond the capability of injection molding and the parts would be too small and delicate to handle as well. Anyway below are the final photos.
And for those who think I might have gone over board on the exhaust staining...
This was for the most part an enjoyable build. It is a handful when it comes to painting, applying decals and weathering due to its size but it does make an impressive model when complete.
Back to Miscellaneous 1/72 page
Updated
1/6/17