
Do 26D
The Do 26 was a complete breakaway from traditional Dornier seaplane design which included a pylon mounted wing and stabilizing sponsons. When it appeared in 1938 it was without a doubt the shapeliest water-borne craft of its time. While it didn't employ any noteworthy innovations or display any previously untried features, it carried aerodynamic cleanliness to what was considered the ultimate for aircraft in its category. Work on the craft had been initiated in 1936 for Lufthansa to meet a requirement for an aircraft capable of operating non-stop between Lisbon and New York. The rear engines drove pusher air screws through hinged extension shafts that allowed them to be raised 10º during take off and landing to keep them out of the water spray. All four of the engines were Junkers Jumo 205 diesel engines a quite unique engine and more can be found on it here. Lufthansa ordered 3 of the craft with and option for 3 more in 1937. The first two aircraft made 18 South Atlantic crossings prior to the outbreak of the hostilities. Lufthansa had elected to take their option on the additional 3 craft but before any of the remaining planes on the order were delivered the RLM instructed Dornier to complete the aircraft for the task of long range reconnaissance and transport under the designation Do 26D. This conversion consisted on mounting a bow turret of the Bv 138 type, lateral glazed blisters amidships and a machine gun position located in a watertight position behind the rear hull step. It also included installing military radios and instruments. These together with the second aircraft produced were pressed into service during the Norwegian campaign flying in and out of narrow Norwegian fiords on troop transportation and resupply missions. Two of the craft were lost to fighters. The remaining three were withdrawn from first-line service and used on communications tasks until servicing difficulties necessitated their retirement. At least two of them survived until 1944.
The Kit
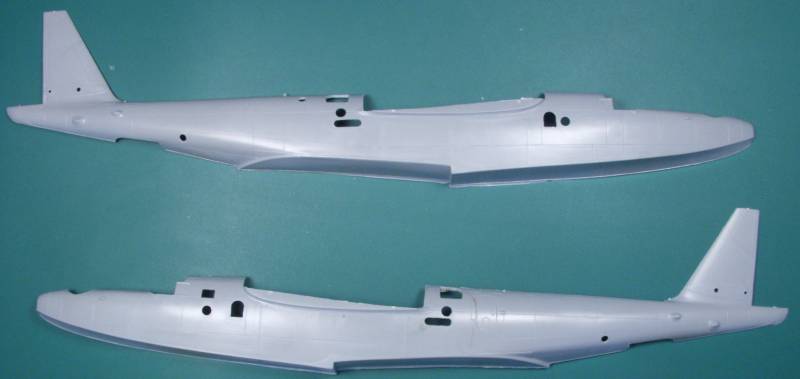
The Amodel kit comes in a huge box for the scale that is only at best half full of sprues. I believe the box could have easily held a 1/48 scale kit of the Do 26. The two part tray type box has a thin cardboard top and a heavier corrugated bottom half. The box top has very nice artwork that would almost be suitable for framing. Inside the box one finds a large zip lock bag with all the sprues in it. Inside that bag is a smaller zip lock bag with the clear parts in it. The kit is presented on 14 sprues some of which are duplicates, most of which are about the size of a 4 x 6 index card. The plastic is a light gray in color. The fuselage halves, which are shown in the parts map as being on sprues, were loose in my kit as if cut off the sprues at the factory and a couple of the cut points will need some minor repair.
The parts feature recessed panel lines which are finer than some of the other 1/72 kits I have reviewed recently but they tend to be a bit inconsistent. In a few places they look like some of my poor attempts at scribing and in a couple places it looks like the tool maker over ran the stop point or wandered off the line a bit. In a few cases some filling and rescribing may be necessary. The surface finish is a bit rough as well in some places looking like the tooling was polished with a wire brush. This is not as bad as it sounds but one may want to sand a few places and give everything a good coat of primer before painting. I found a few other surface anomalys as well, some minor sink marks and the like. The parts are typical of short run kits from a few years back and not quite up to current standards. Some parts have flash although most are fairly free of it. Sprue attachment points are heavier than desired and many of them impact both the outer surface and the mating surface as well. Round parts have a fairly heavy parting seam to clean up. Being a short run kit there are no alignment pins and most of the mounting surfaces on the wings and fuselage and tail parts would benefit from a quick pass over some fine grit sandpaper attached to a flat surface. The plastic is soft and easy to work.
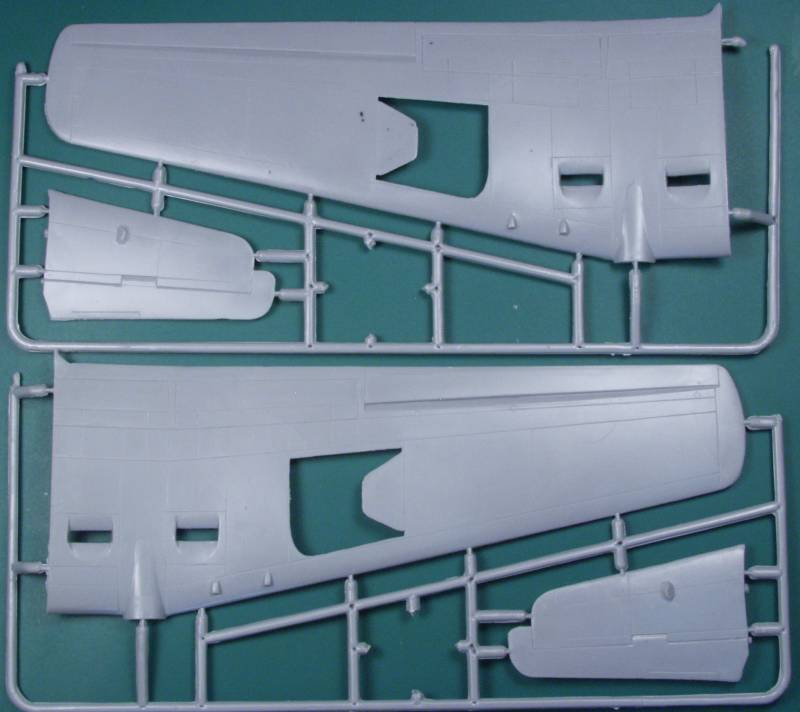
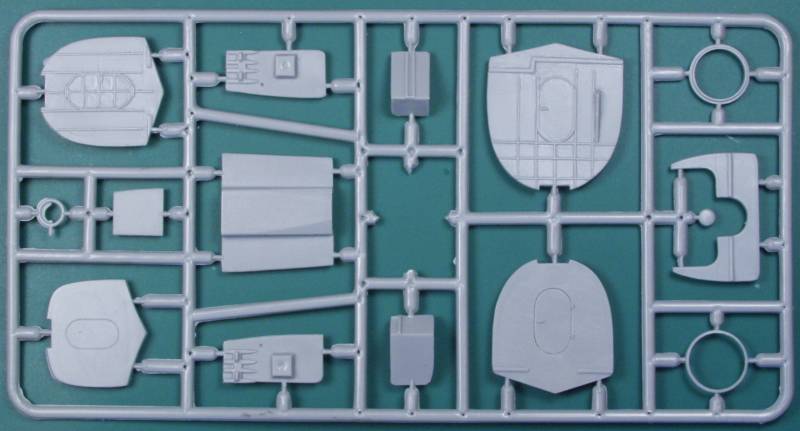
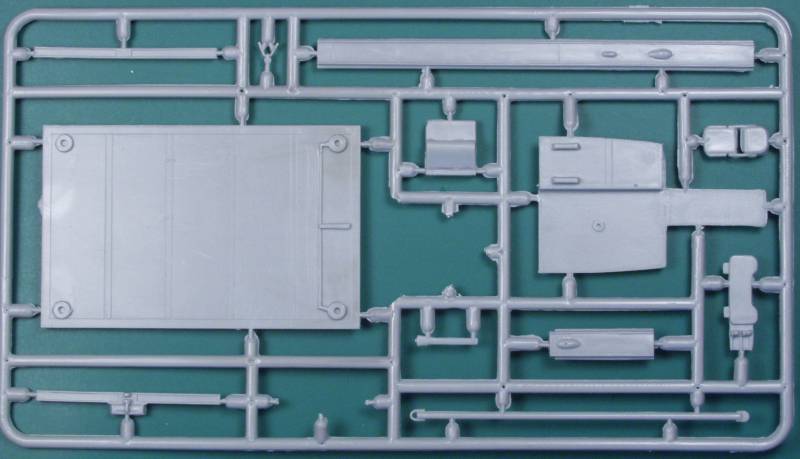
The interior has good amount of detail for the scale with the cockpit and the navigator and radio operators areas behind the pilots and another section enclosed with bulkheads in the gunners area. The tunnel gun in the rear is also provided. The wings have a boxed in area for the retractable wing floats. This must be pieced together from four pieces. The area above it has structural detail molded into the underside of the upper wing. Ejector pin marks are strangely absent as I did not find any anywhere. The kit comes with a dock wagon on which to display the aircraft. It has a lot of little wheels that are not very cleanly molded or detailed and will no doubt be a pain to clean up. OK enough verbiage, lets look at some parts. First up the fuselage halves.
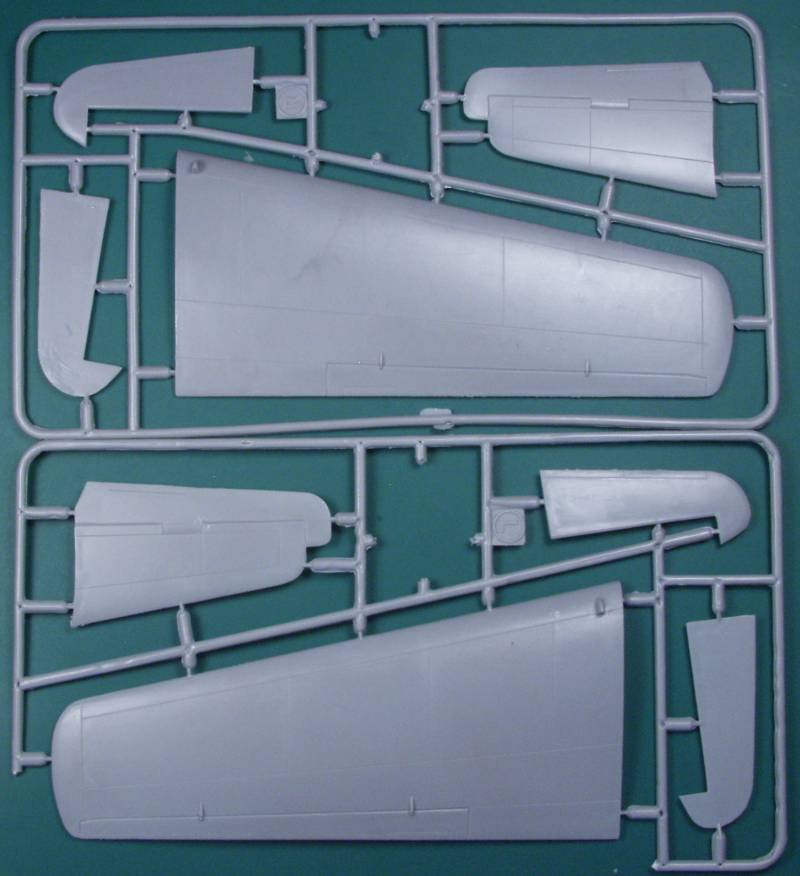
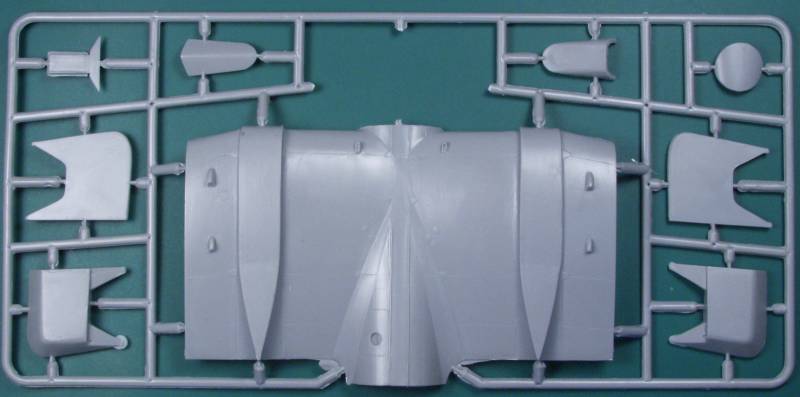
Next the upper and lower wings and tail parts. The horizontal stabilizers are quite thin especially near the tip area of the elevators.

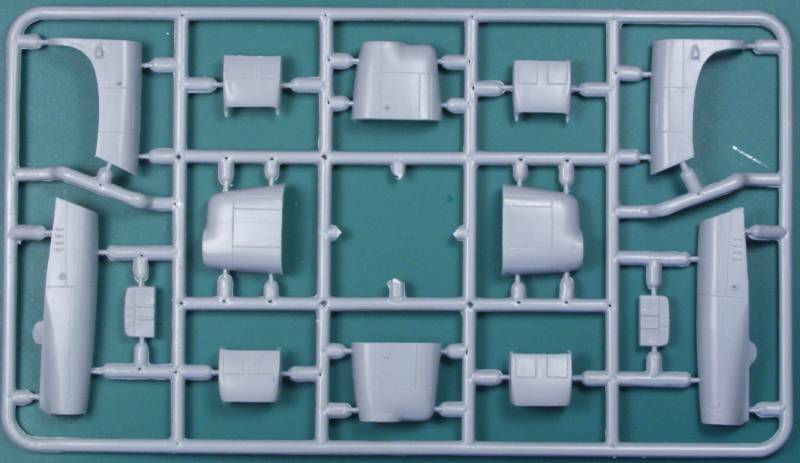
The clear parts are just OK, a bit thick and not all that clear, hopefully Future will work it's magic. There are parts for both the civilian version which is offered in a separate kit, All of the parts on the left sprue are used as are all but the top three on the right sprue. The frame lines are raised enough that masking shouldn't be too difficult. I not expecting to see an Eduard mask set for this one.
![]()
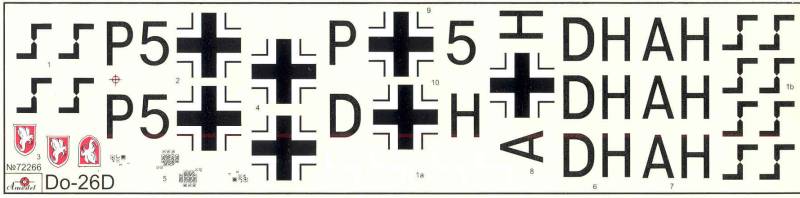
The decals appear quite thin, are in register and include markings for two aircraft. There were only four militarized versions so there is not a lot to choose from, just a guess but I suspect AH was the first of the four and DH the last of the four. There is a lot of excess clear film on these and suspect it will be a crap shoot as far as how well they work. There are also decals for the instrument panel, these are barely discernible and I'm not sure they will be visible when the things get closed up but there are two of them in case you screw up one of them.
The instructions are in an A4 format, a twelve page stapled booklet. The front page has an extremely brief history, a symbol chart, a paint chart listing paint color by generic name, RLM number and Humbrol number. All the text is in English and Russian although the kit is distributed from Poland. One telling statement in the center of the front page states "This model is executed on technology short run and is intended only for experienced modelers". The next two pages are a parts map, pages four through ten are the assembly diagrams divided into 27 steps. The last two pages are painting and marking instructions. Both planes were painted identically only the one letter in the radio codes is different between the two.
So after all of my negative comments about the contents, how is the fit ? Well, no alignment pins and no ejector towers made fitting a bit easier. The fuselage was a bit of a bear as the Do 26 had a walkway built into the top spine of the aircraft and this is supplied as separate pieces. Trying to fit it together without them made things a bit slippery as there were big gaps in the upper surface. The long walkway from the wing to the tail did not fit well as the opening for it appears to taper towards the tail but the walkway does not so the slot will need to be adjusted. I ended up fitting the forward bulkhead in place to give the fuselage some strength.

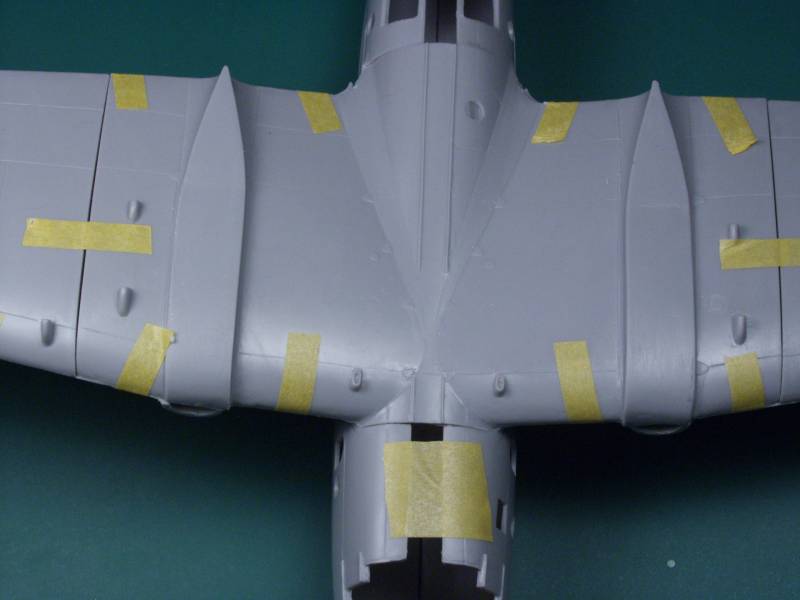
My biggest concern was the gull wings and the fit of the wings to the fuselage as this was most problematic on the Mach 2 kit. The upper and lower wing halves actually fit together fairly well but when they were mated to the wing center section I noticed some alignment issues. The area where the front engine cowling would mate to the wing was seriously off and there was a large gap where the lower wing would mate to the fuselage.

As suspected when the wing was mated to the fuselage things were not good. This would have looked worse if I had taped the bottom seam tighter.

Wowsers, that's quite a gap and the other side was just as bad. Top side things didn't look too bad, the fore and aft areas where the wing met the fuselage, if not great were certainly acceptable and the outer wing to wing center section joints were passable.
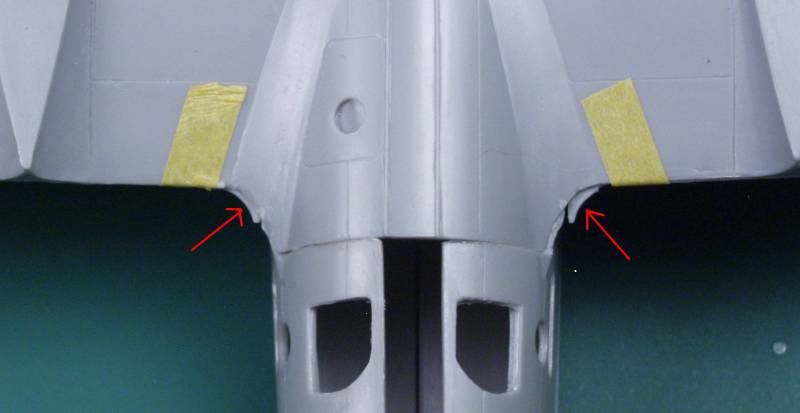
At the rear the effect of the gaps could be seen in the rear wing fillets being out of place.
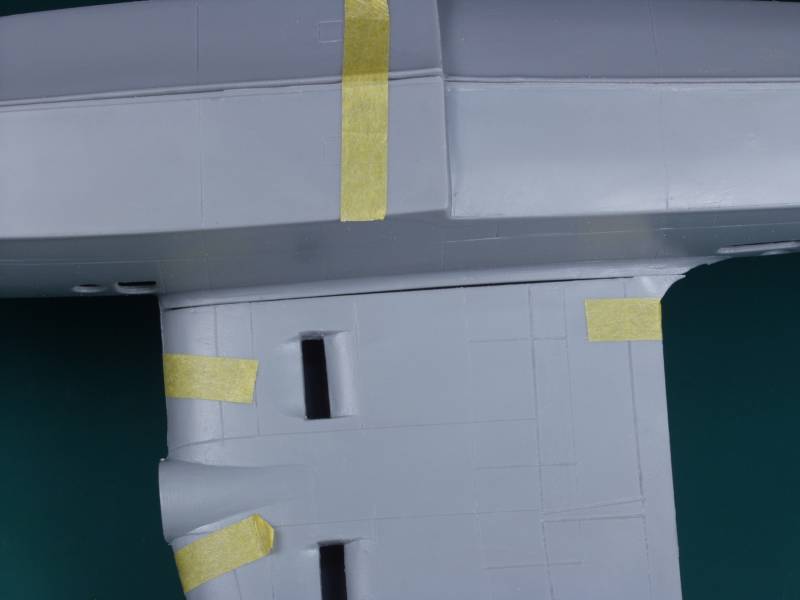
At this point I nearly got sucked in, I wanted to fix this problem and dive into building the kit making it a build review but I noticed some things that I would want to change and I prefer that build review be pretty much out of box. In the end a clear head prevailed and I decided to see if I could easily fix this alignment issue and put the build off for a later time. It appeared to me that taking some material off the center wing where it mated to the outer wing would reduce the gap and might also improve the upper wing joint as well. Using a sanding stick and some 320 sandpaper taped to my bench top top I worked the edge down till most of the gap was gone.
And the wing to fuselage joint much improved. I still think it needs a bit more tweaking but I satisfied myself that it would be a relatively easy fix and save a lot of sanding and filling later.
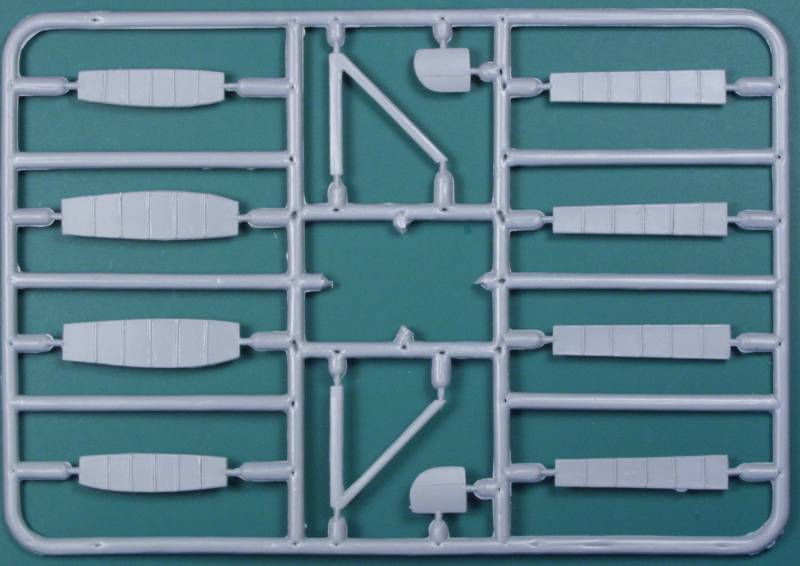
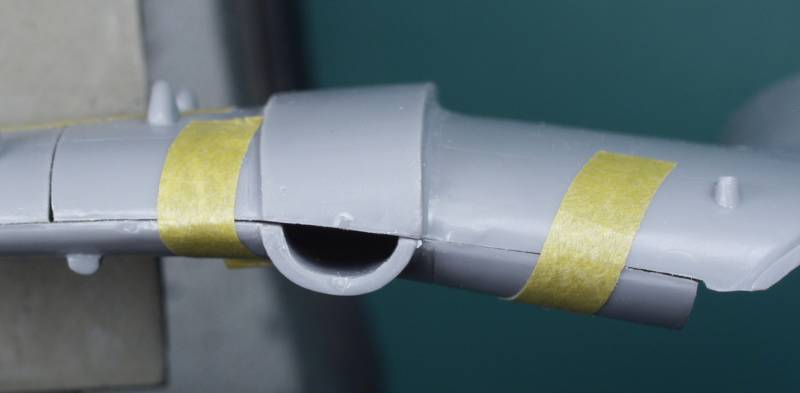
The engines were made up of six pieces that did not lend them selves to being taped up so I didn't go there. There are extra engine parts supplied that go on the civilian version so use care to select the correct parts. Same goes for the under wing radiators which are slightly smaller on the civilian version.
I didn't realize until I had all the tape off and the parts back in the box that I didn't take any photos of the fit of the stabilizers to the fuselage. Take my word for it that it was not all that great. Each stab has two short pins that fit into holes in the fuselage. The holes were initially too small and either the locations of the pins or the holes was off as even after opening them up the stabs still didn't fit well, the shape of the mating surfaces needs some work and if it were me I'd cut the pins off, fill the holes with some styrene and drill new holes for some pins that go clear through the tail area and into the stabs. There are tail braces that will set the angle which should be 90º to the vertical tail.
I haven't tried them to see if they will fit but Falcon made a set of vacuform replacements for the Mach 2 kit, just the main canopy and the blisters that might work on this kit if applying future to the kit parts doesn't work.
There are some nice interior and exterior photos here. and some in larger format and clearer in the book "Luftwaffe Maritime and Units 1939-1945" by Adam Thompson.
After Market Goodies
I don't expect any to materialize but one never knows.
Conclusions
This kit release hit me like a bolt out of the blue, perhaps the Russians knew about it but I had heard no rumors about it till it showed up for Preorder at DMC. As you read in the review I pulled no punches. It is a limited run kit of the quality typically produced by MPM, Special Hobby and Classic Airframes five to ten years ago. That said there is nothing that can't be over come with a bit of old fashion modeling skills. Compared to the only other kit of this aircraft, the horrible Mach 2 kit makes this kit look like something from Tamiya. A review of the Mach 2 kit can be found here. But die hard Dornier fans like me am grateful that it was produced at all. Recommended for experienced modelers only.
Links to kit build or reviews
None at the date of publication.
References
"Warplanes of the Third Reich" by William Green
"Luftwaffe Maritime Aircraft and Units 1935 - 1945" by Adam Thompson
Back to
the Flying Boat page.