
He 111H-22
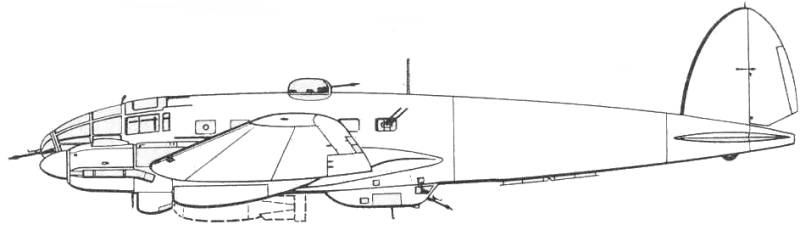
When it entered service, the Heinkel He 111 was one of the best medium bombers in the world. Having originally been demonstrated as a civilian passenger aircraft, it was obvious that its design was actually that of a high performance military aircraft, and its development was almost exclusively for military use. Early versions of the He 111 featured a conventional stepped cockpit, but efforts to streamline the aircraft resulted in the distinctive offset bullet-shaped nose that made the silhouette of the He 111 unique in the skies over Europe throughout World War II. During its operational service, the He 111 was produced in a considerable number of variants, and it was used to perform a wide variety of missions. Although it is primarily known for its service as a bomber, especially during the Battle of Britain, it was also used in the transport, reconnaissance, anti-shipping, glider tug, and pathfinder roles. Some He 111's were even fitted with cable cutters that spanned across the entire aircraft from wing tip to wing tip. These were used to cut the cables of barrage balloons which inhibited low-level air attacks.
But among the most unusual versions of the He 111 was that of a missile carrier. Foreshadowing the use of today's air launched cruise missiles, He-111 s were modified to carry several types of missiles. The first missile to be tested with the aircraft was the Henschel Hs 293A, however these were never used operationally. But beginning in late 1943, tests at Peenemunde indicated that the Fieseler Fi 103 missile could be air launched from the He 111 H. This missile, better known as the V-1 Buzz Bomb, was already being used successfully from ground launchers.
Several
He 111 H-21 bombers were converted on the production line to
the He 111
H-22 missile-carrying variant. Other existing He 111 H-16s and
H-20s
were also modified to launch the V-1. III Gruppe of
Kampfgeschwader 3
(III./KG 3) began operations with the He 111 H-22s on July
9,1944, in
Operation Rumpelkammer. They launched scores of V-1 s against
London,
Southampton, and other cities. Tactics for employing the V-1 s
began
with a low level approach at night. The He 111 would climb to
1,500
feet, launch its missile, then quickly dive back to low level
for its
escape. In order to make the aircraft less visible during
these night
attacks, exhaust hiders were placed over the engine exhaust
ports. In
late July or early August, III./KG 3 was redesignated I./KG
53.
The Kit
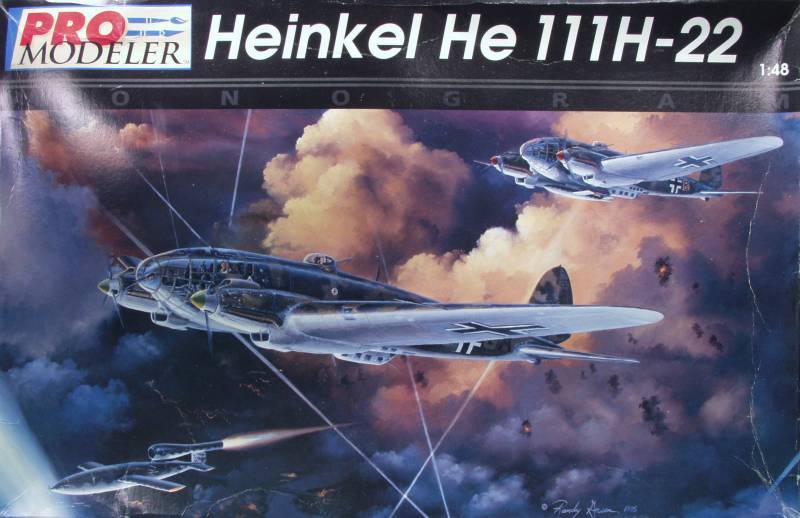
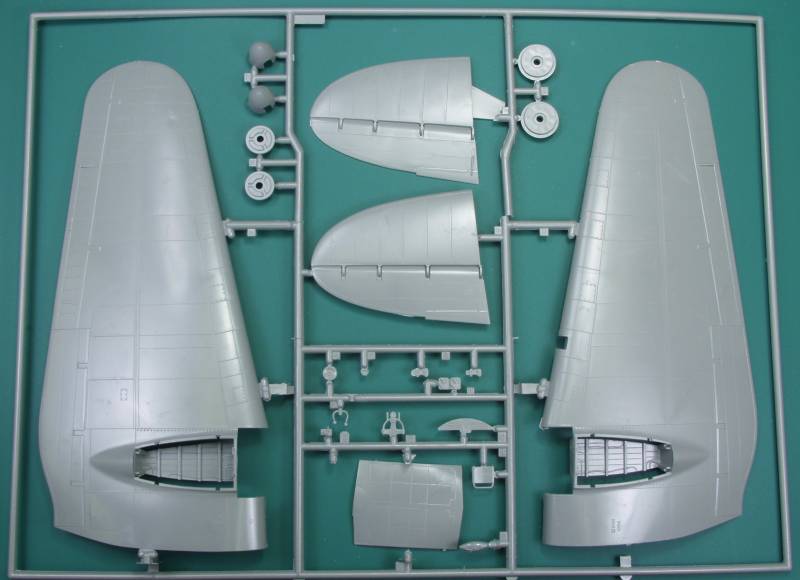
The Promodeler kit comes in a fairly large but flimsy two part top open box with OK artwork on the top. The artwork shows the subject aircraft launching a V1 which is OK but it appears to be flying over enemy soil based on the flak and search lights whereas in the real world these were launched over the North Sea and the only thing the crews needed to be concerned about was lurking Mosquitoes. But anyway this is a kit review so let's get on with that. Inside the box there are two large bags with two sprues each and one small bag with two sprues and lastly, one small bag with the clear parts. The decals were also in a zip lock bag but I bought this kit second hand so I don't know if they came from the factory that way or not. According to the copyright on the kit it was done in 1994 and I believe it was the first kit that Monogram did with recessed panel detail. Although the kit is not state of the art it's still a very nicely detail kit.
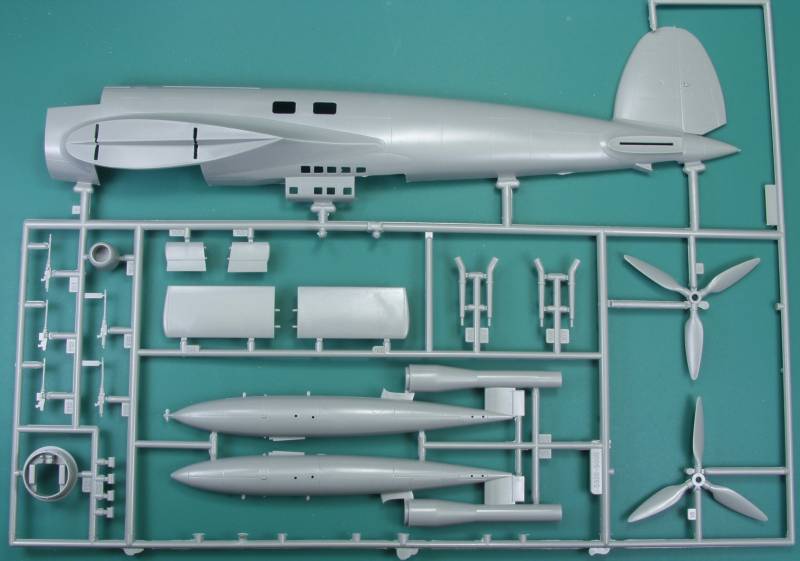
The parts are molded in a medium gray color and feature recessed panel lines and fastener detail. The lines are fine and uniform. The surface is smooth and glossy. The parts are mostly flash free but there is some flash on a few parts. The wings on my kit featured some irregularities. One upper wing half had some almost imperceptible ripples in it. These look enough like the oil canning effect seen on actual aircraft that I probably won't do anything to it. The other upper wing half had a sink hole near the tip that will need to be filled, it is opposite from an ejector pin location on the underside. One lower wing had two sink marks opposite ejector pins marks and two raised bumps where there molded drill hole locators on the under side. These shouldn't be an issue once they are drilled out. The other lower wing has a copyright mark and date that will need to be removed. The control surfaces are all fixed and while the demarcation lines for these in the wing seemed a bit shallow to me the ones on the tail were deep and very convincing.
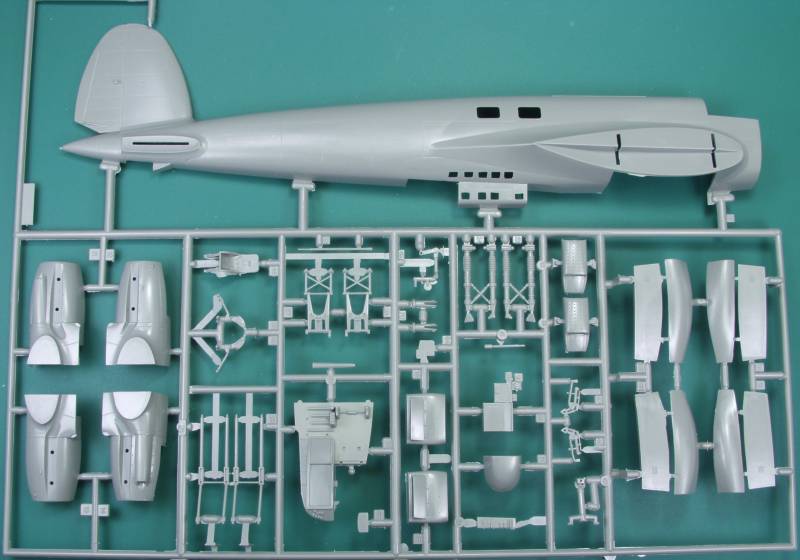
The fuselage has a couple of sink marks as well and the small window openings will require some cleaning and squaring up to get the glazing to fit properly. Inside areas of the fuselage that might show feature molded in structural detail as well as some wiring harness detail but it also includes some ejector pin marks. Most will not show but one or two may need to be cleaned up. The kit includes a good bit of detail for the cockpit area. The pilots seat includes a molded on harness. The various instrument panels have raised bezels and interior dial markings which should paint up nicely for those talented in that area. The top turret detail is a little sparse but without resorting to detail photos that may be the way it should be but it is all quite visible through the one piece molded turret glazing. The kit's guns are nothing to write home about but they won't be all that visible
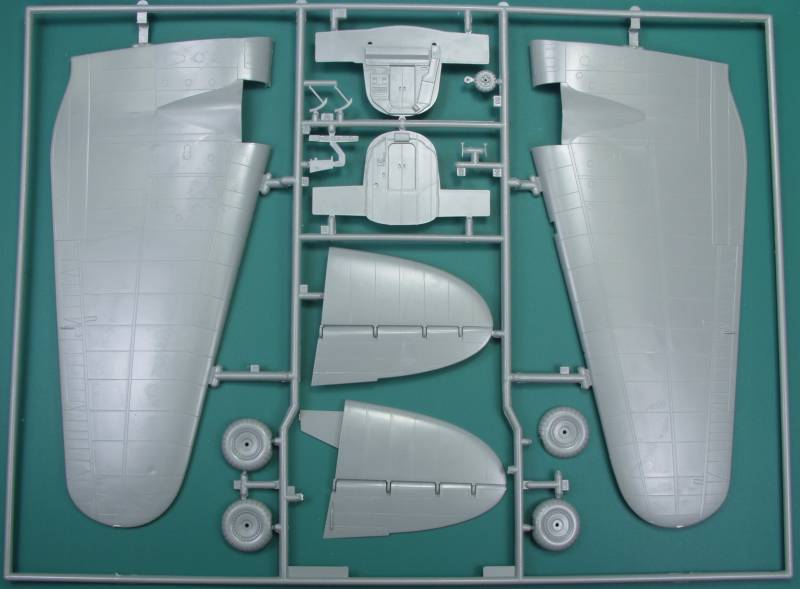
The wheel wells are boxed in, the top and ends are molded integral to the lower wing, the sides are molded to the gear bay doors which is very nice in that it eliminates the usual weak point where these mount. These inside parts feature a lot of molded in detail including structure, wiring, and raised rivet detail. Unfortunately these area also include multiple ejector pin marks.. Good luck with those. Except for those dreaded ejector pin marks again, the landing gear struts are nicely detailed and include molded on brake lines. The tail wheel strut is also very well done. The wheels hubs are nicely detailed and the tires are weighted.
The kit includes a complete V1 missile. The panel lines on it did not seem to be quite as crisp as the rest of the kit. The spinner on the nose is rather crude and would be better if replaced. Other than that it looks like a V1 to me. The kit also includes three crew figures although one is standing, the other two could be placed inside. By my count there are 108 parts in gray. See below.

The clear parts are thin and reasonably clear although mine had a few minor abrasions in spite of being packaged separately. A couple pieces had a slight cloudy look to them, I'm not sure if this is mold release residue but it should go away with a dip in Future. The frame lines are a bit light and a masking kit is highly recommended. The clear parts seemed to have a bit more flash than the rest of the kit. The parts were on three separate sprues, I suspect this has to do with the turret which was only specific to the H-21 and 22 aircraft, early versions had an open gun position at this location. There are 13 clear parts, see below.
![]()
![]()
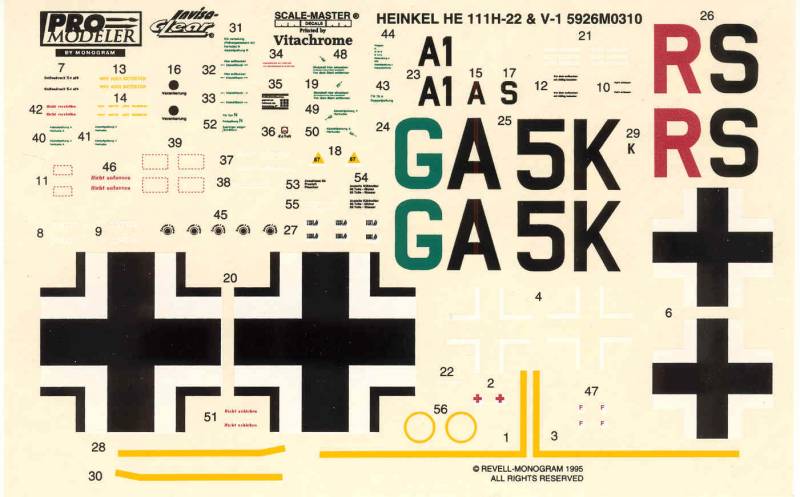
![]()
The decals are thin and in register and include a fair amount of stenciling. Some of it is in green which I have not seen before on German aircraft. There is very little excess clear film around the various markings which makes life easier. The decals provide marking for two aircraft. See below.
The instructions are a 20 page booklet in an 8 1/2" x 11" format. Page one has history, page two the usual safety warnings and a chart the lists the color names in four languages, pages 3 through 17 are the assembly instructions. These are not only drawings but a liberal amount of verbiage is included noting colors and other tips and hints. These pages also include a number of detailing photos from a real aircraft which I believe is one of the Spanish built Casa 111's so you may want to seek other sources before coping verbatim. The last three pages include painting and marking instructions.
After Market Goodies
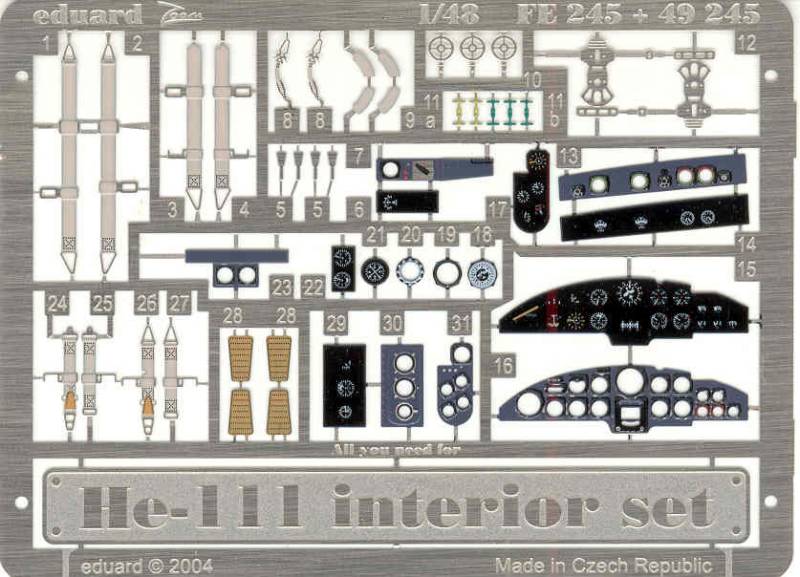
I decided to limit myself on this build to a small Eduard [FE 245] set of color photoetch to dress up the cockpit. Over the years there have been a lot of different sets available for this kit both from Eduard and CMK and perhaps Verlinden as well, both photoetch and resin and at one time Squadron made vacuformed glazing for it as well. If you do a search on any of the online retailer sites you should find a number of these items. Since the kit has been around for some time not all of them may be available from regular sources and you may need to resort to eBay if you think you can't live without them. The set shown below has the basics, instrument panel, belts and harnesses, rudder pedals, which on this aircraft are out in plain sight, some auxiliary panels and ring sights for some of the guns. I also opted for a mask set from Eduard.
Conclusions
While not a new kit, this one has held up very well and will produce a very nice looking model right out of the box. As is common with kits from this vintage there will be some minor fit issues but nothing that are build killers. Because of the quality of the kit itself and the in depth instructions I would recommend this kit to modelers of most skill levels except for rank beginners and only then because of the size and complexity of the kit.
Links to kit build or reviews
Build / reviews can be found here, here and here. Note; some of these are for other versions but the same basic kit.
References
Warplanes of the Third Reich by William Green
Heinkel He 111 in Action by Uwe Feist and Mike Dario
Heinkel He 111 by Karl- Heinz Regnat, Black Cross Volume 4